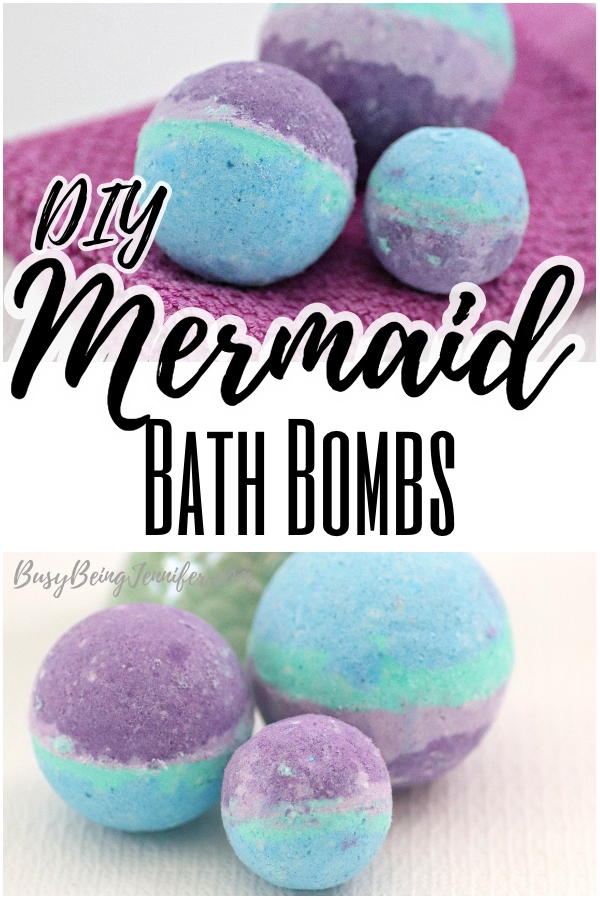
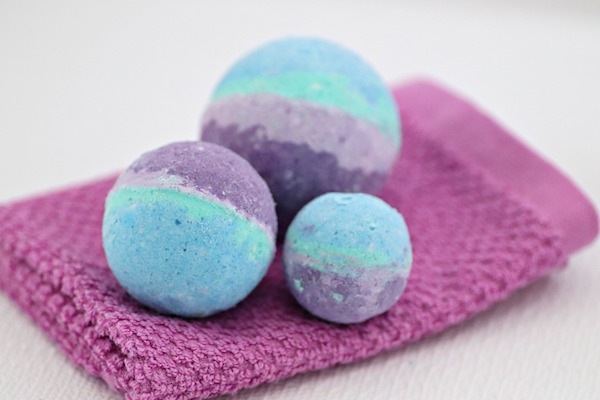
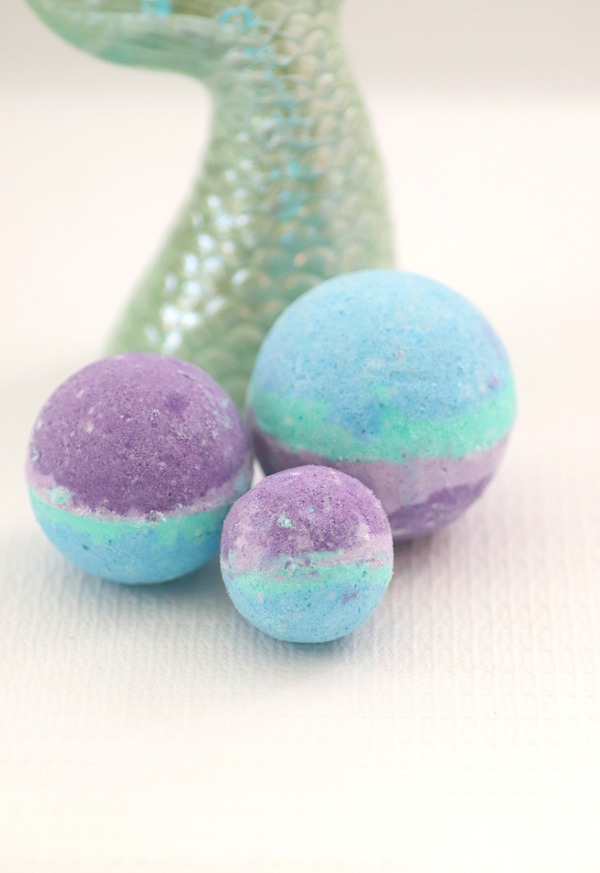
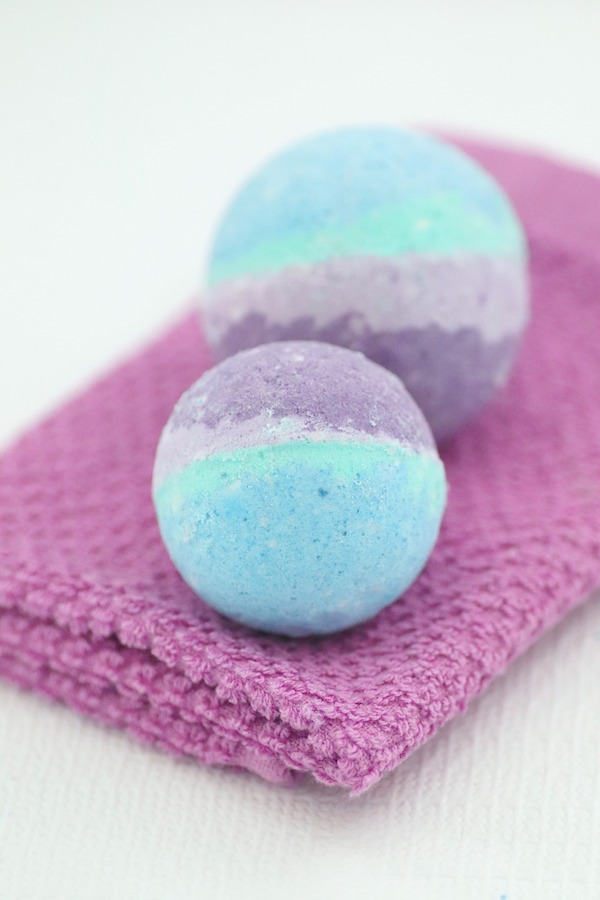
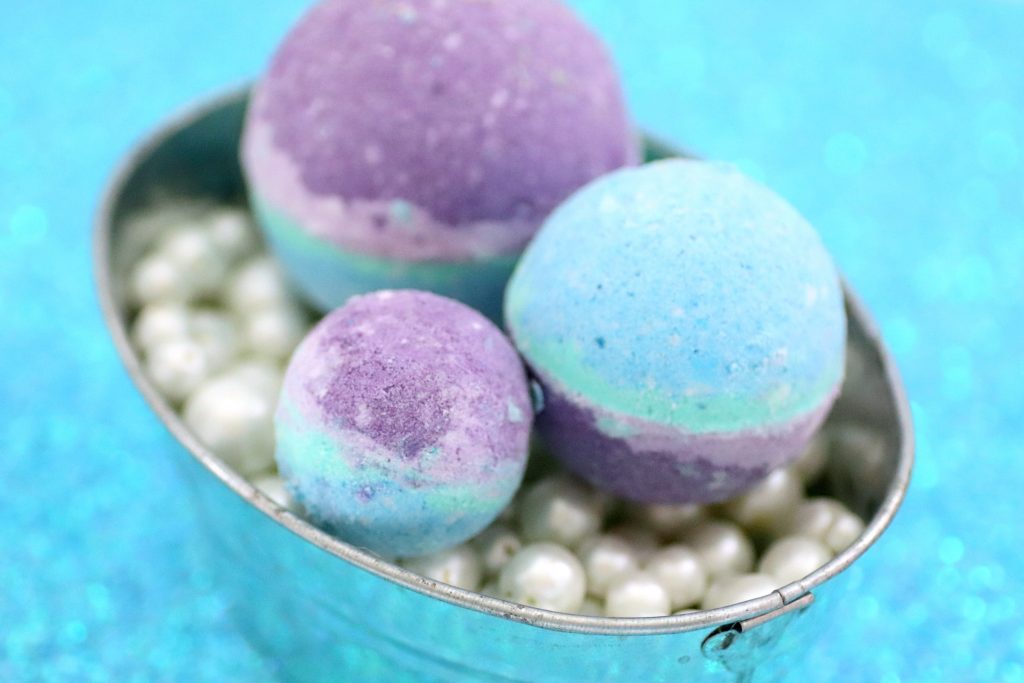
These epic and easy mermaid bath bombs are so beautiful and fun, they make me feel like I’ve got a tail and fins just waiting for me in the warm bath!
Just kidding, there’s no tail. But The smooooooth, silky feeling that I get from relaxing with a DIY bath bomb, well, it’s amazing.
In all honesty, though, the whole point of these mermaid themed bath bombs is not to just have a pretty ball next to the tub.
Nope, I could do that with something much less likely to fizz-up and go nuts if I accidentally splash it.
The whole point is to make your skin feel fabulous and enjoy a bath just that much more.
So, if you’re ready to make a change in your bathroom and get this relaxation show on the road, grab your supplies and let’s get to making!
What You Need to Make Mermaid Bath Bombs
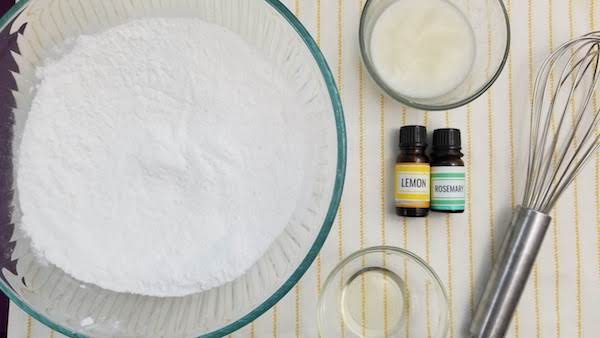
- 2 cups baking soda
- 1 cup citric acid (It’s better to buy in bulk on Amazon)
- 1/4 cup cornstarch (you can use up to 1/2 cup if your coconut oil is particularly melty)
- 2 tablespoons Sea Kelp Mineral Epsom salts
- 1/3 cup coconut oil
- 1 teaspoon polysorbate 80
- 10-20 drops lemon essential oil
- 10-20 drops rosemary essential oil
- 10-do drops witch hazel extract, optional for sensitive skin
- 1-2 tablespoons of purple, blue & teal mica powder colorant
- 1-2 teaspoons of purple, blue & teal cosmetic glitter
- Stainless steel bath bomb molds
- Mini muffin tin (optional)
- Spray bottle filled with rubbing alcohol
- 1 large mixing bowl
- 3 small bowls
How to Make Mermaid Bath Bombs
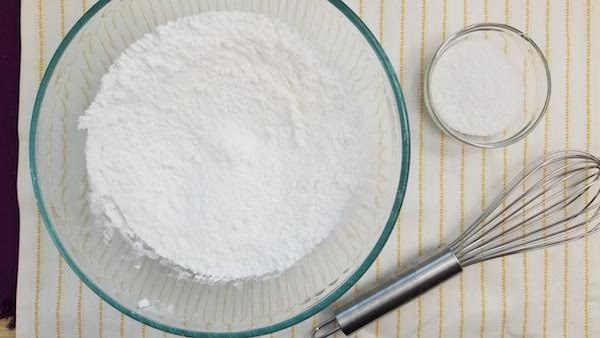
In a large mixing bowl, add the baking soda, citric acid, Epsom salts and cornstarch. Whisk dry ingredients together.
Add the coconut oil. This binds all the bath bomb mixture ingredients together, so you bath bombs don’t crumble when you touch them!
Add the polysorbate 80. This helps the coconut oil disperse more evenly in your bath water, makes the bath bombs bubbly and prevents the mica from sticking to the side of the tub.
Add the lemon and rosemary essential oils. Mix well. You may need to use your hands to break down any lumps and make sure everything is mixed in. The mixture is perfect when it holds together when you press it into your hands and feels like wet sand.
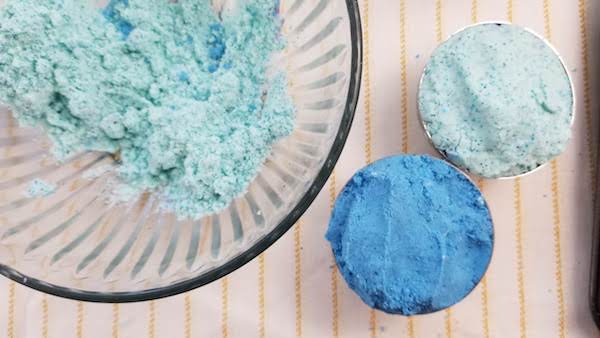
Separate the mixture into the 3 smaller bowls. Mix in 1 in tablespoon of the purple mica in one, the blue in another and teal in the third bowl. Add the corresponding glitter for each.
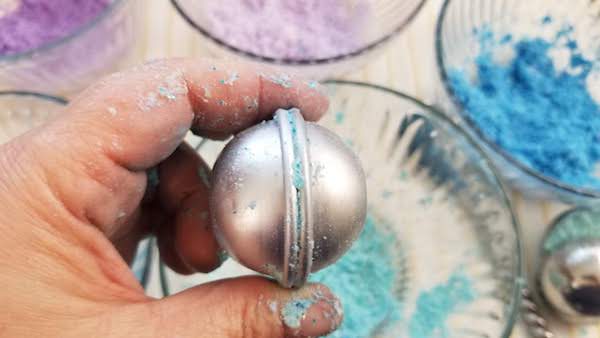
Add the mixture into each side your bath bomb mold until the mixture is slightly overflowing. Press molds together and grind gently to remove excess mixture. Gently tap each side of the mold to release the bombs. Allow to dry a minimum of 24 hours.
Isn’t this just the most practical idea for a gift for a friend–or just a gift for yourself?! It’s so easy to whip up too! I am so glad I made this and I am definitely making more.
Pin this easy bath bomb recipe for later!
More Easy Bath Bomb Recipes You’ll Love
Mermaid Bath Bombs Recipe
These epic and easy mermaid bath bombs are so beautiful and fun, they make me feel like I've got a tail and fins just waiting for me in the warm bath!
Just kidding, there's no tail. But The smooooooth, silky feeling that I get from relaxing with a DIY bath bomb, well, it's amazing.
Materials
- 2 cups baking soda
- 1 cup citric acid (It’s better to buy in bulk on Amazon)
- 1/4 cup cornstarch (you can use up to 1/2 cup if your coconut oil is particularly melty)
- 2 tablespoons Sea Kelp Mineral Epsom salts
- 1/3 cup coconut oil
- 1 teaspoon polysorbate 80
- 10-20 drops lemon essential oil
- 10-20 drops rosemary essential oil
- 10-do drops witch hazel extract, optional for sensitive skin
- 1-2 tablespoons of purple, blue & teal mica powder colorant
- 1-2 teaspoons of purple, blue & teal cosmetic glitter
Tools
- Stainless steel bath bomb molds
- Mini muffin tin (optional)
- Spray bottle filled with rubbing alcohol
- 1 large mixing bowl
- 3 small bowls
Instructions
Steps 1-5: In a large mixing bowl, add the baking soda, citric acid, Epsom salts and cornstarch. Whisk dry ingredients together.
Step 6: Add the coconut oil. This binds all the ingredients together, so you bath bombs don’t crumble when you touch them!
Step 7: Add the polysorbate 80. This helps the coconut oil disperse more evenly in your bath water, makes the bath bombs bubbly and prevents the mica from sticking to the side of the tub.
Steps 8-10: Add the lemon and rosemary essential oils. Mix well. You may need to use your hands to break down any lumps and make sure everything is mixed in. The mixture is perfect when it holds together when you press it into your hands and feels like wet sand.
Steps 11-13: Separate the mixture into the 3 smaller bowls. Mix in 1 in tablespoon of the purple mica in one, the blue in another and teal in the third bowl. Add the corresponding glitter for each.
Steps 14-16: Add the mixture into each side your bath bomb mold until the mixture is slightly overflowing. Press molds together and grind gently to remove excess mixture. Gently tap each side of the mold to release the bombs. Allow to dry a minimum of 24 hours.
Leave a Reply