This DIY Button Embroidery Cards tutorial is so easy, and the simple embroidery pattern is seriously perfect for a beginner emboider-er.
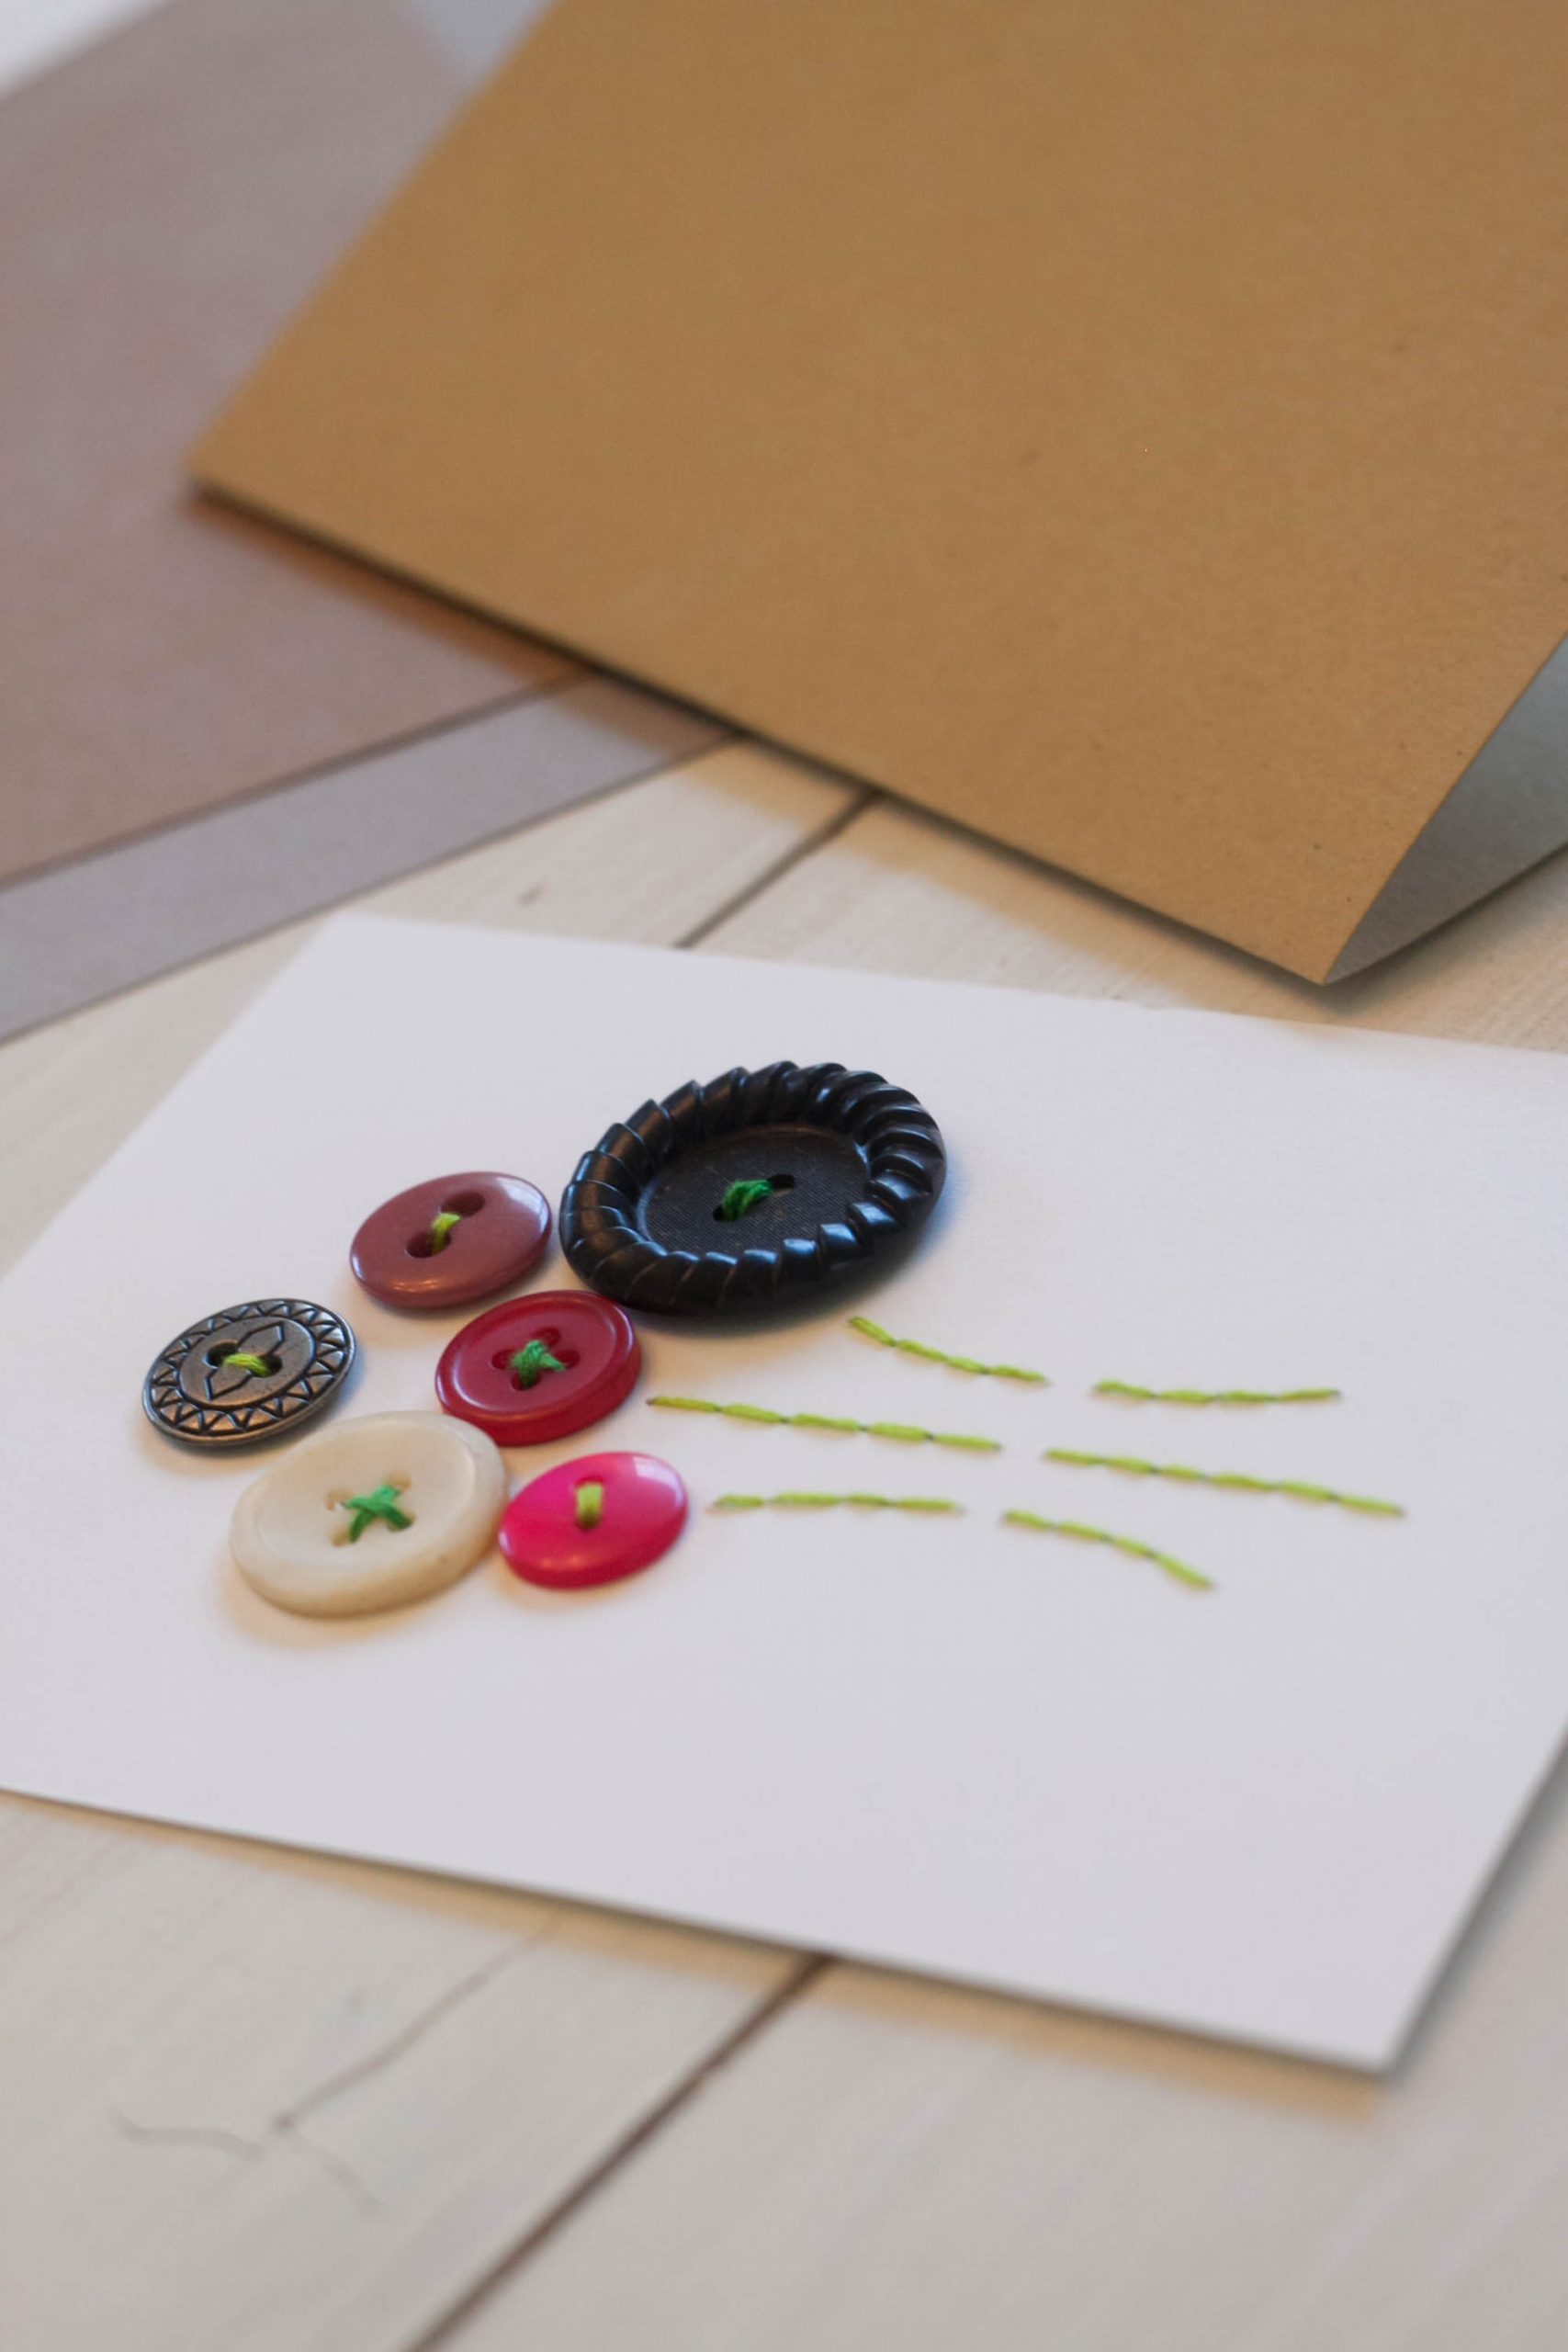
If you’re planning to make a whole bunch of these cards, you can always grab one of those “mixed box of buttons” they have at the fabric store, but the honest truth is: I found everything I needed to make this project (including the mismatched buttons) around my house and in the craft room!
I just dug through the drawer of “missing things” (you know that drawer–you know you have one) and found as many pretty buttons as I could find!

And that’s the beauty of this project, honestly. Almost everything can be found right in your craft room. The only thing I had to go out and grab was the green thread.
I don’t know why, but I was all out of green thread, go figure. It’s probably because I’ve been stitching these mini floral necklaces like crazy so get them added to my etsy shop!
But, besides that, I had enough buttons to do about 200 more cards, enough card stock paper to do about 500 cards. So, I guess that means I’ll be working on a few ideas to use those things up…ha!
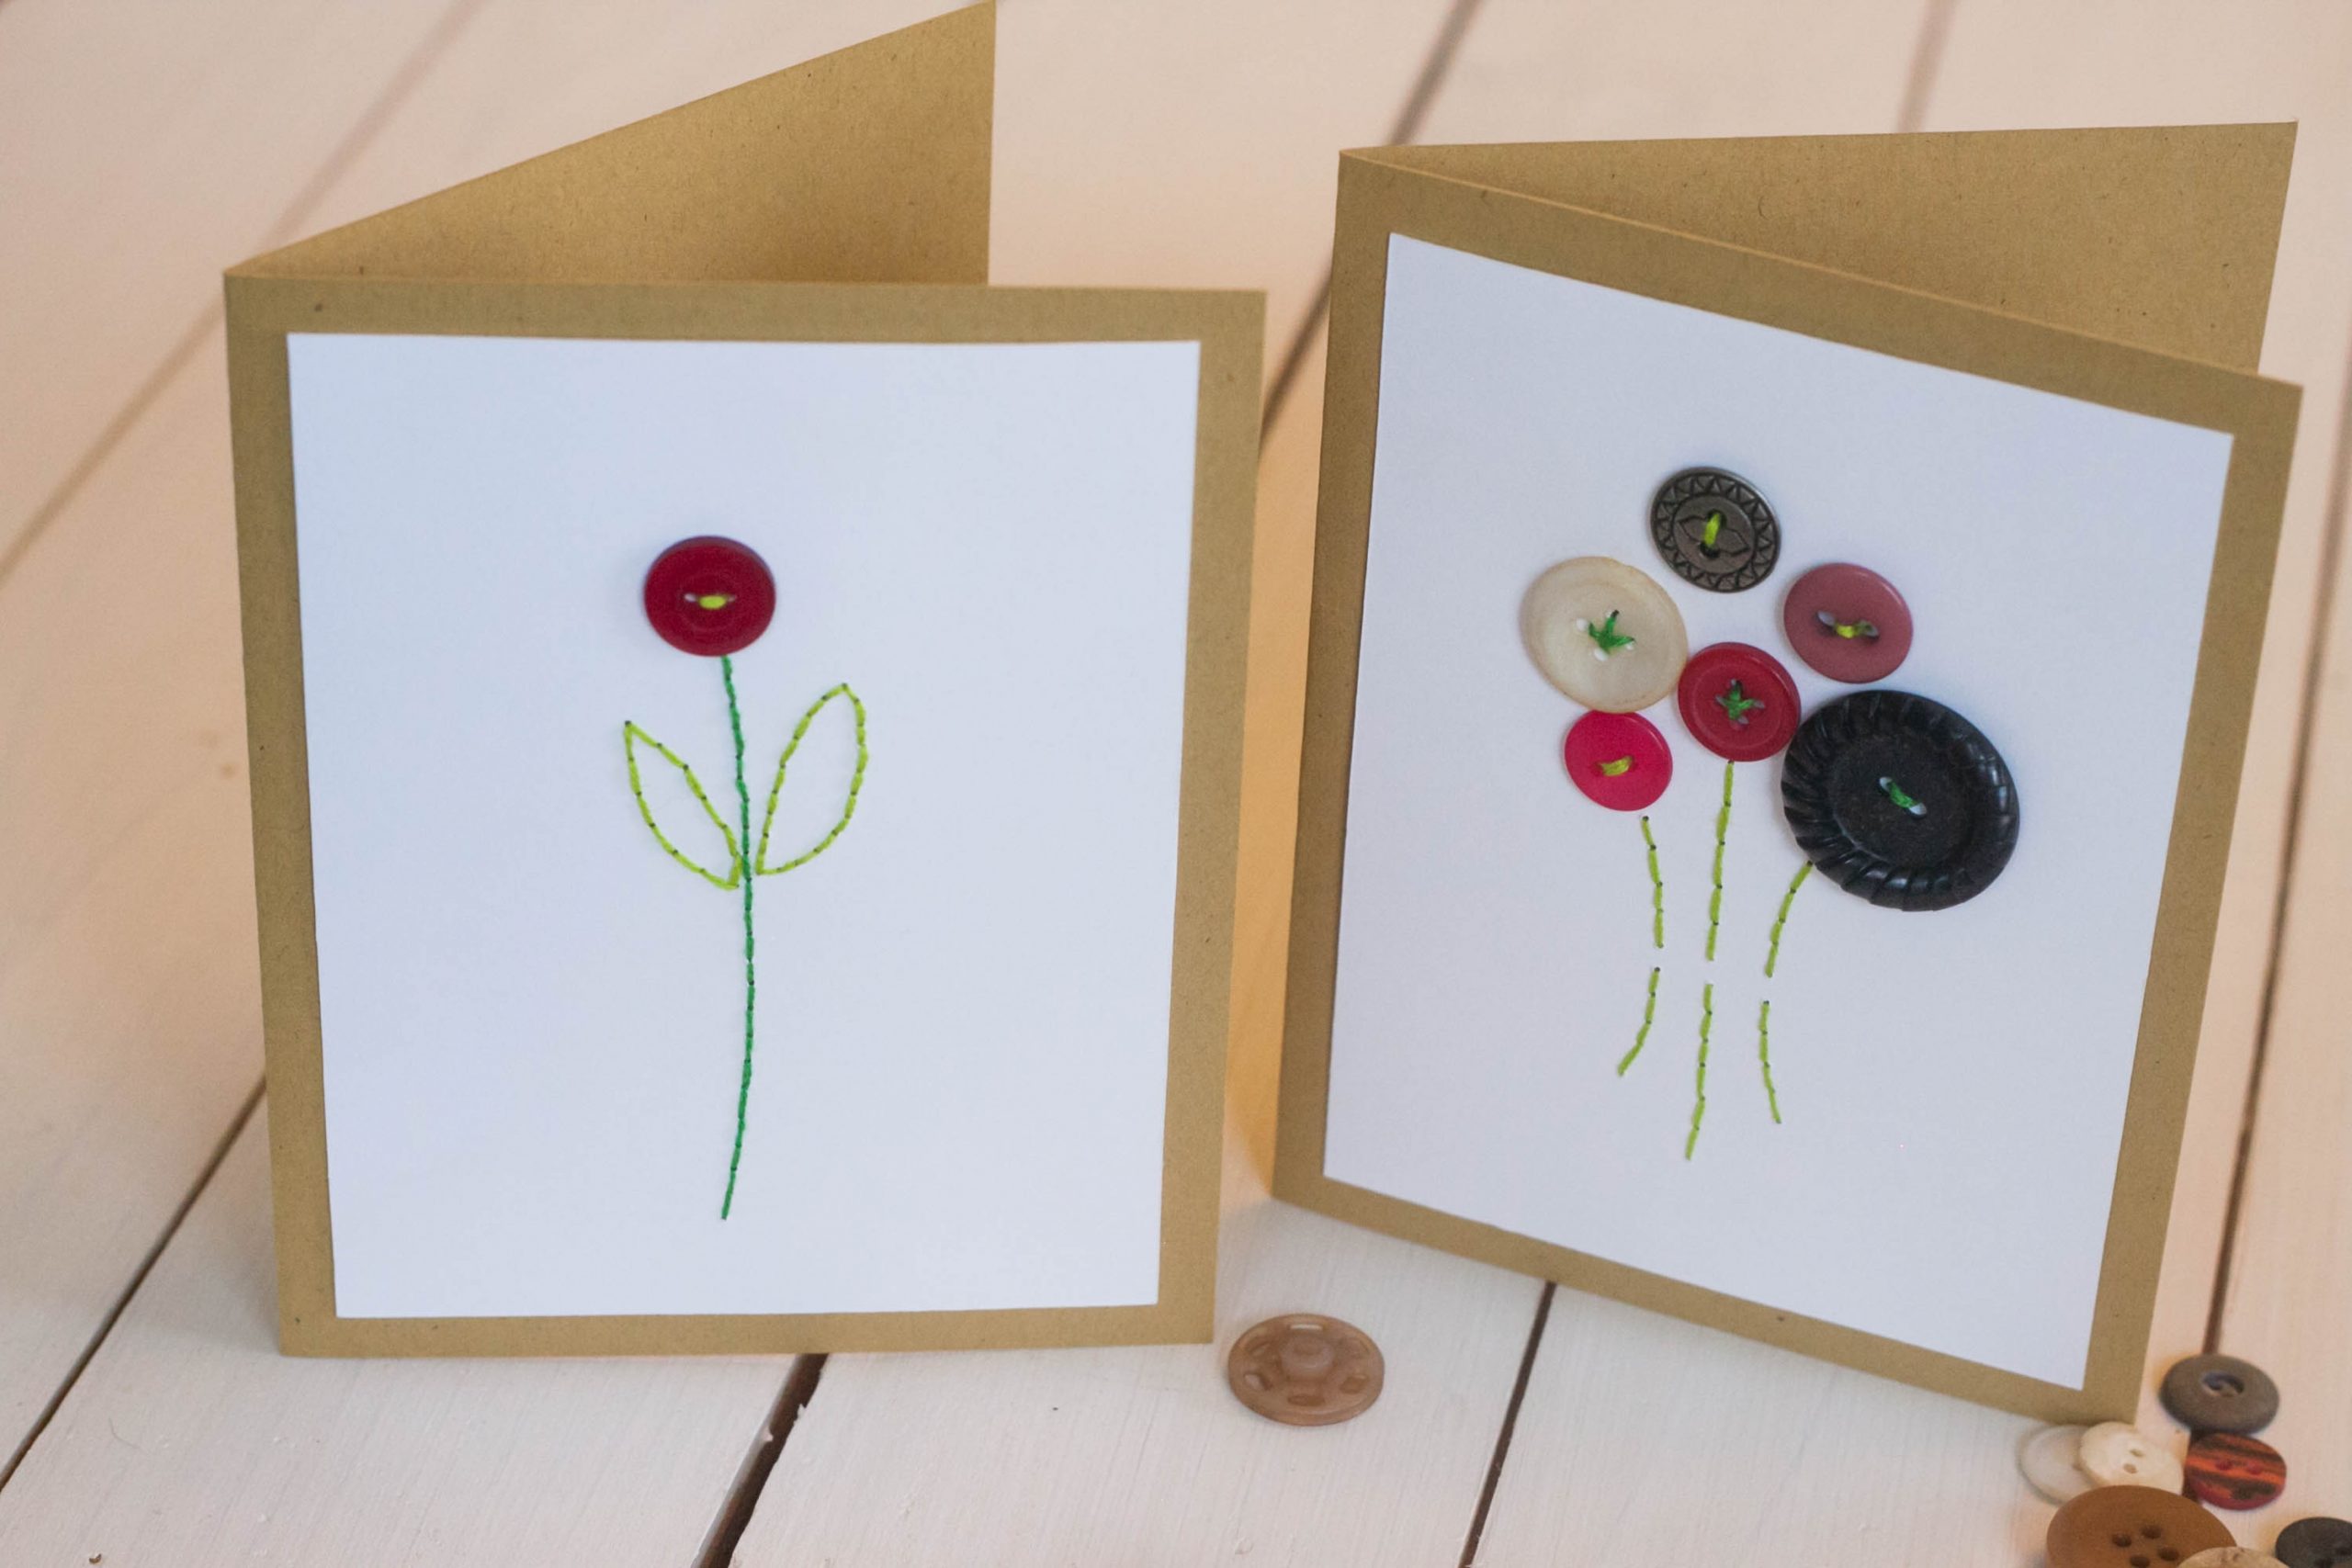
Ok. So, if you’re ready to make a card for a friend that you AND your giftee will both really love, grab your box of loose buttons and let’s make!
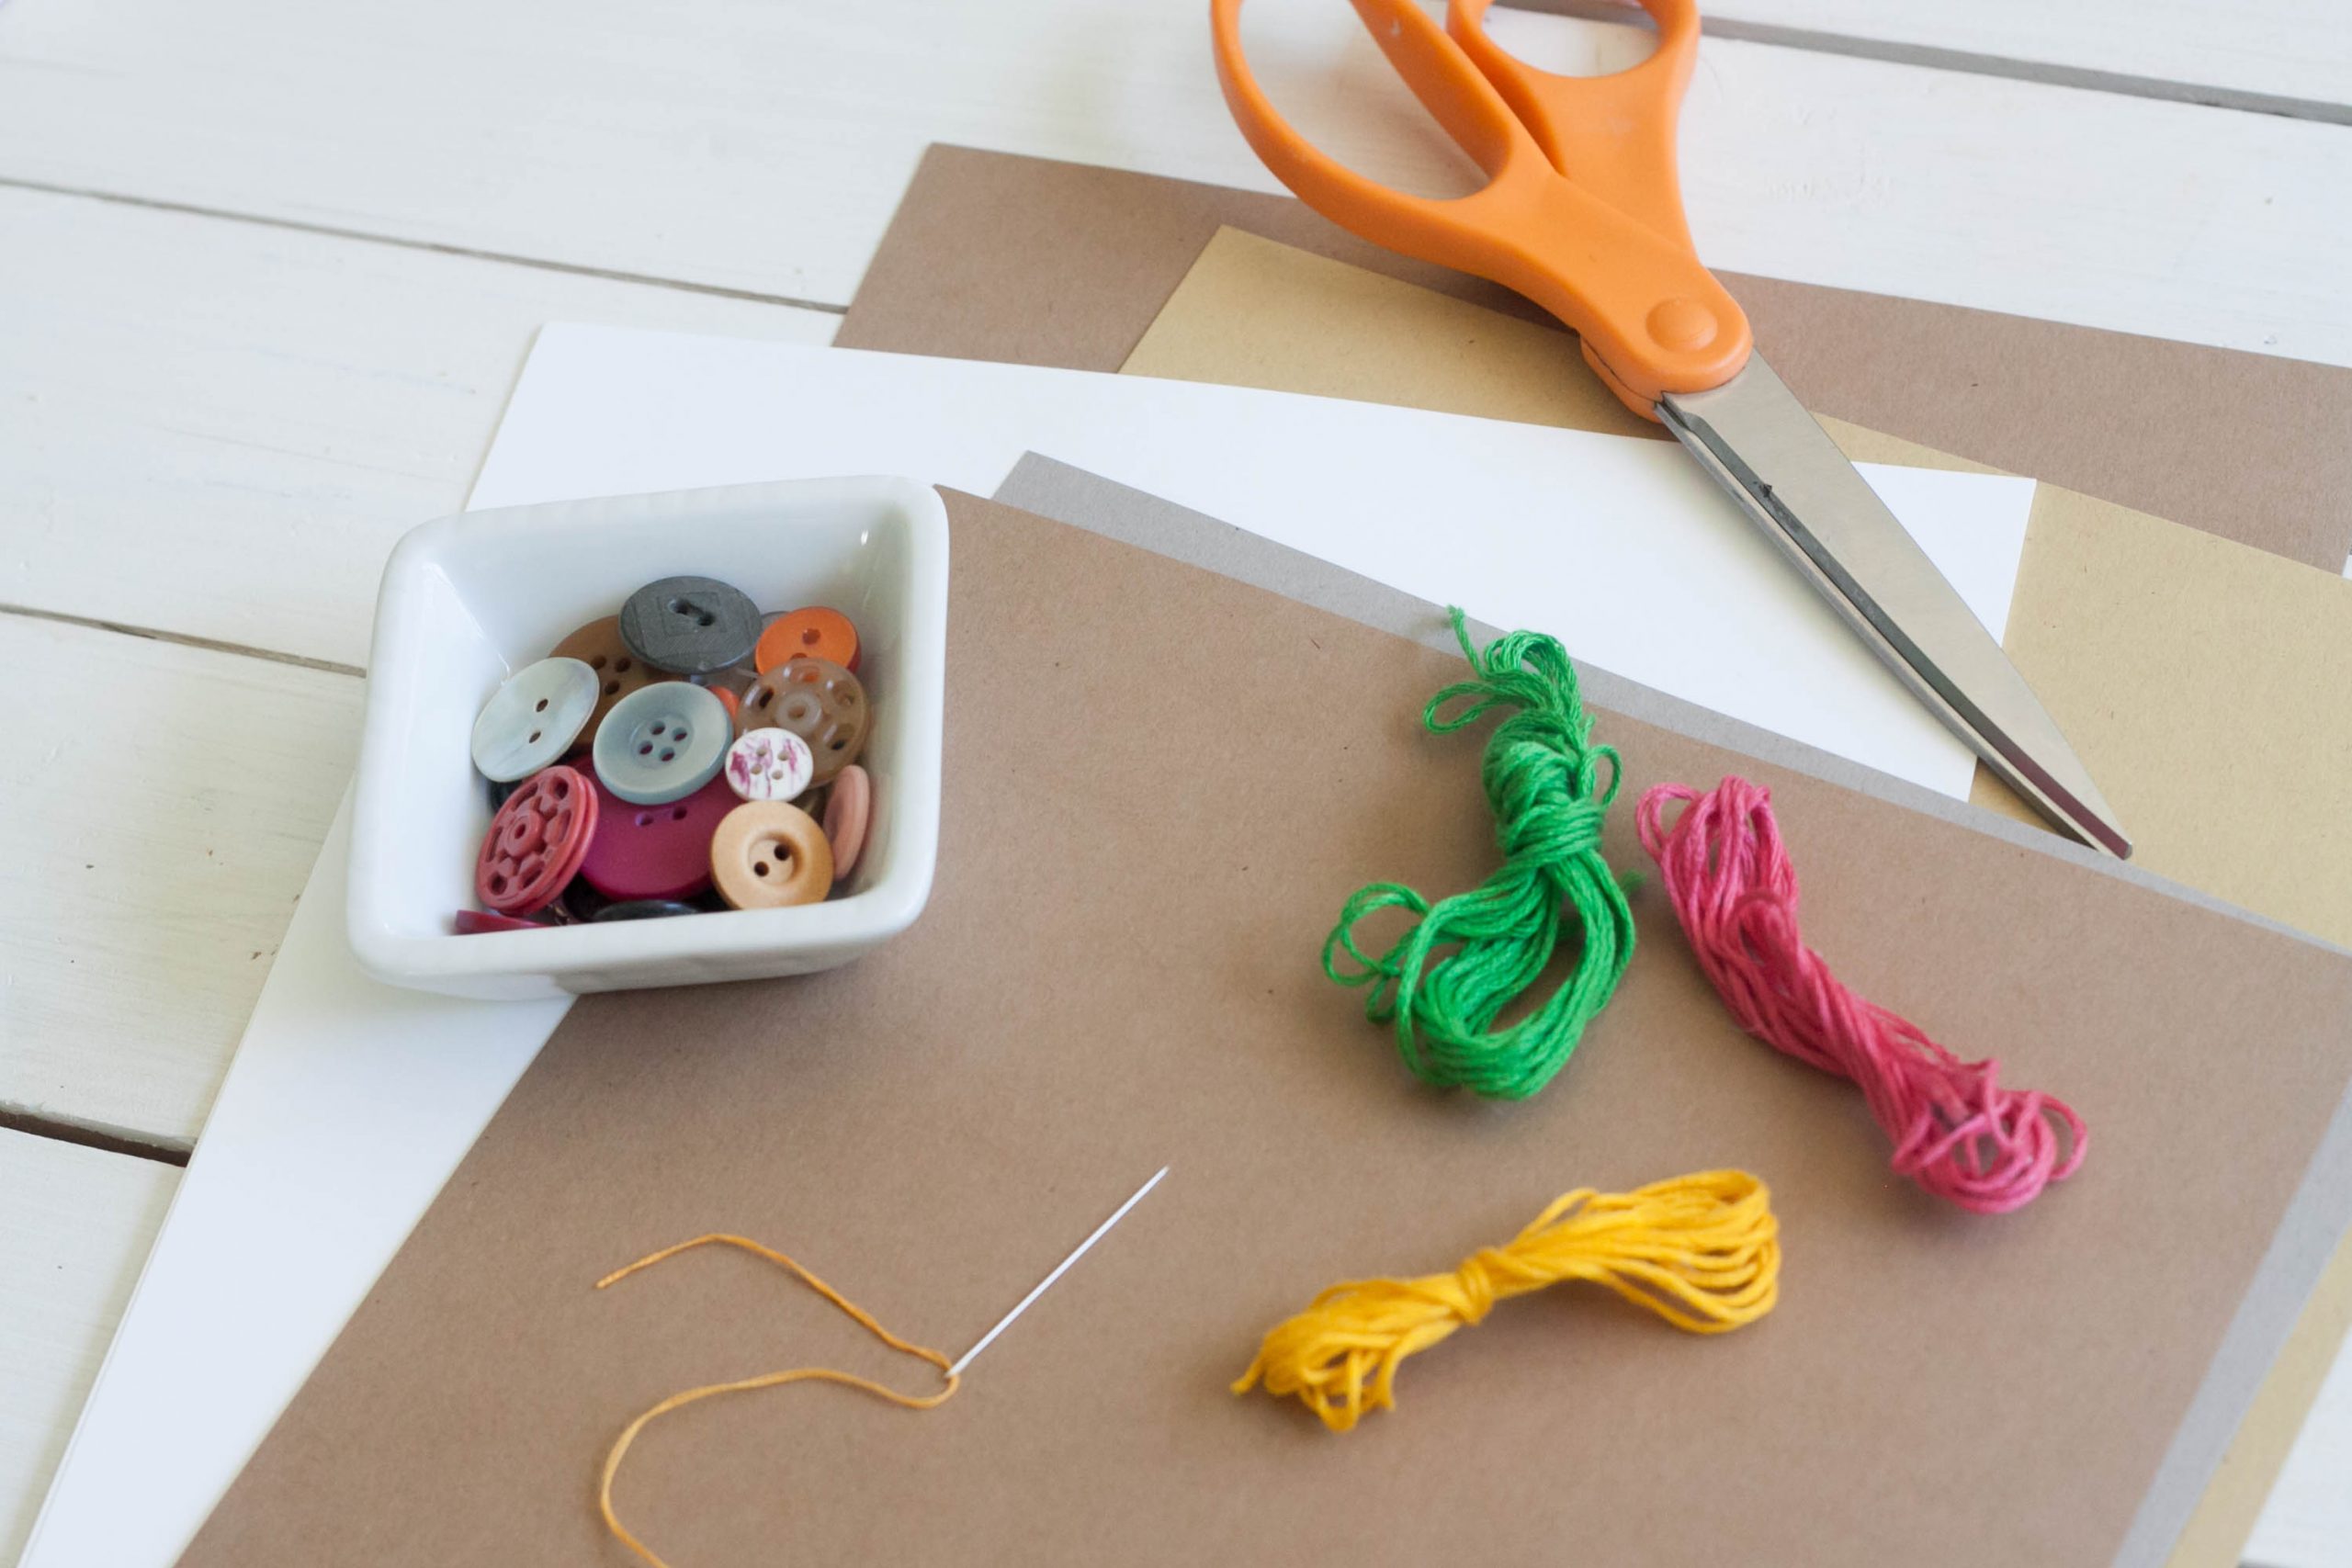
What You Need to Make DIY Button Embroidery Cards
- Scissors
- White and colored card stock
- Pencil
- Needle
- Thread or embroidery floss
- Buttons
- Tape
- Printable Template
How to Make DIY Button Embroidery Cards
Print and cut out templates provided. Or if you want to get creative and make your own patterns, cut out a piece of white card stock that measures 3.75” x 5” and lightly draw your pattern.
Cut one sheet of colored card stock (8.5” x 11”) in half, so you have two pieces of paper that are 5.5” x 8.5”. This will be the backing of your card.
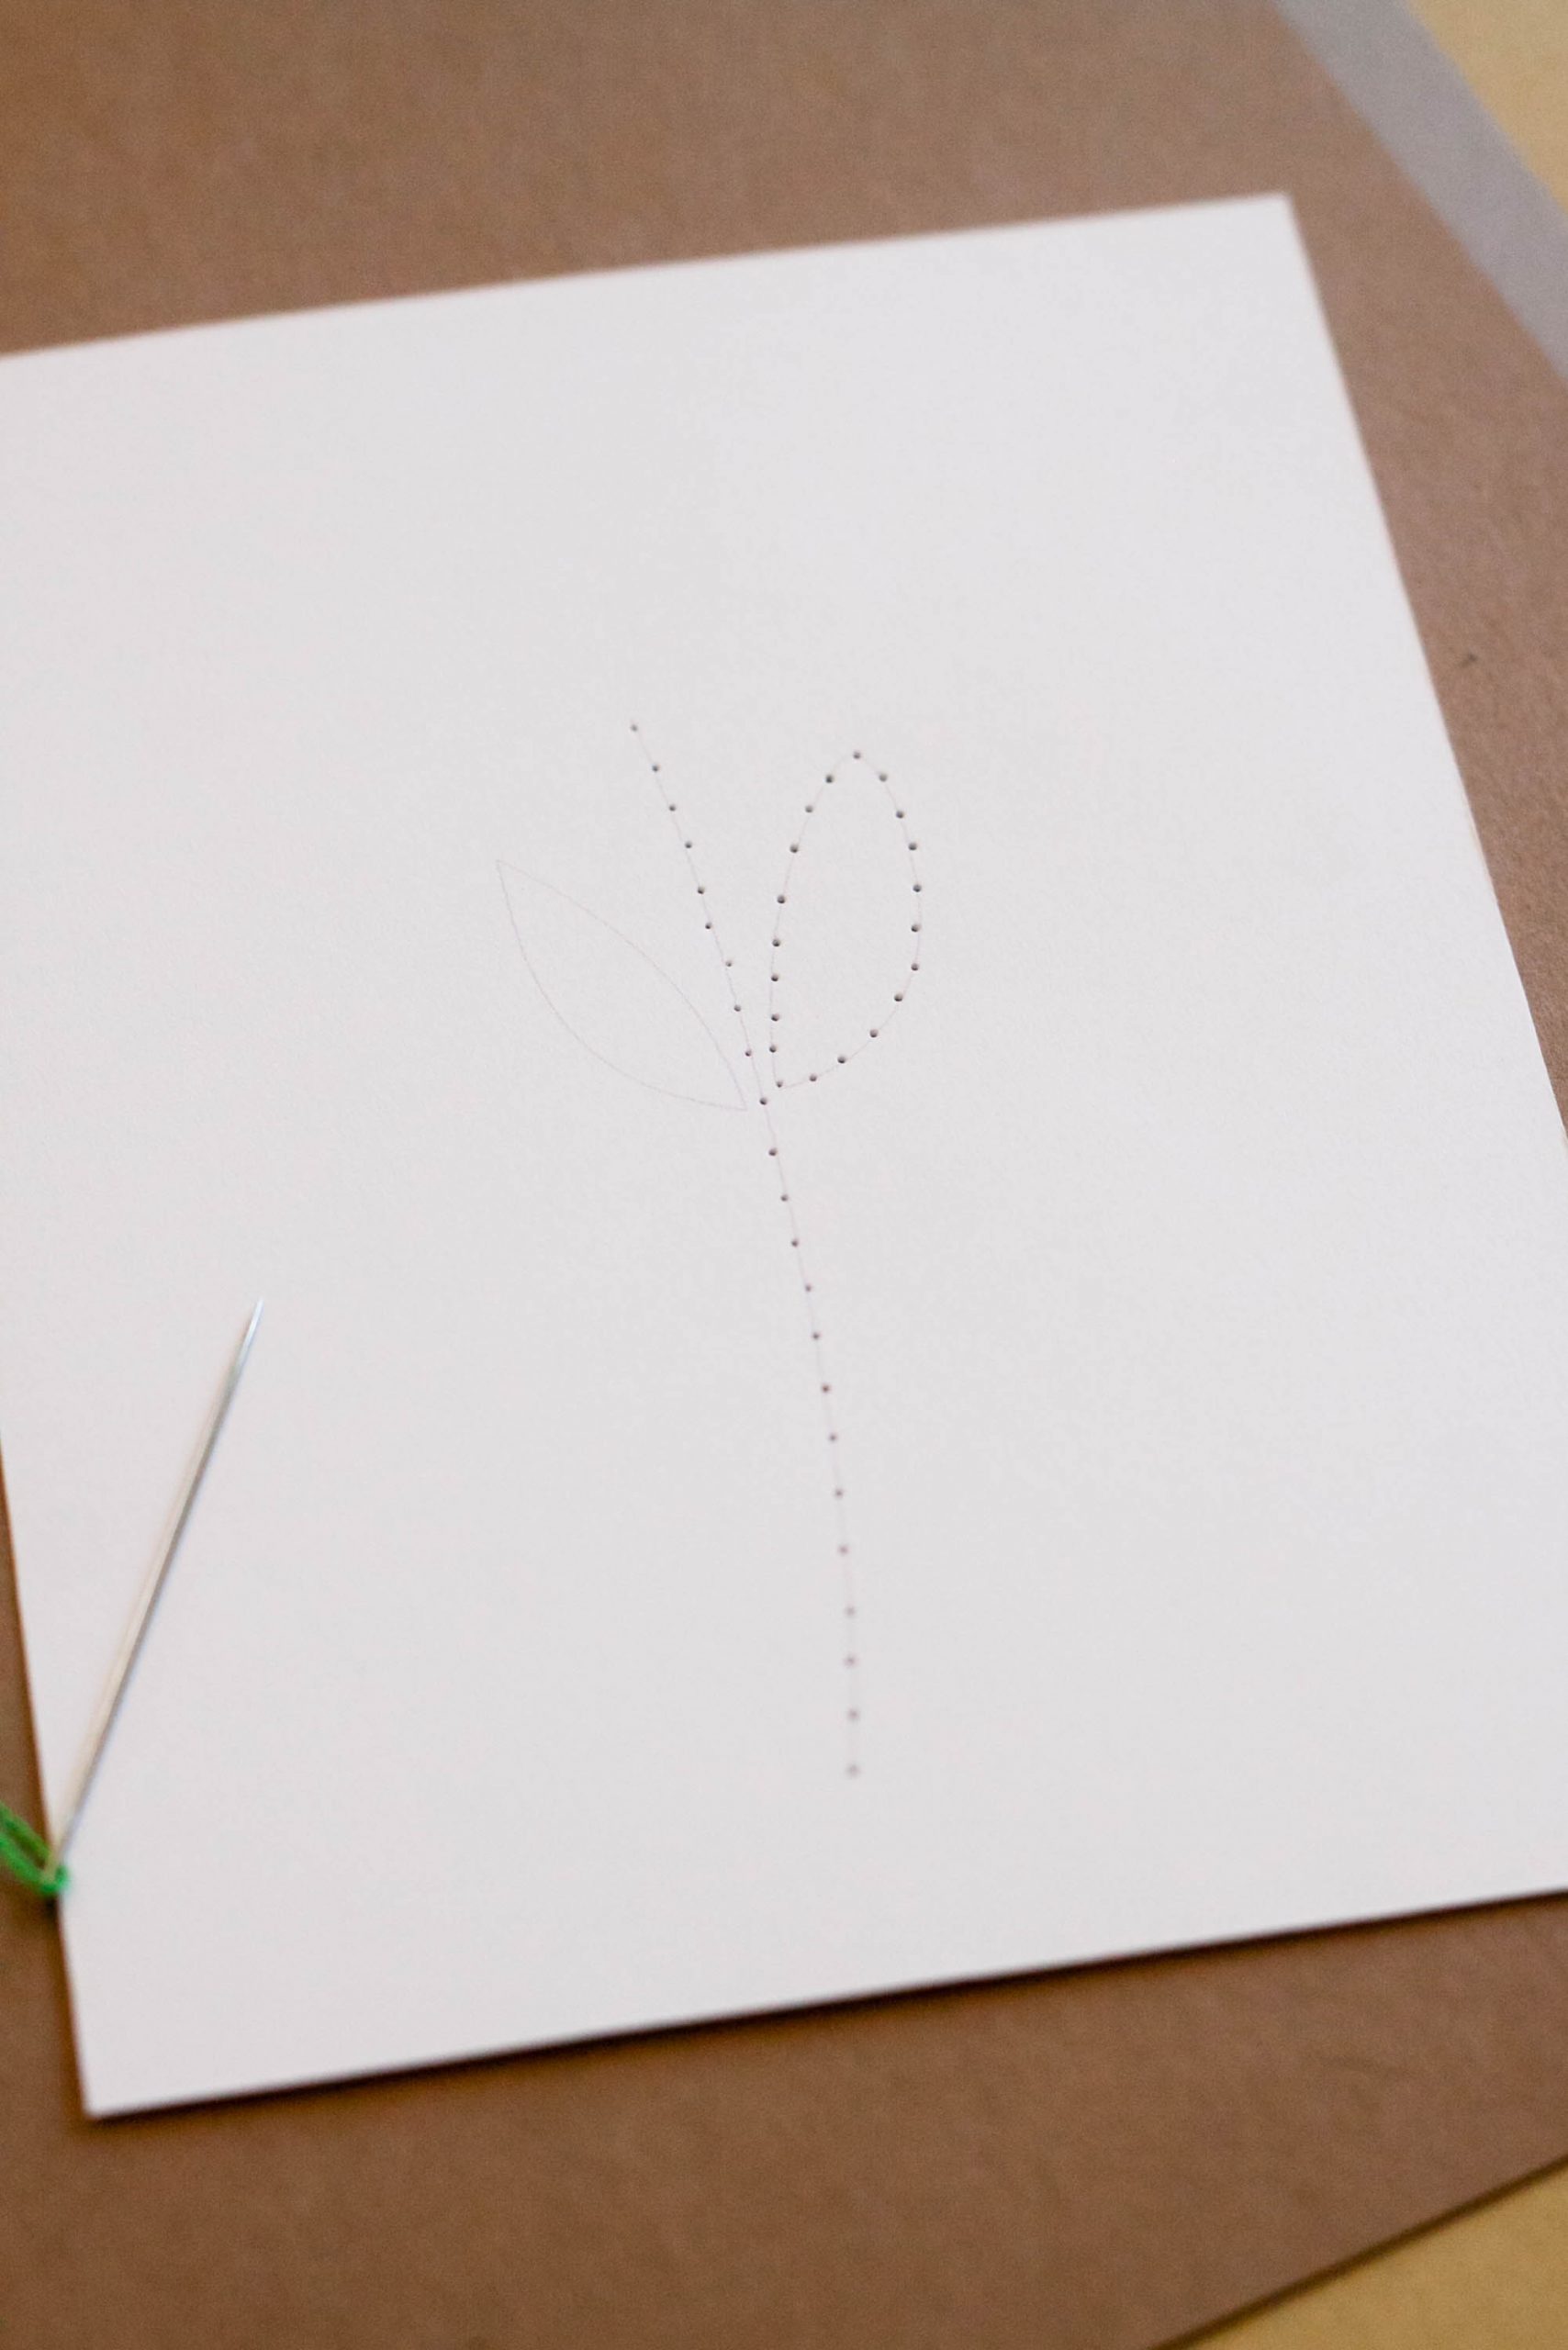
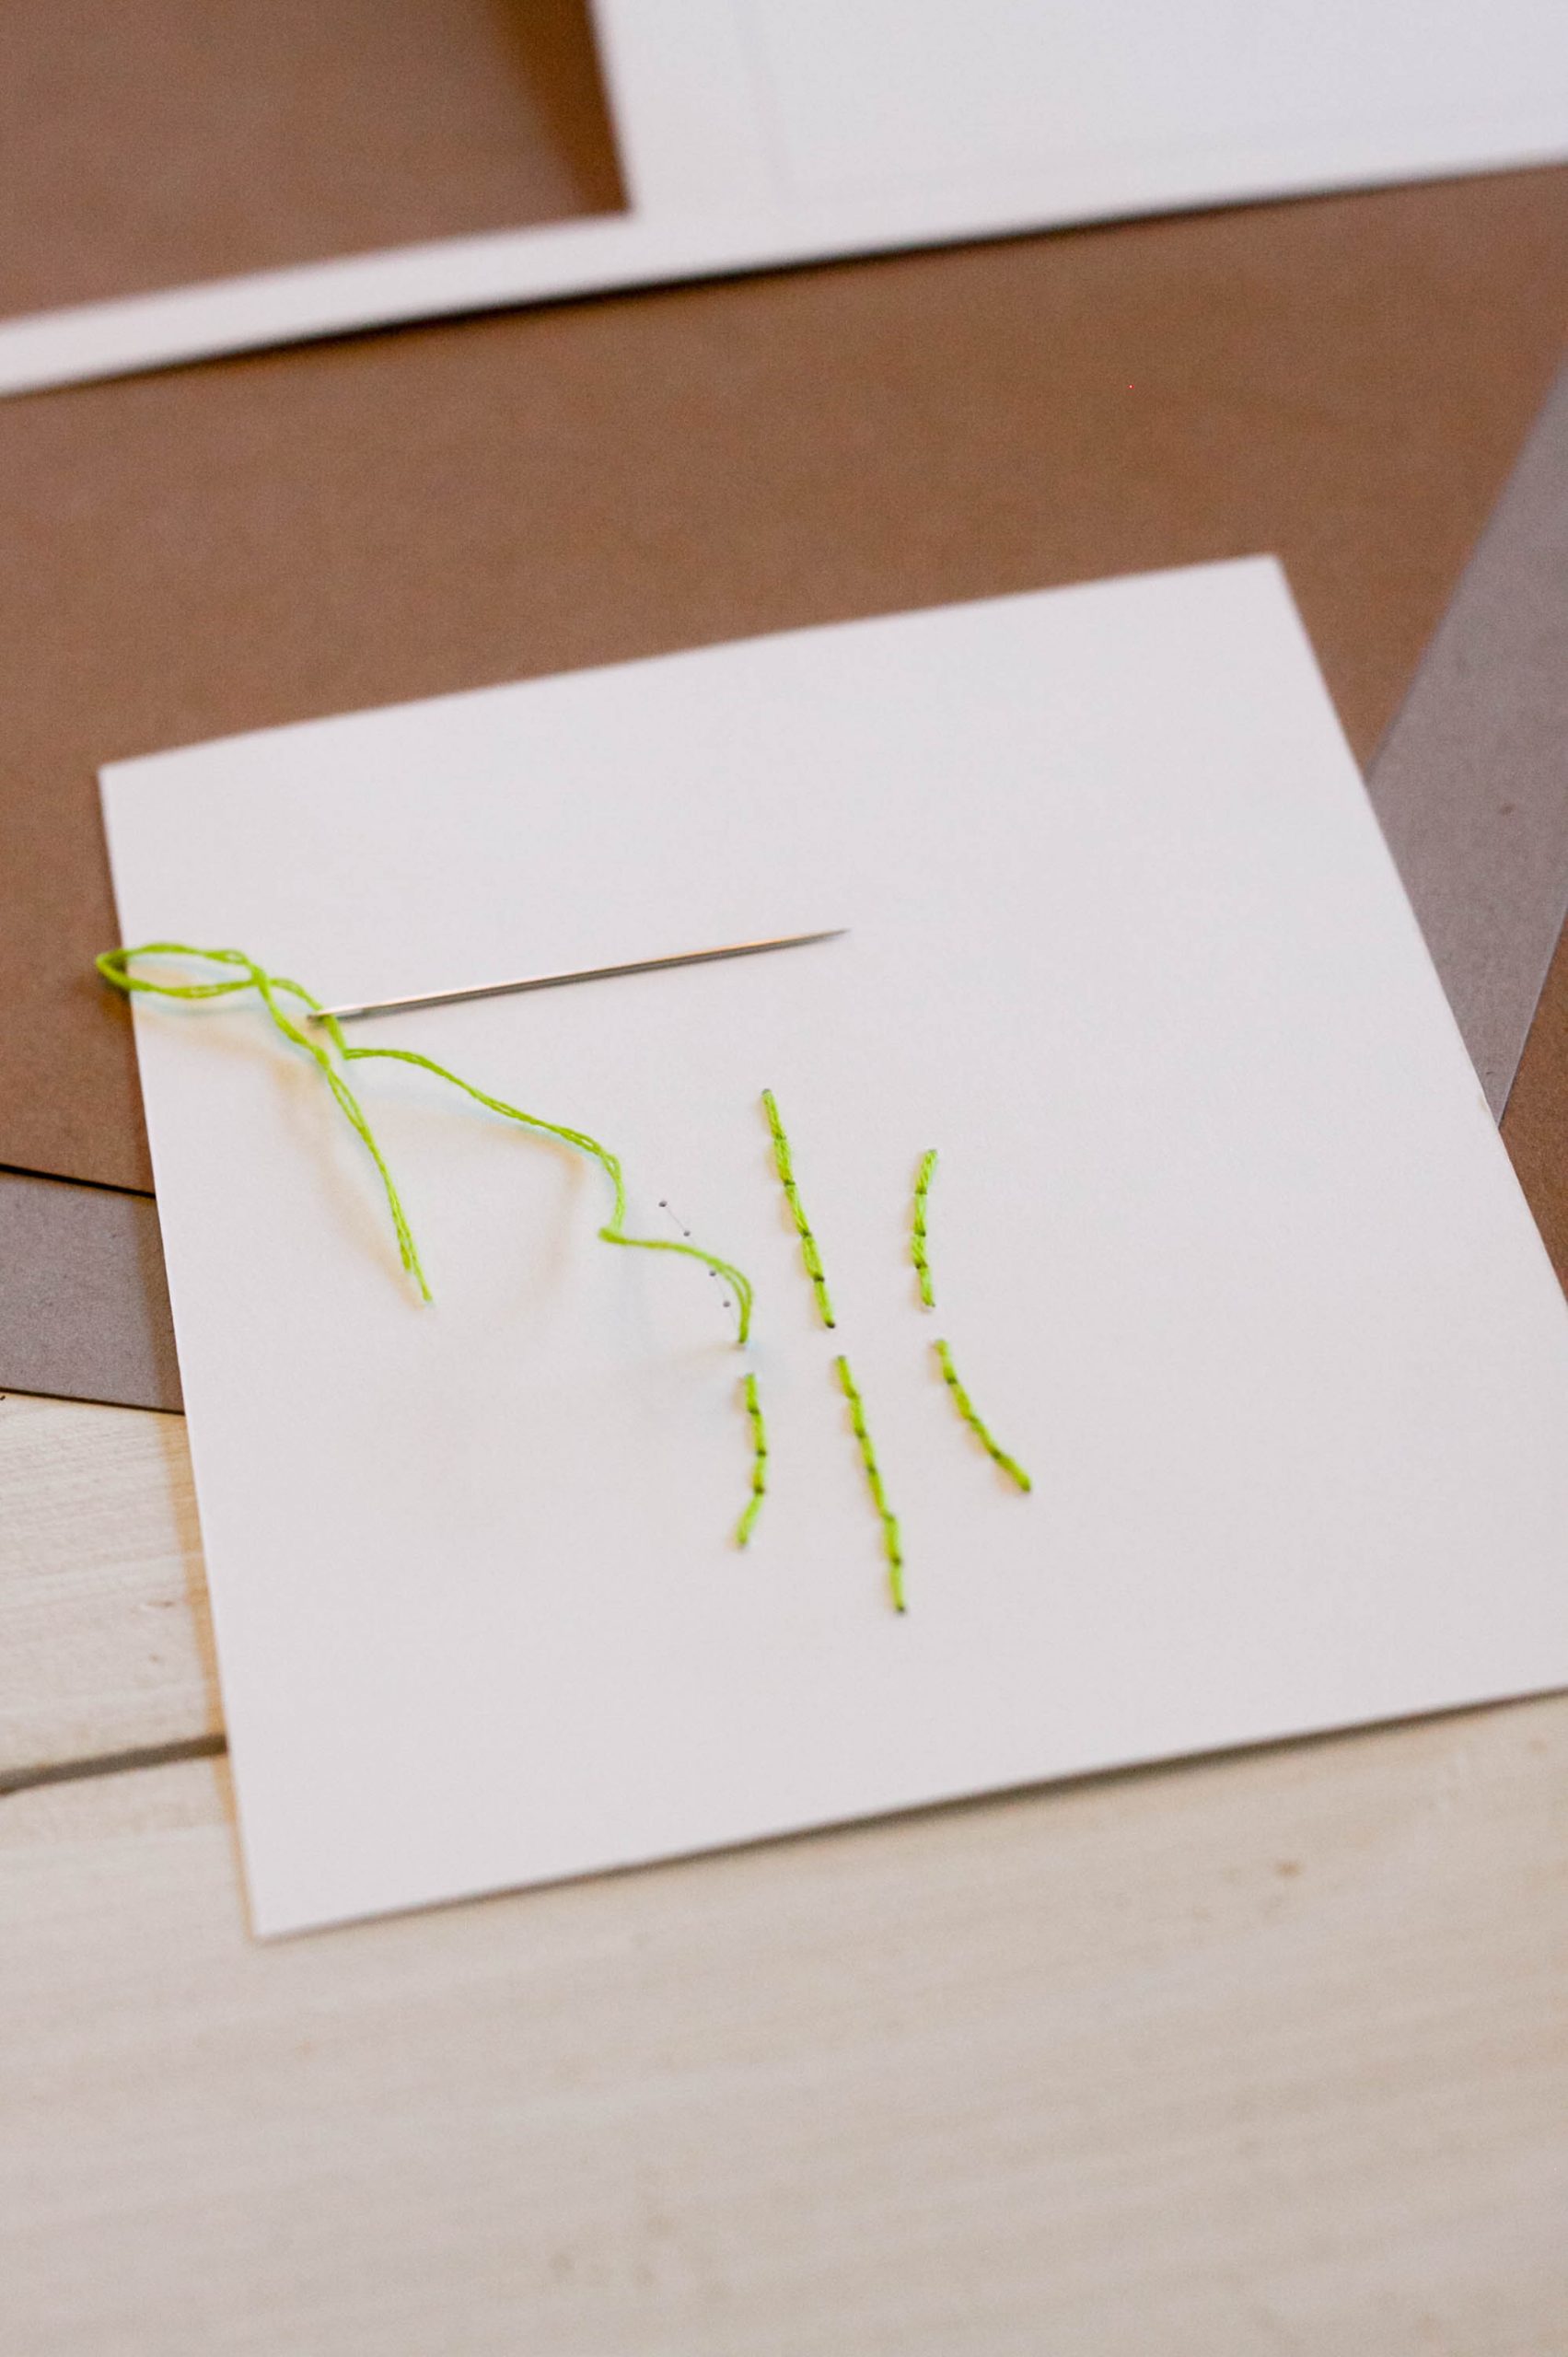
Poke holes along the pattern lines with a needle. These don’t need to be thick. As a matter of fact, turn it into a game to see exactly how perfectly tiny you can make them–its’ kind of relaxing.
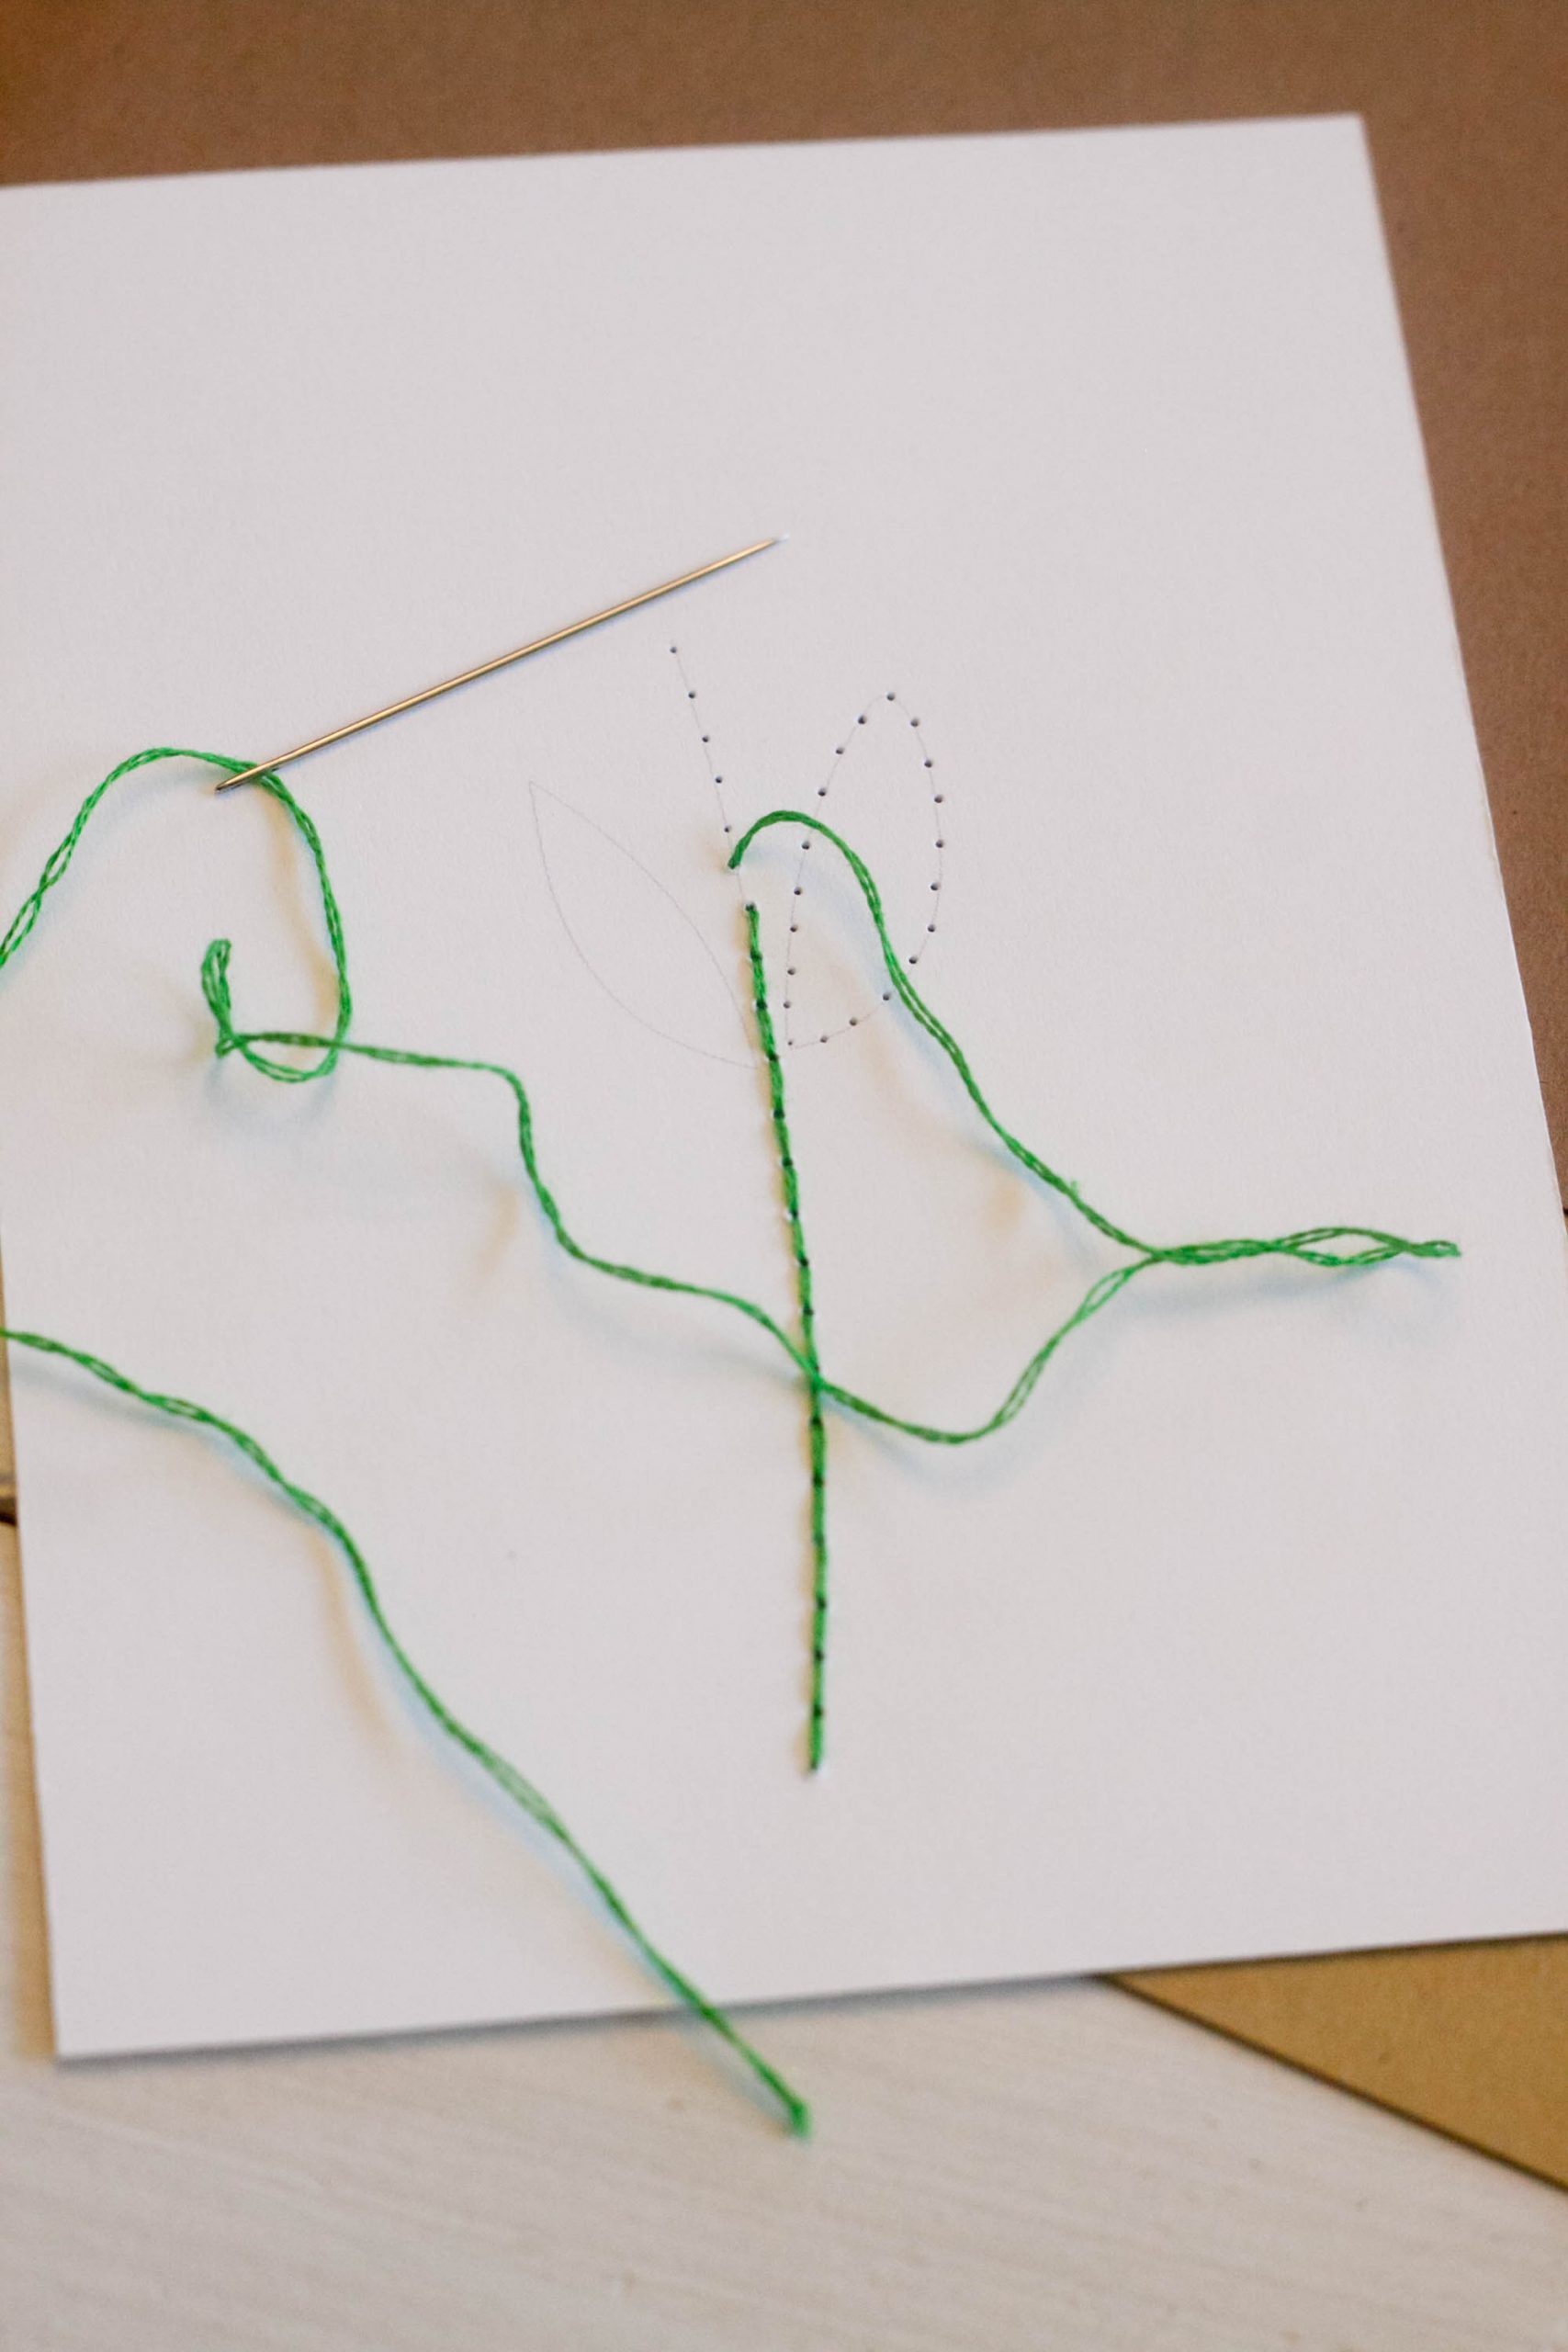
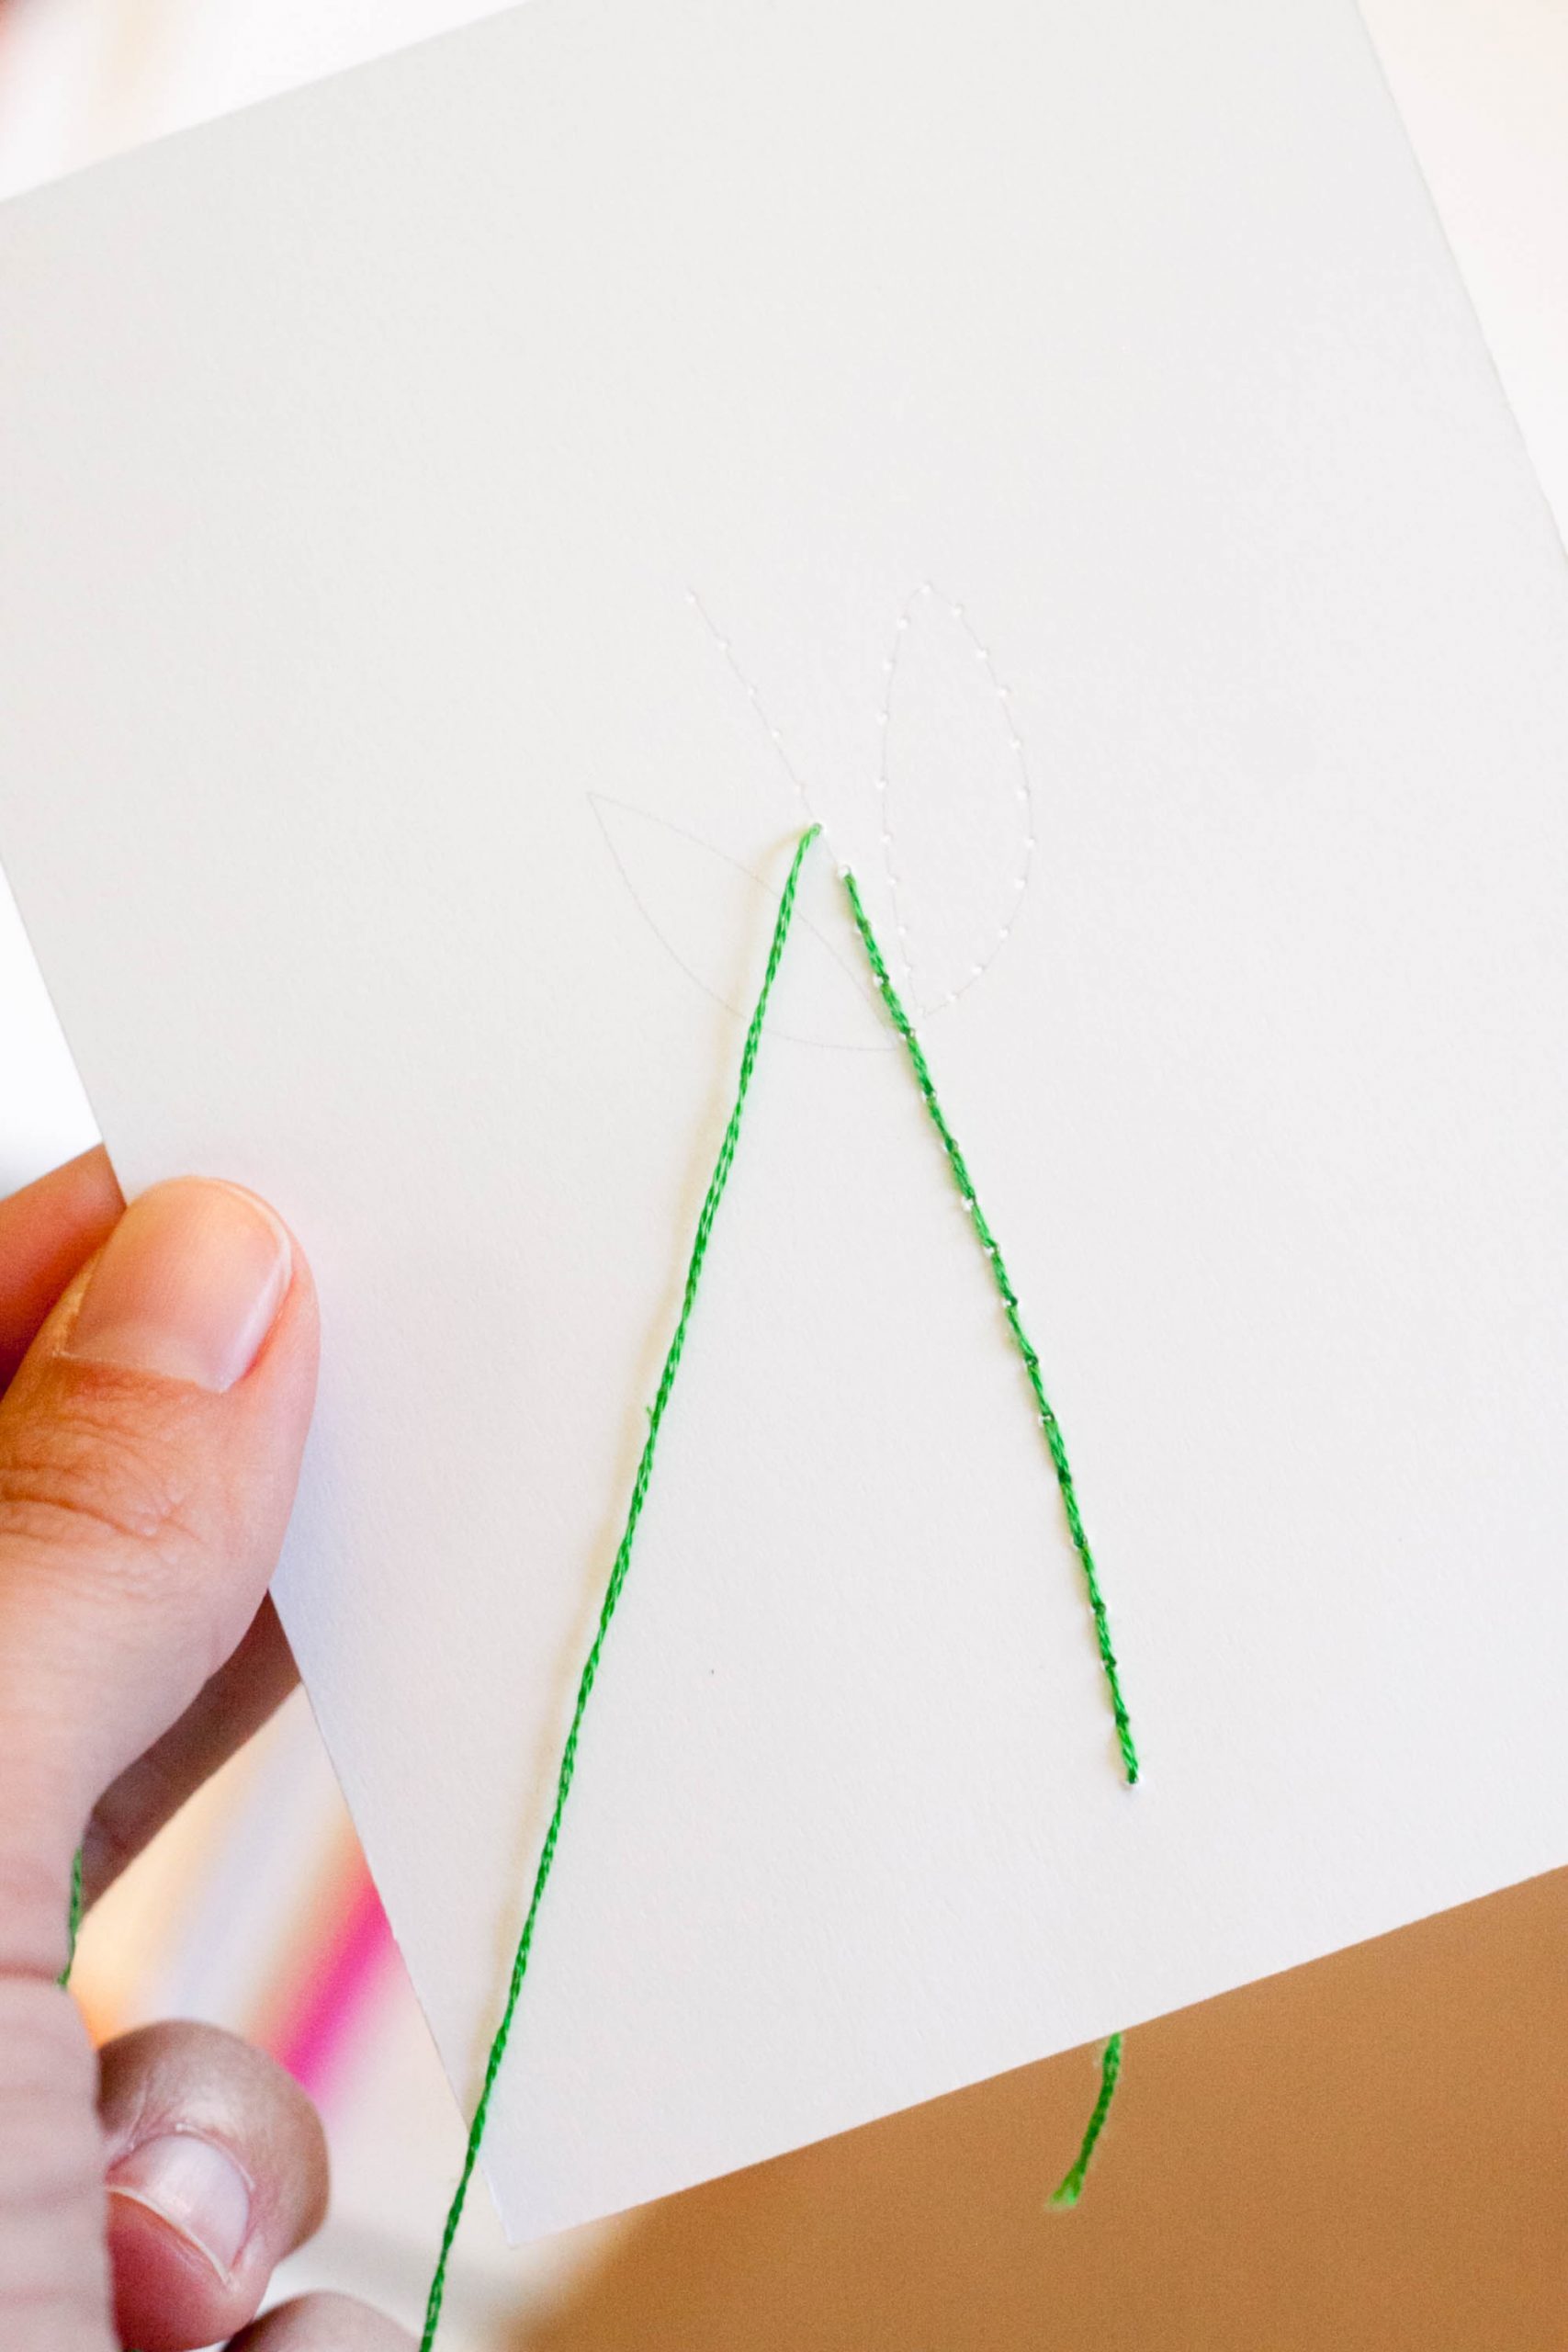
Using thread or two strands of embroidery floss, embroider lines with a running stitch, passing the needles through existing holes.
If it seems like you are having a little trouble threading the needle through the hole and working the thread through, DO NOT widen your holes.
Conversely, get some sewing wax and wax your needle and thread. Then it’ll slip right through!
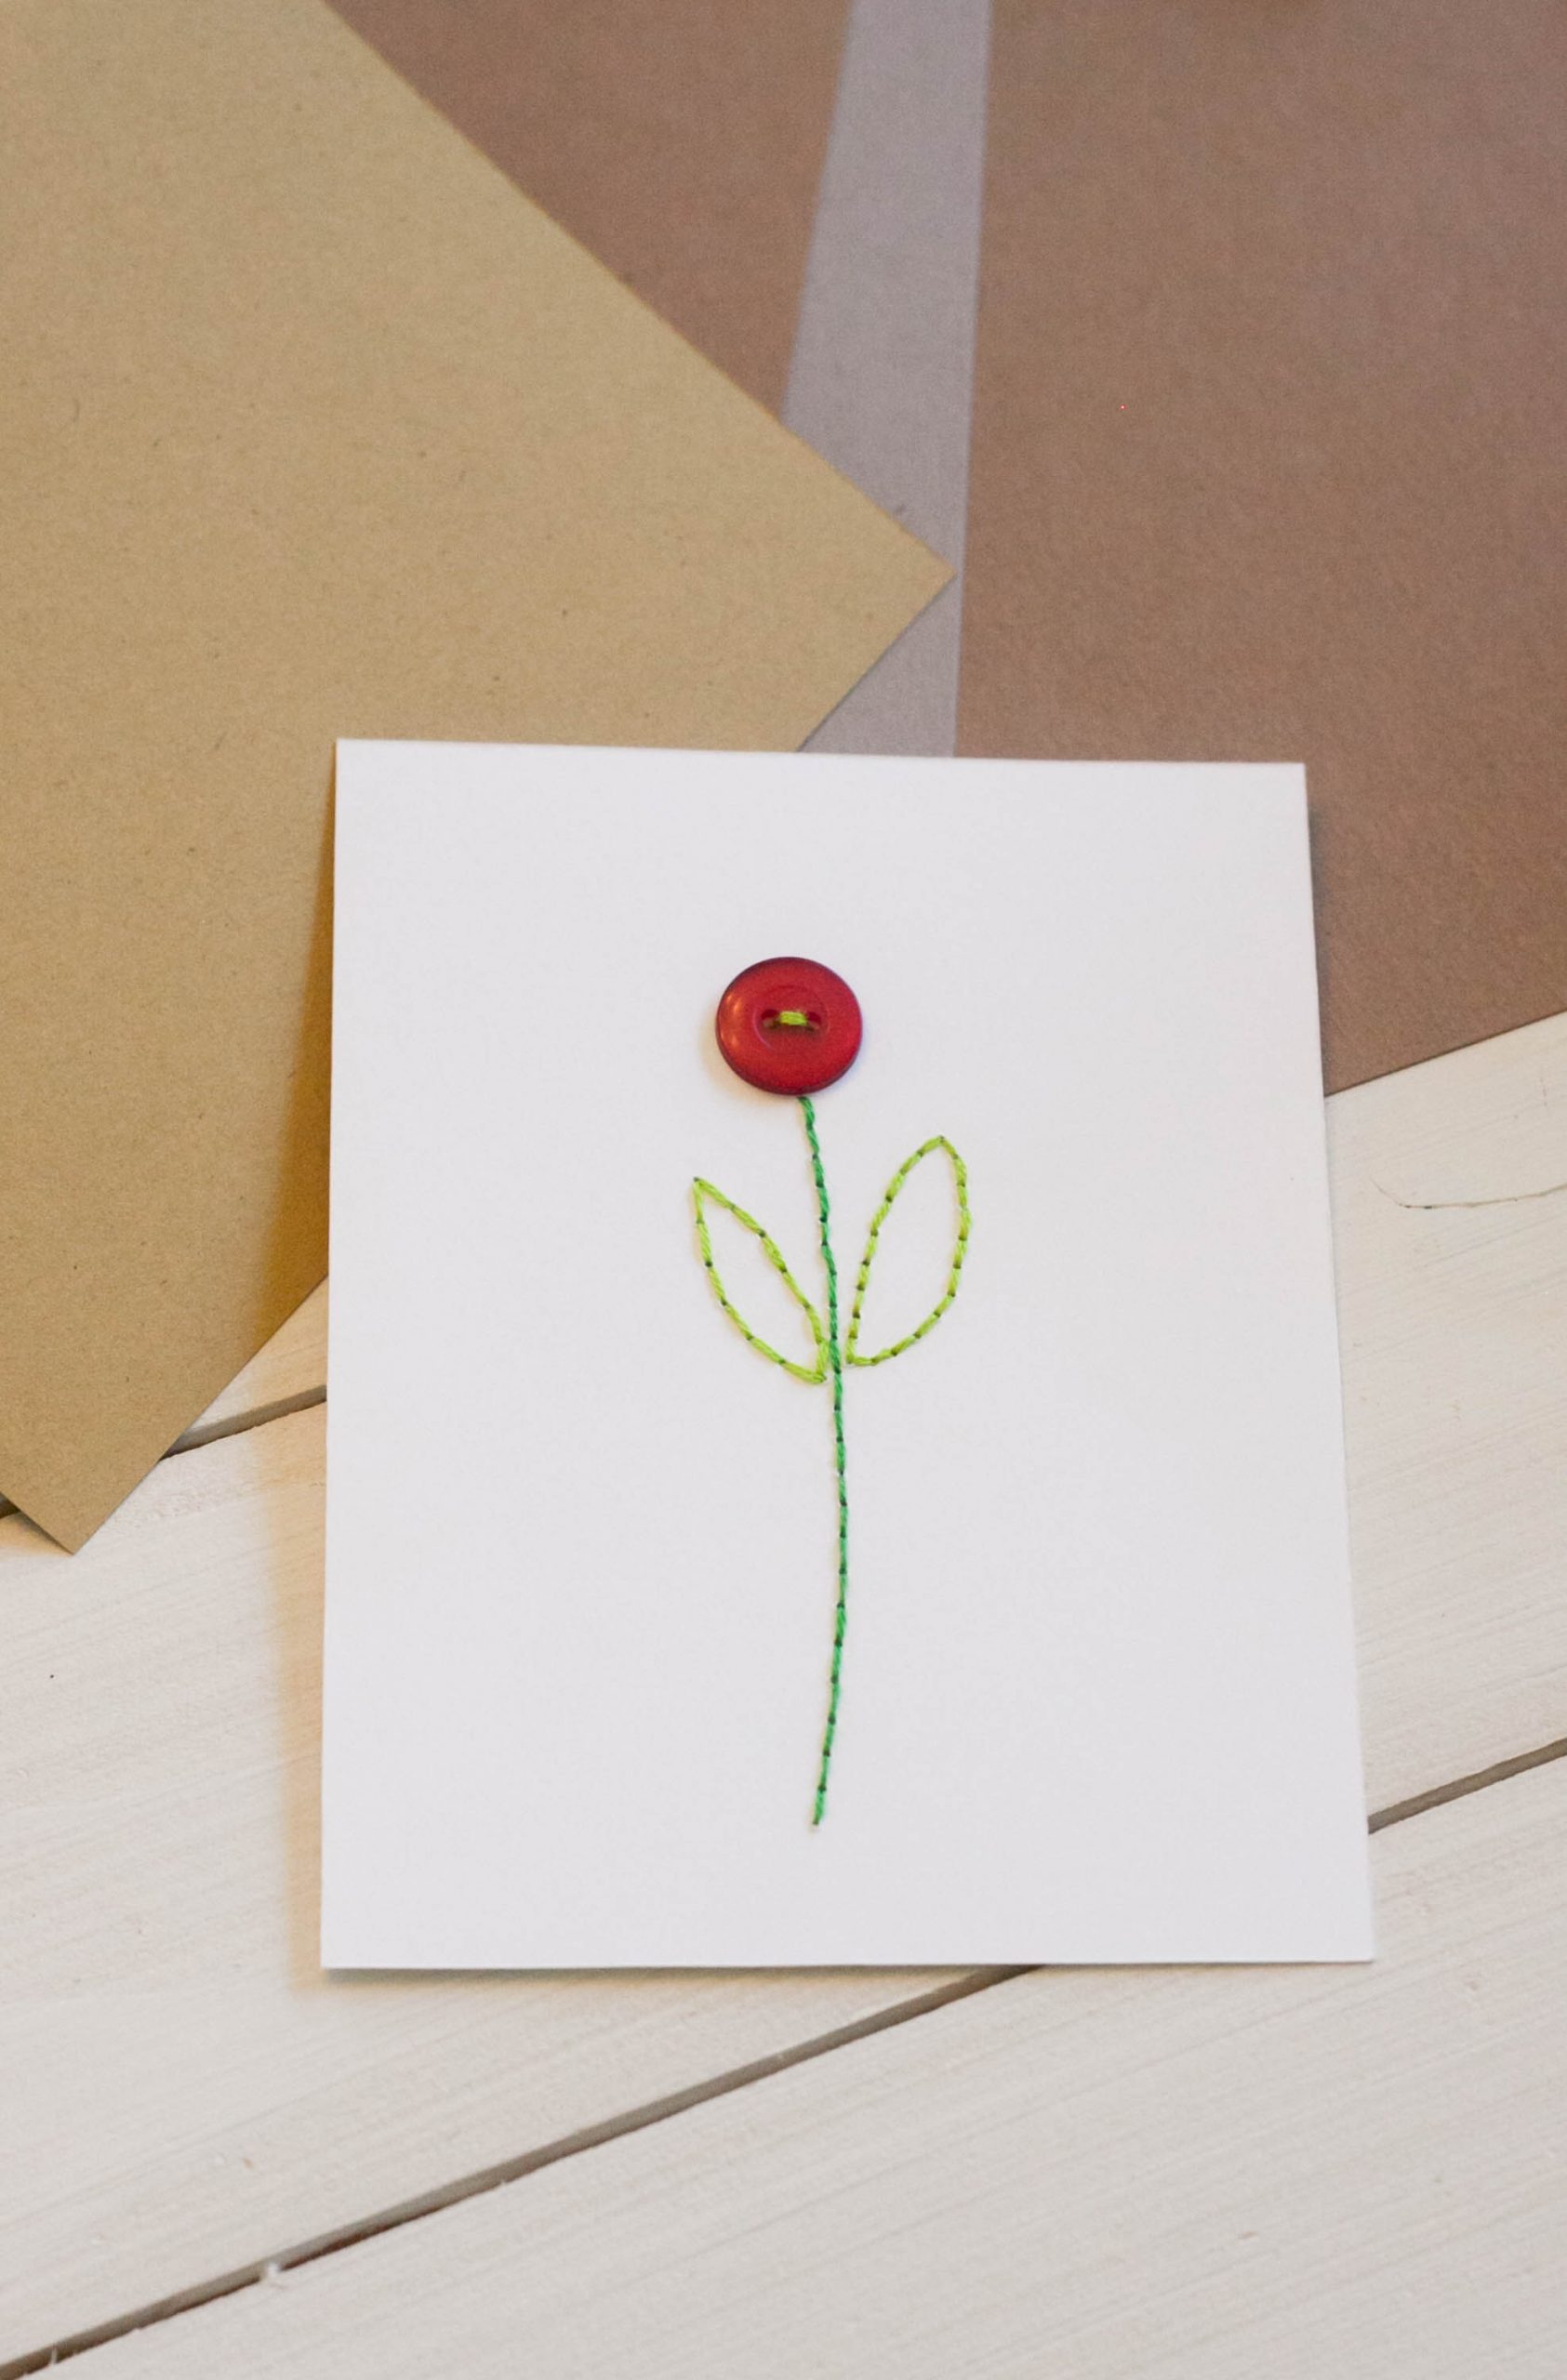
Place buttons where you want them to be and sew them on tightly.
Tape down thread ends on the back of your embroidered card to ensure that they won’t come loose.
When you are happy with your design, attach the embroidered card to the backing with regular scotch tape (looped) or with double-sided tape (my preference).
Pin this easy DIY idea for later!
Isn’t this just the most fun idea to send a heartfelt card to a friend?! I’d dearly love to make some of these for my favorite moms out there that are getting cards from me for Mother’s Day. Hmmmm…
More Fun DIY Craft Ideas You’ll Love
DIY Button Embroidery Cards
This DIY Button Embroidery Cards tutorial is so easy, and the simple embroidery pattern is seriously perfect for a beginner emboider-er.
Materials
- White and colored card stock
- Thread or embroidery floss
- Buttons
- Tape
- Printable Template
Tools
- Scissors
- Pencil
- Needle
- Printer for template
Instructions
Print and cut out templates provided. Or if you want to get creative and make your own patterns, cut out a piece of white card stock that measures 3.75” x 5” and lightly draw your pattern. Cut one sheet of colored card stock (8.5” x 11”) in half, so you have two pieces of paper that are 5.5” x 8.5”. This will be the backing of your card.
Poke holes along the pattern lines with a needle.
Using thread or two strands of embroidery floss, embroider lines with a running stitch, passing the needles through existing holes.
Place buttons where you want them to be and sew them on tightly.
Tape down thread ends on the back of your embroidered card to ensure that they won’t come loose.
When you are happy with your design, attach the embroidered card to the backing with regular scotch tape (looped) or with double-sided tape.
These are so cute.