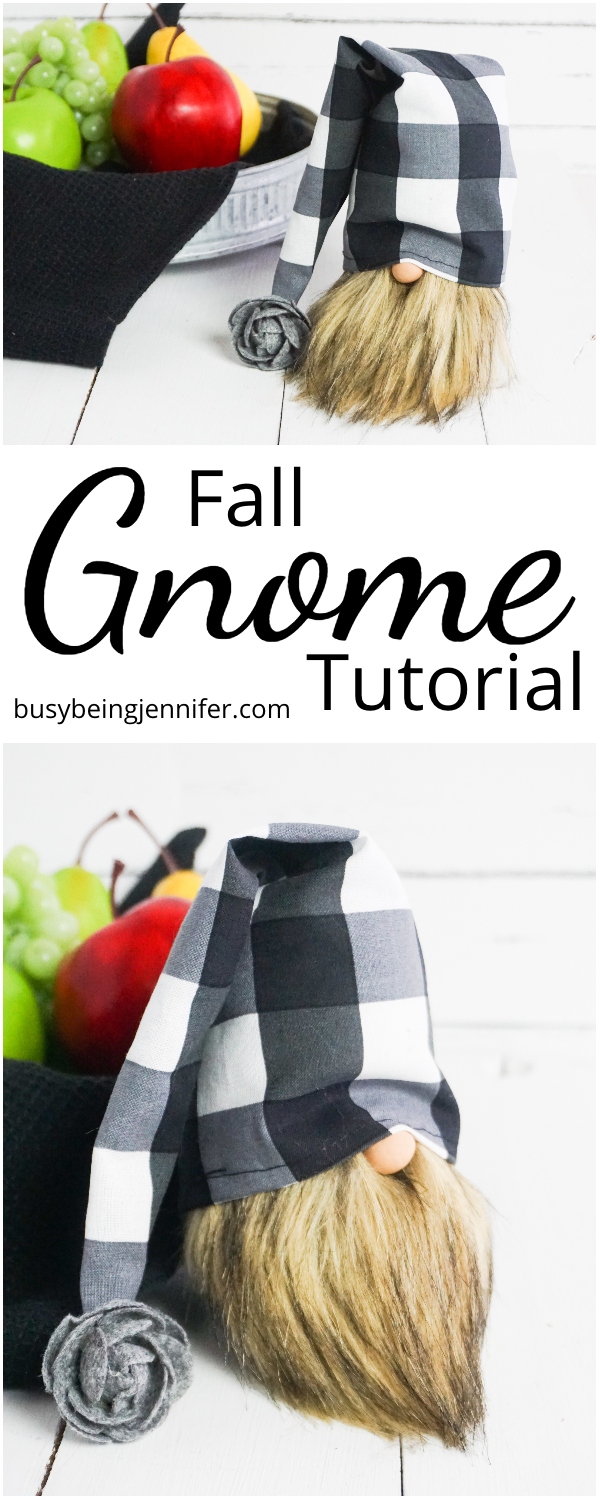
This easy DIY Gnome is perfect for an entryway or mantle. It’s seriously cute and making this fall sock gnome was definitely the highlight of my week!
When I learned how to make a gnome, I thought it was all about cone shapes and felt. But then I saw a tutorial for a sock gnome and immediately had an idea for making this awesome buffalo check gnome.
It’s a fun Christmas decoration, but really, Scandinavian gnomes are not just for the holiday season. There’s just so many more fun things you can do with gnomes than just making Christmas ornaments!
So, whether you’re making a Scandinavian Christmas gnome for your holiday decor, or you’re making a fun fall gnome for no reason other than you love buffalo check, well, let’s get your scissors and get to trimmin’!
If you’re looking for more awesome fall DIY ideas, check out these 7 epic fall DIY projects that you’ll absolutely love.
What do you need to create your own DIY Gnome?
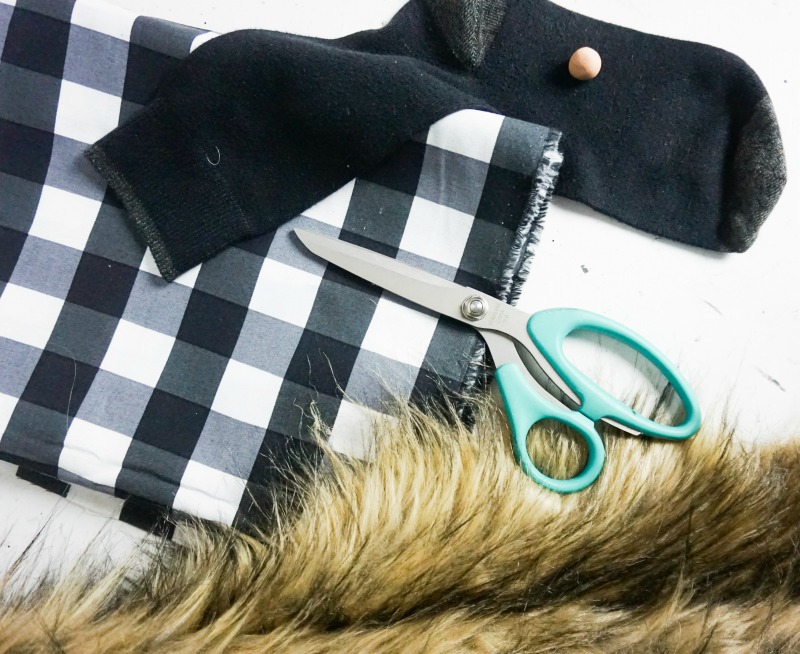
- Black and White Buffalo Check Fabric
- Black Sock
- Black Thread
- Grey Felt Flower (I bought mine in the button section of the craft store)
- Wooden Bead, Wine Cork or Polymer Clay Ball for a Nose
- 1-2 cups Uncooked Rice
- Small Amount of Polyfill
- Brown Mongolian Fur Fabric
- Printable Pattern
Tools You Need for This DIY Fall Gnome Tutorial
- Hot Glue Gun & Glue
- Sewing Machine
- Scissors
- Mason Jar or Cup
- Exacto Knife
- Printer for pattern
How Do You Make Your Own DIY Gnome?
Using the printable pattern, cut out the half-moon shape from the backside of the Mongolian fur. Be very careful to use your Exacto knife and cut only the fabric, or you will cut the fur and be unhappy with the result. Set beard aside.
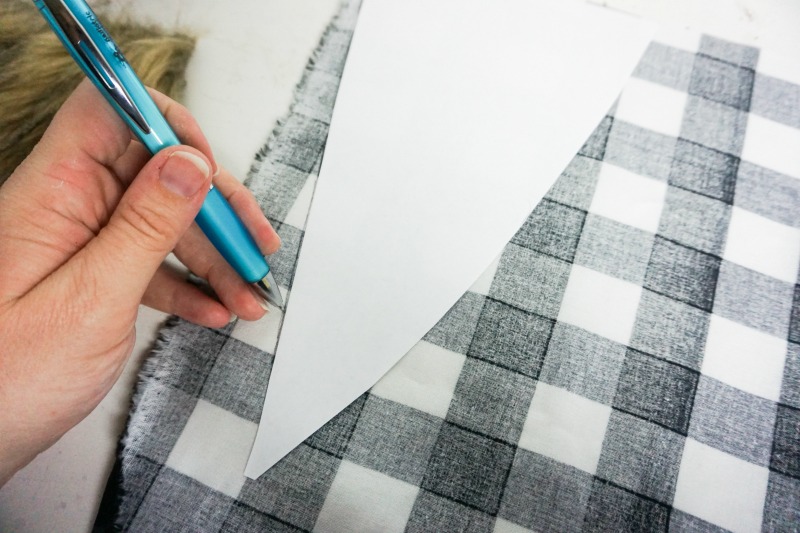
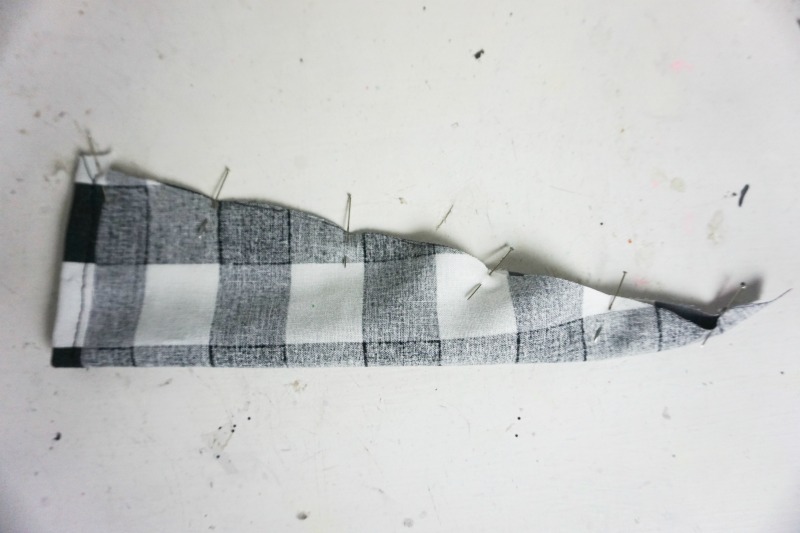
Fold the buffalo check fabric in half and cut one triangle shape from the printable pattern out of the folded buffalo check fabric, with one long edge of the folded in the fabric along one long edge of the triangle shape.
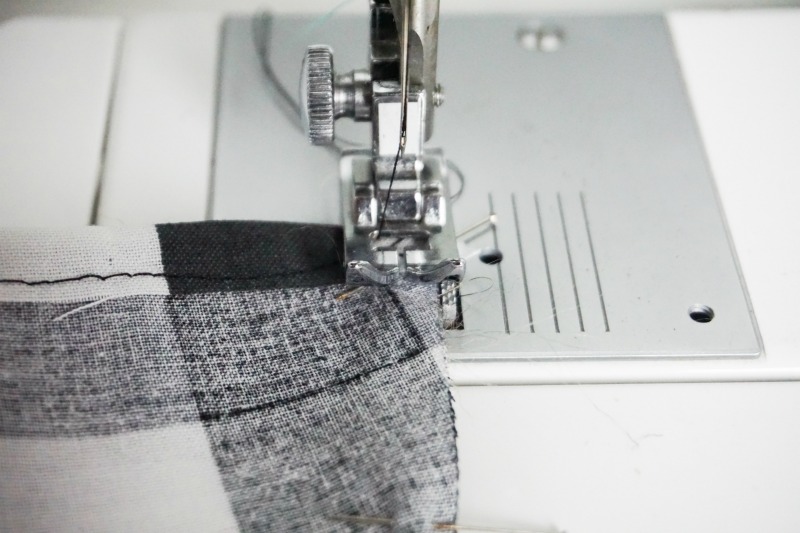
Open the buffalo check fabric and fold up the base of the triangle toward the wrong side of the fabric to create a hem. Pin this in place.
Sew the hem along the bottom of the triangle of buffalo check fabric.
Trim dangling strings.
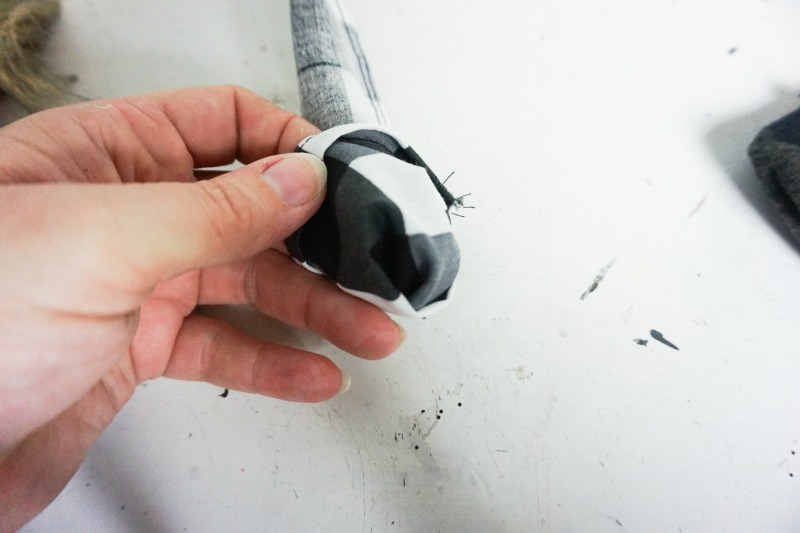
Fold the triangle longways, with the fabric face-to-face. Pin the unfolded side in place, and sew along this hemline.
Trim dangling strings.
Turn triangle hat right side out. Set aside.
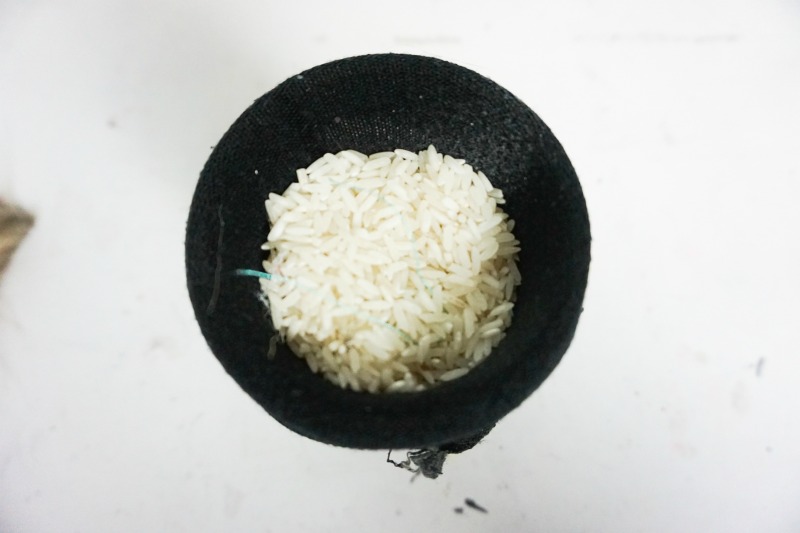
Cut the sock in half at the heel. Discard the top half.
Place the bottom half of the sock into the jar and pull the sides of the sock over the lip of the jar.
Fill the sock with the rice, then top with polyfill to the desired thickness of the gnome body.
Tie a knot at the top of the sock and hot glue it closed. You can also wrap a rubber band around the top of the sock, and feel free to hot glue that in place, too.
Hot glue the beard onto the top of the sock, just on the bottom edge of the knot.
Place a small amount of polyfill in the hat, just enough to create a head inside it, but not enough to stop the hat from flopping over in a cute way.
Tuck the hat over the beard and hot glue the back of the hat in place.
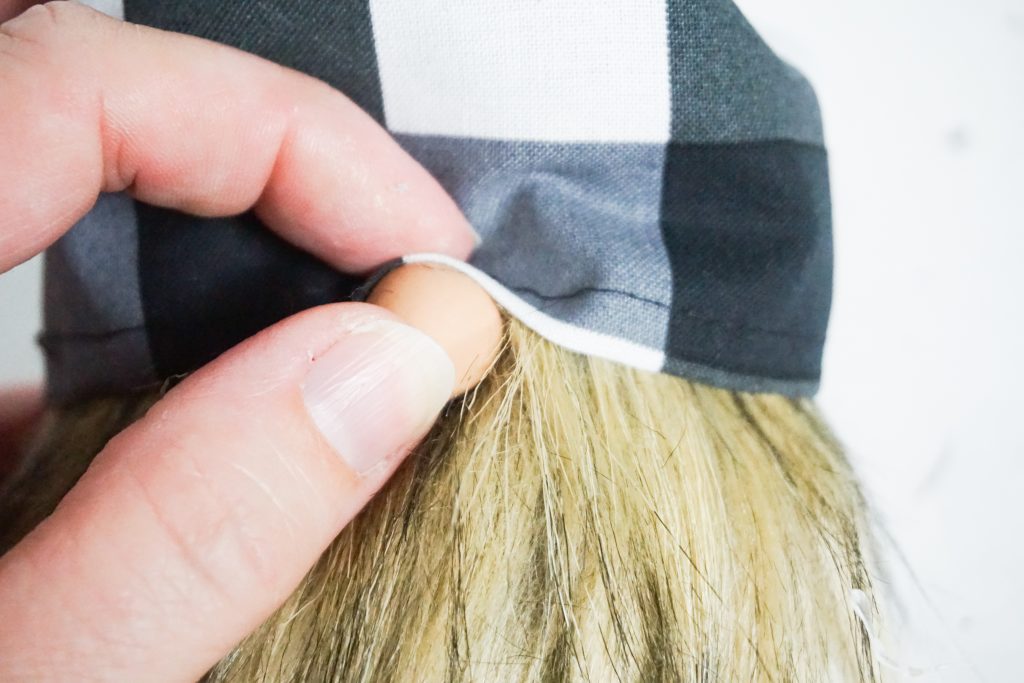
Hot glue the nose in place onto the beard and pull the hat over it to make a wrinkle, hot gluing that wrinkle in place.
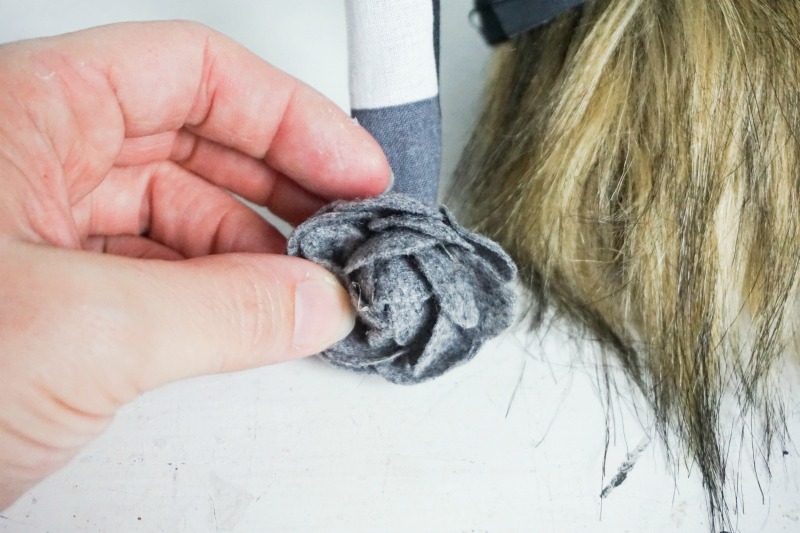
Affix the grey felt flower in place on the tip of the hat with hot glue.
Trim the beard with the scissors, being very careful to cut organically so that it looks neat, but not too neat.

More Fall DIY Projects You’ll Love
DIY Gnome

How cute is this easy DIY gnome?! I can't believe how fast it came together. Such a fun sock gnome and it's perfect perfect for fall!
Materials
- Black and White Buffalo Check Fabric
- Black Sock
- Black Thread
- Grey Felt Flower (I bought mine in the button section of the craft store)
- Wooden Bead, Wine Cork or Polymer Clay Ball for a Nose
- 1-2 cups Uncooked Rice
- Small Amount of Polyfill
- Brown Mongolian Fur
- Printable Pattern
Tools
- Hot Glue Gun & Glue
- Sewing Machine
- Scissors
- Mason Jar or Cup
- Exacto Knife
Instructions
- Using the printable pattern, cut out the half-moon shape from the backside of the Mongolian fur. Be very careful to use your Exacto knife and cut only the fabric, or you will cut the fur and be unhappy with the result. Set beard aside.
- Fold the buffalo check fabric in half and cut one triangle shape from the printable pattern out of the folded buffalo check fabric, with one long edge of the folded in the fabric along one long edge of the triangle shape.
- Open the buffalo check fabric and fold up the base of the triangle toward the wrong side of the fabric to create a hem. Pin this in place.
- Sew the hem along the bottom of the triangle of buffalo check fabric.
- Trim dangling strings.
- Fold the triangle longways, with the fabric face-to-face. Pin the unfolded side in place, and sew along this hemline.
- Trim dangling strings.
- Turn triangle hat right side out. Set aside.
- Cut the sock in half at the heel. Discard the top half.
- Place the bottom half of the sock into the jar and pull the sides of the sock over the lip of the jar.
- Fill the sock with the rice, then top with polyfill to the desired thickness of the gnome body.
- Tie a knot in the top of the sock and hot glue it closed.
- Hot glue the beard onto the top of the sock, just below the knot.
- Place a small amount of polyfill in the hat, just enough to create a head inside it, but not enough to stop the hat from flopping over in a cute way.
- Tuck the hat over the beard and hot glue the back of the hat in place.
- Hot glue the nose in place on the beard and pull the hat over it to make a wrinkle, hot gluing that wrinkle in place.
- Affix the grey felt flower in place on the tip of the hat with hot glue.
- Trim the beard with the scissors, being very careful to cut organically so that it looks neat, but not too neat.
- Enjoy!
Leave a Reply