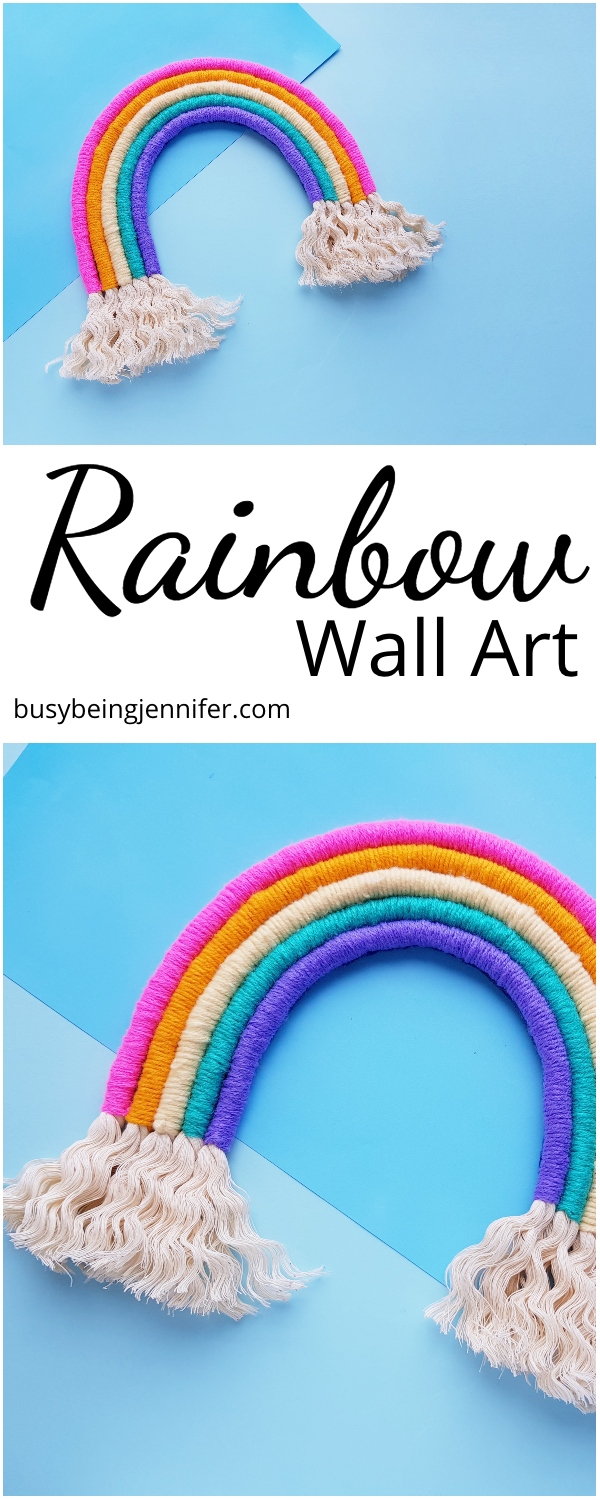
If you love rainbows and unicorns, this Easy DIY Rainbow Wall Art is the awesome piece of art you need to add to your home decor. It’s so fun, and so much more personal than art prints.
I am so tickled to put this on my gallery wall and really perk-up a blank canvas of just plain wall.
Perfect for kid room art, nursery or a little something in your entryway, this DIY wall art is amazingly cute–and incredibly simple.
No popsicle sticks, no string art. Just a simple, fun rainbow craft with the perfect rainbow colored curves that are perfect for a wall’s decorative splash of color. It’s seriously a happy day when I see this cute rainbow wall hanging.
So, let’s get your supplies together and make this easy DIY wall art idea!
Easy DIY Rainbow Wall Art
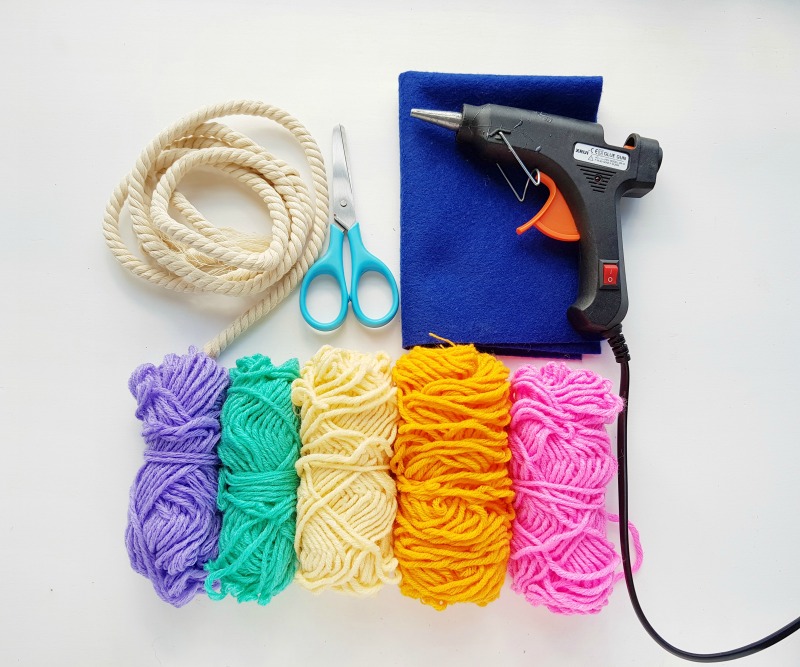
- Natural twisted cotton rope
- Colorful yarns
- Sharp scissors
- Hot glue gun
- Felt
- Needle
How Do You Make Rainbow Wall Art?
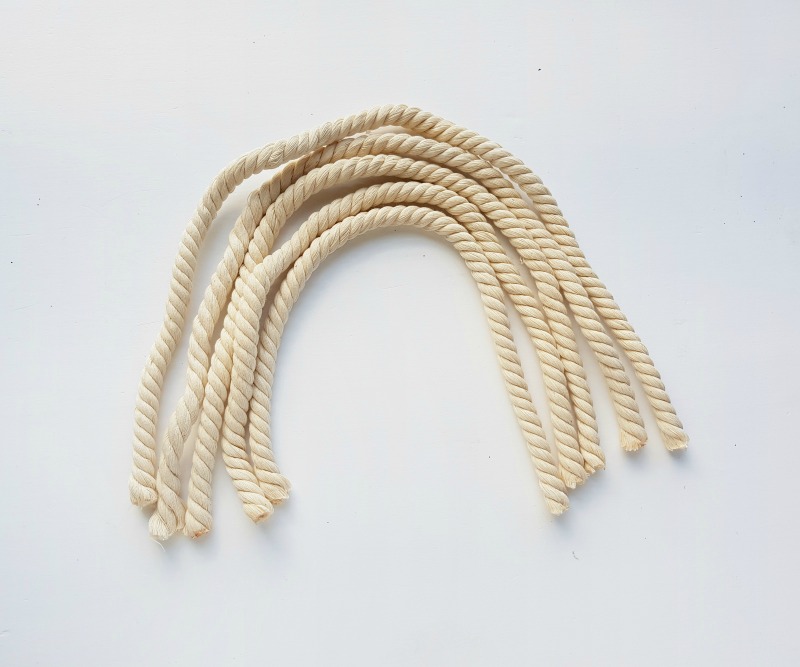
Grab the rope bundle and prepare the strands by cutting the smallest one first. Decide the length you want for the smallest curve of the rainbow and add, 4 inches extra to it, and then cut the rope (I like to cover the end of my rope ball with washi tape so that it doesn’t unravel while it’s in storage, just a fun fact.)
Lay the rope on a flat surface by forming a ‘U’ shape. Now hold the open end of the bundle adjacent to anyone open end of the ‘U’ shaped rope and bring it all the way to the other end of it.
Match the ends of both ropes and cut the rope. Similarly cut the other strands.
Cut as many strands as you want. Each strand is for each color.
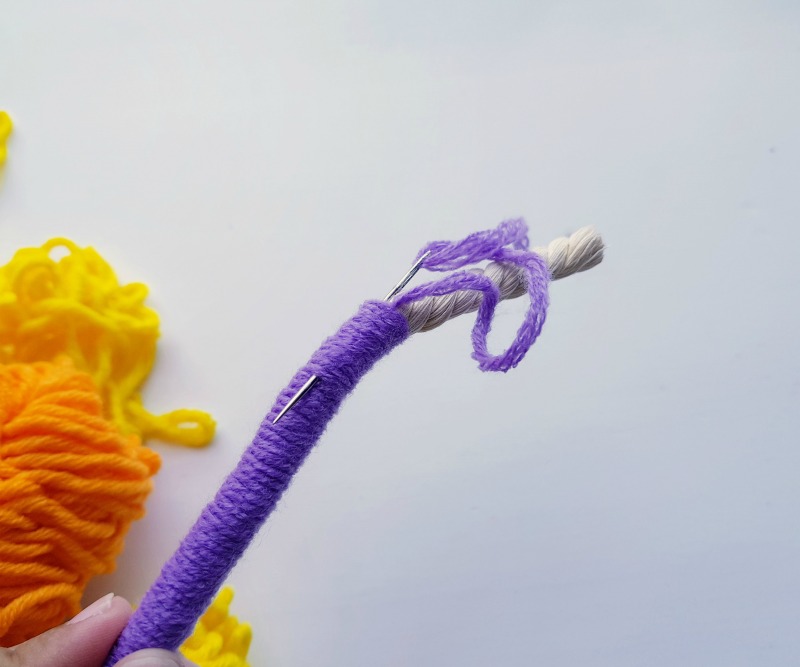
I’m starting from the smallest rope strand. Select yarn and tie a tight knot with it around the rope by leaving 2 inches from any one open end.
Neatly wrap the yarn around the rope and try not to leave any gap between the wrappings.

Continue to wrap until reaching 2 inches away from the other open end of the rope. You can simply tie another tight knot or you can use a needle to make a neat ending for the yarn wrapping.
Cut off yarn from the bundle by keeping 3 inches extra.
Insert a needle through the open end of the yarn.
Draw the needle through the rope, adjacent to the last wrapping. Pull out the needle along with the yarn.
Now draw the needle through the wrapped yarn. Pull the needle out and cut off the extra yarn.
Similarly, prepare the other rope strands. Select the colors of your choice and get going.
Grab a piece of felt and prepare the hot glue gun.
Attach the smallest rope on the felt by keeping the intact ends outside the felt fabric.
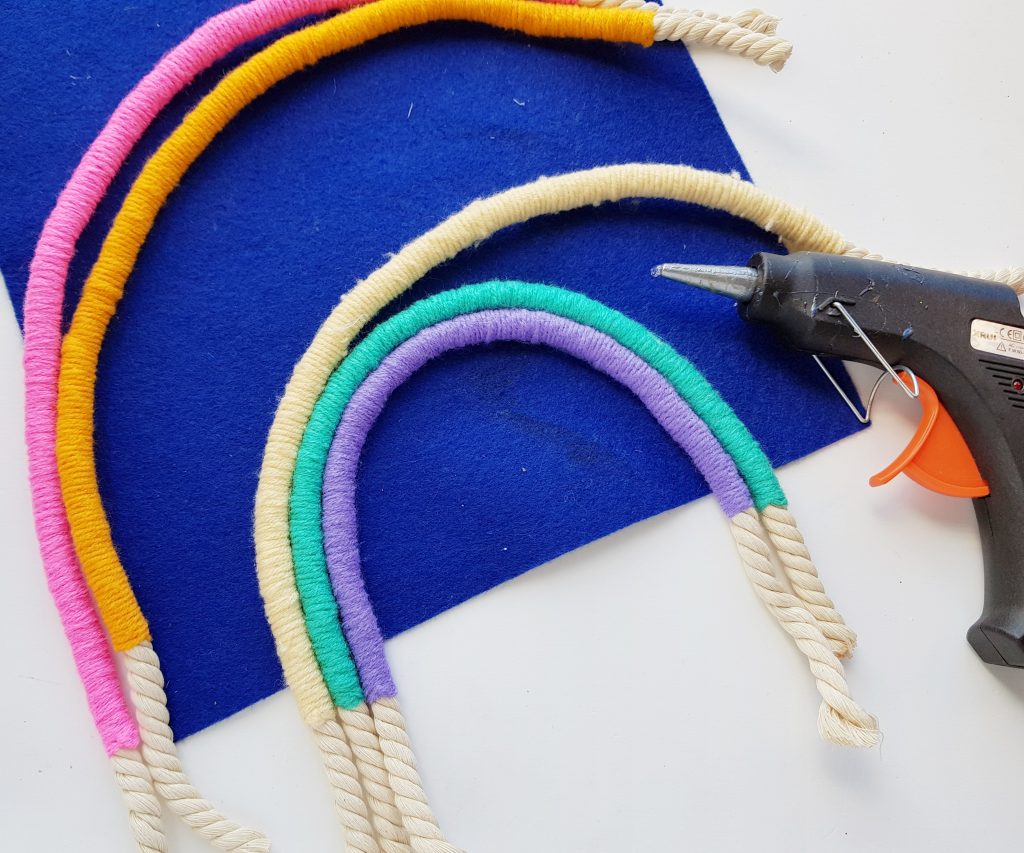
One by one attach all the wrapped rope strands.
Use a sharp pair of scissors to cut the felt along the outer border of the glued ropes.
Here’s a picture of the backside of the rope rainbow.
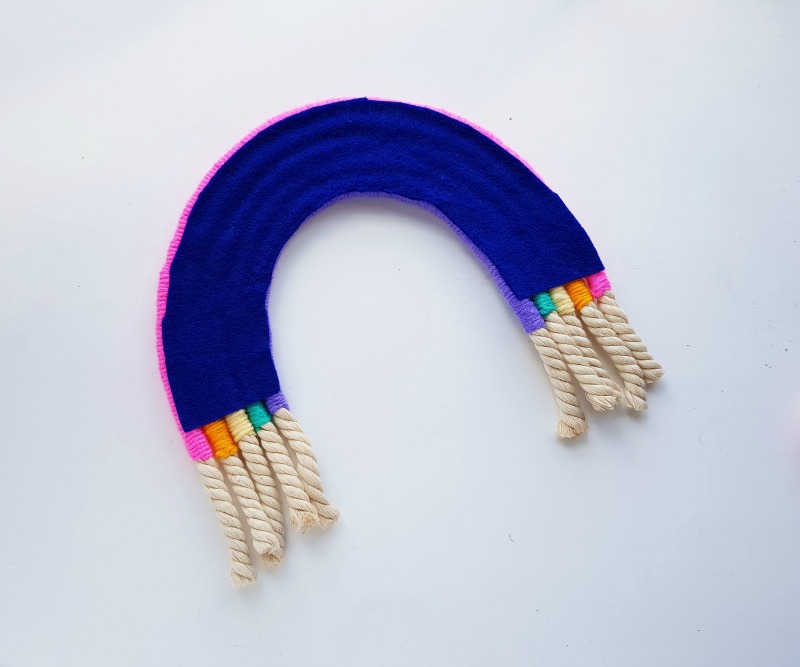
Now un-twist the open ends of the cotton rope.
Attach a hanging mechanism on the backside of the rainbow and hang it on a wall.
This is the perfect accompaniment for a unicorn wall decal or a whole canvas wall dedicated to every color of the rainbow!

More Fun Rainbow Wall Art Ideas You’ll Love
If you’re looking for more fun rainbow-themed wall art, don’t worry, I have so many ideas, you’ll never run out of fun crafts. Conveniently for you, I’ve pulled them all together here!
- The Coolest Gifts for Anyone Who Loves Rainbows
- Free Printable Rainbow Wall Art
- Rainbow Tote DIY Project
Rainbow Wall Art

How fun is this easy rainbow wall art made from rope?! It's a simple project that comes together fast, and is perfect for a kid's room or nursery!
Materials
- Natural twisted cotton rope
- Colorful yarns
- Sharp scissors
- Felt
Tools
- Hot glue gun
- Glue sticks
- Needle
- Scissors
Instructions
- Grab the rope bundle and prepare the strands by cutting the smallest one first.
- Decide the length you want for the smallest curve of the rainbow and add 4 inches extra to it, and then cut the rope.
- Lay the rope on a flat surface by forming a ‘U’ shape.
- Now hold the open end of the bundle adjacent to anyone open end of the ‘U’ shaped rope and bring it all the way to the other end of it.
- Match the ends of both ropes and cut the rope. Similarly cut the other strands. Cut as many strands as you want. Each strand is for each color.
- I’m starting from the smallest rope strand. Select yarn and tie a tight knot with it around the rope by leaving 2 inches from any open end.
- Neatly wrap the yarn around the rope and try not to leave any gap between the wrappings.
- Continue to wrap until reaching 2 inches away from the other open end of the rope. You can simply tie another tight knot or you can use a needle to make a neat ending for the yarn wrapping.
- Cut off yarn from the bundle by keeping 3 inches extra.
- Insert a needle through the open end of the yarn.
- Draw the needle through the rope, adjacent to the last wrapping. Pull out the needle along with the yarn.
- Now draw the needle through the wrapped yarn. Pull the needle out and cut off the extra yarn.
- Similarly, prepare the other rope strands. Select the colors of your choice and get going.
- Grab a piece of felt and prepare the hot glue gun. Attach the smallest rope on the felt by keeping the intact ends outside the felt fabric.
- One by one attach all the wrapped rope strands.
- Use a sharp pair of scissors to cut the felt along the outer border of the glued ropes.
- Here’s a picture of the backside of the rope rainbow.
- Now un-twist the open ends of the cotton rope. Attach a hanging mechanism on the backside of the rainbow and hang it on a wall.
Thanks for sharing!!