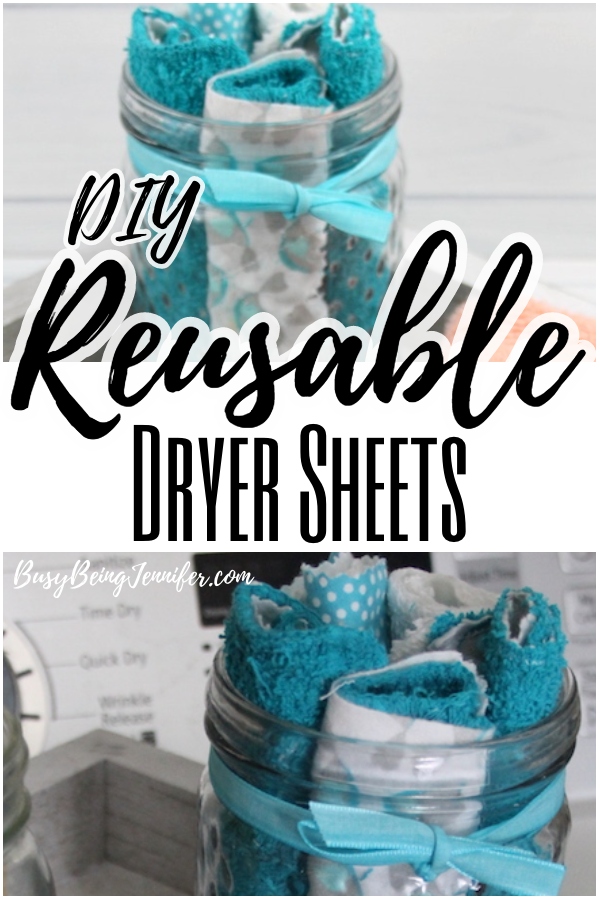
This easy tutorial for how to make reusable dryer sheets is so simple. And, it’s insanely better for the environment and my wallet. You’ve got to love an easy DIY project that will, ultimately, save you money, stress and trees.
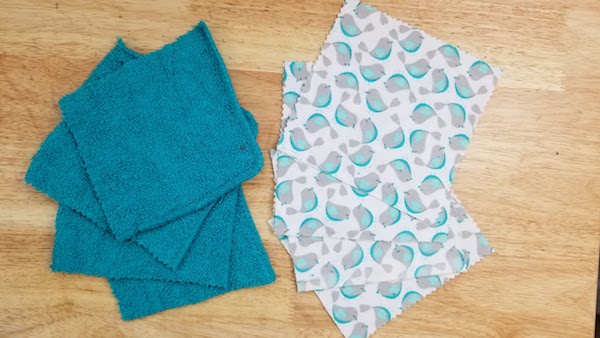
Plus, this is an awesome project for using up quilting scraps and old towels–I’m so lucky my DIY reusable dryer sheets could be made in coordinated colors, but because these are just getting tossed in the in your dryer? They can be as pretty or as ugly as you’d like! Ha!
That’s seriously one of the most awesome things about this project. I mean, aside from having the option to use any essential oil you like, aside from being all sorts of environmental-friendly, these DIY dryer sheets are one of the most aestethicgally pleasing (or not–totally up to you, again) homemade laundry tool ever.
Plus, they tend to smell a lot better than those weird wool dryer balls everyone is using.
I mean, I love a good felt ball, but after they’ve been in the dryer a few dozen times, that smell is a little worrisome–clearly they need a little more care than some simple air dry time.
Ok. So, if you’re ready to make a change in your laundry room and get rid of that little box of weird, waxy store bought dryer sheets, grab your scrap fabric bin and let’s make!
What You Need to Make Reusable Dryer Sheets
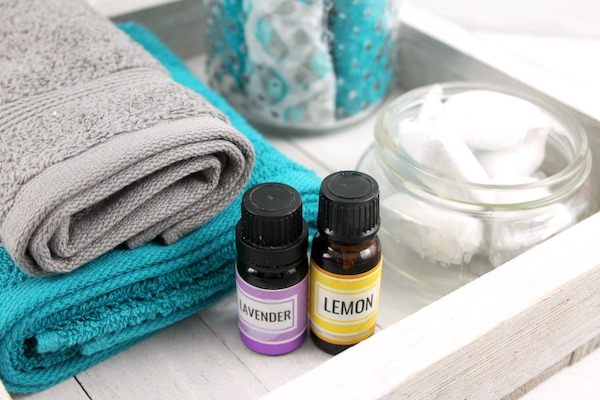
- 1/2 yard each of two complimentary colored/patterned fabrics. I used flannel because I feel it absorbs better, but you can use any light-medium weight fabric.
- 8-12 washcloths. We bought an inexpensive package at a local retailer for about $5 for 10
- Scissors (I prefer pinking shears )
- All-purpose thread
- Sewing pins
- Sewing machine
- Essential oils (I use young living)
- 1 cup water
- 1 cup white vinegar
- 1-2 drops vegetable glycerin (optional)
- Container with a lid

How to Make Reusable Dryer Sheets
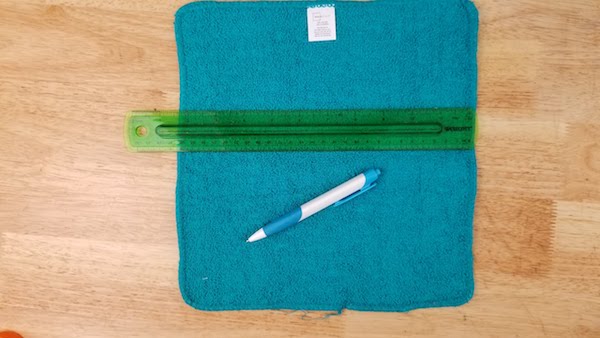
Measure, mark and cut washcloth in half.
Measure, mark and cut as many pieces of fabric as you have half pieces of washcloths.
Pin with wrong side of fabric to wrong side of washcloth.
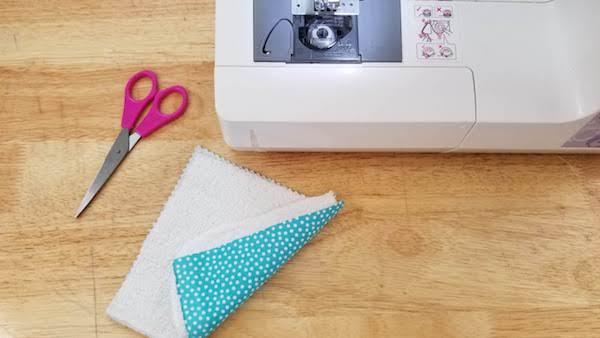
Sew all four sides about a 1/4 – 2/3” from edge.
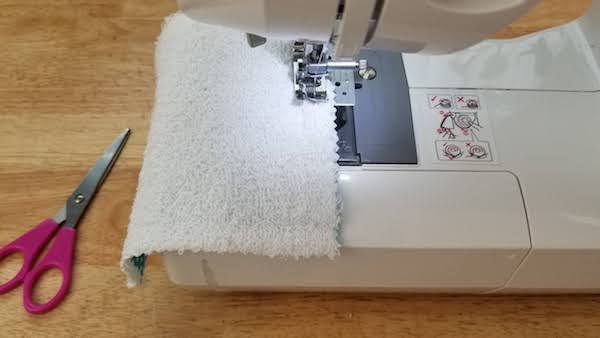
Sew a line down the middle, turn and sew another to form a “+”. You can also sew from corner to corner, forming an “X”. This keeps the dryer sheets from “ballooning” in the dryer. Repeat until all pieces are sewn together.

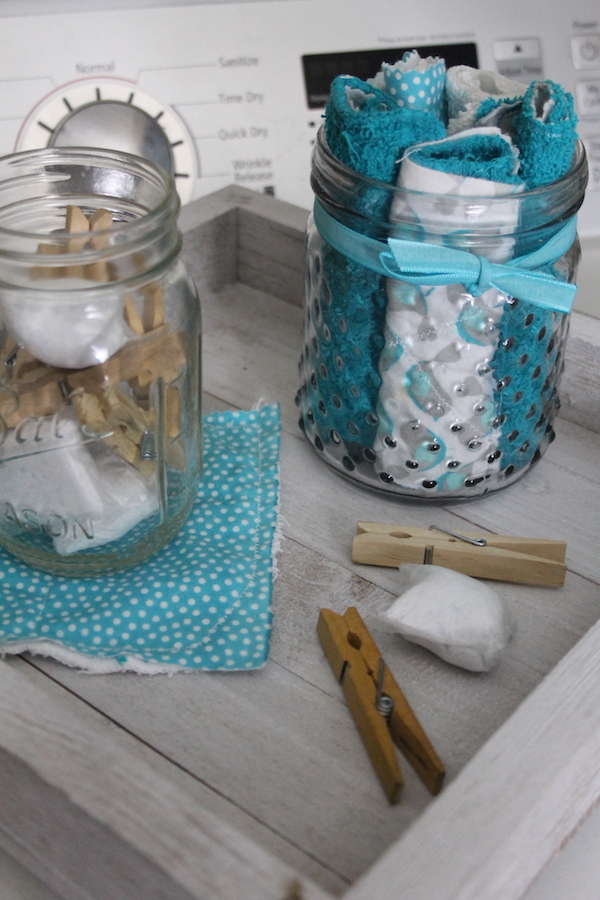
In your container, add water, vinegar and essential oils. Add dryer sheets and shake a little to make sure they all get evenly coated with your homemade fabric softener and water.
Alternatively, you can make a spray bottle of this same homemade liquid fabric softener to spray on your homemade dryer sheets, but I’m too rushed for all that most days.
When you’re ready to use your DIY dryer sheets, slightly wring one of your homemade dryer sheets out to get ridge of the excess liquid and throw them in the dryer with your clothes.
You can expect this to help reduce static cling (I mean, static free clothes are seriously a priority for me) and smell so much more yummy than those weird store bought ones.
Isn’t this just the most practical idea for a housewarming gift–or just a gift for yourself?! It’s so easy to whip up too! I might make a second set just so I have a backup…
Pin this easy DIY idea for later!
More DIY Crafts You’ll Love:
- Rolled Fabric Rose Farmhouse Wreath
- DIY Laundry Detergent (super budget-friendly!)
- How to Make an Interchangeable HOME Sign
I will have to make some dryer sheets. And I thought the get organized was how to organize my craft room. Maybe you could do one on the best placement for all the different circut machines. The maker, the joy,cuddle bug. The older machine before the circut maker. Should they all be near each other. Or should some be on a shelf until you need it with the circuit maker always on the table ready to go. Rubber stamps, paper organizing best way to do that. With your experience I thought you may have a layout plan. Plus. Tools for circuit, tools for. Handwork, computor or IPad set up. Light box, all the things used for crafting. I have different items , glitter, embossing powder, die cuts. And I have set it up since I was given the maker for Christmas the year it came out. As I have sever pain and to hard to try things in different places. Rather would like to draw up floor plan for the things Togo so I only have to move them once.
This is a Great idea! I used wool dryer balls and have tried adding drops of essential oils to the balls and then squishing them together to absorb the oils. However, they’ve left oil stains on my clothes a few times. So I started adding a few drops of oil in the detergent drawer in the washer. Your dryers cloths sound like the perfect option. Thank you!