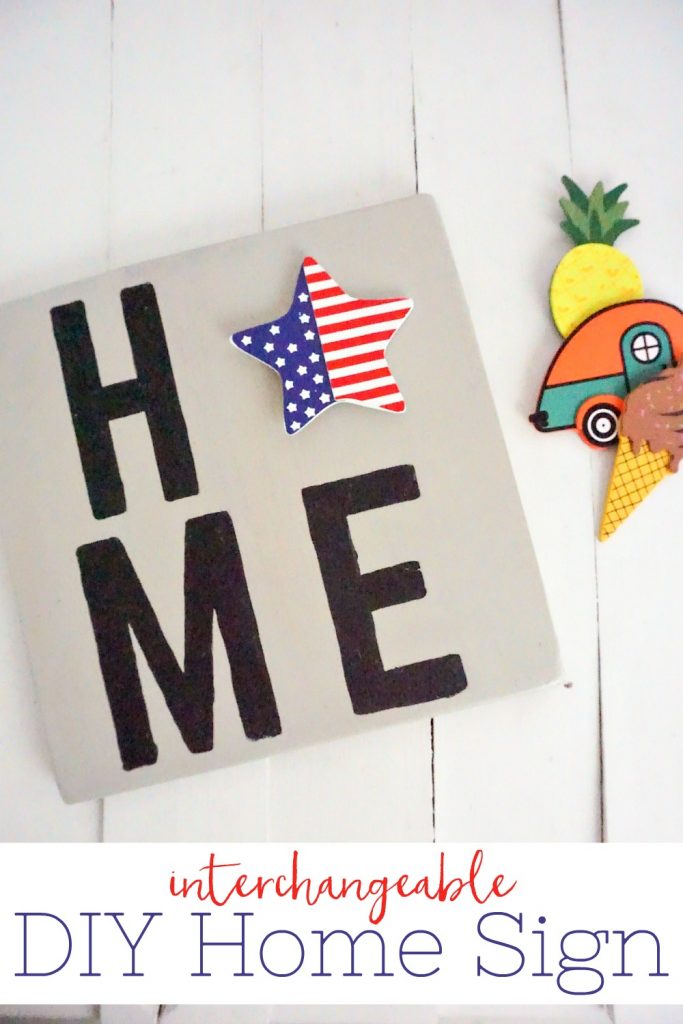
Add a little fun to all your celebrations with this interchangeable DIY home sign! Read on for the full tutorial.
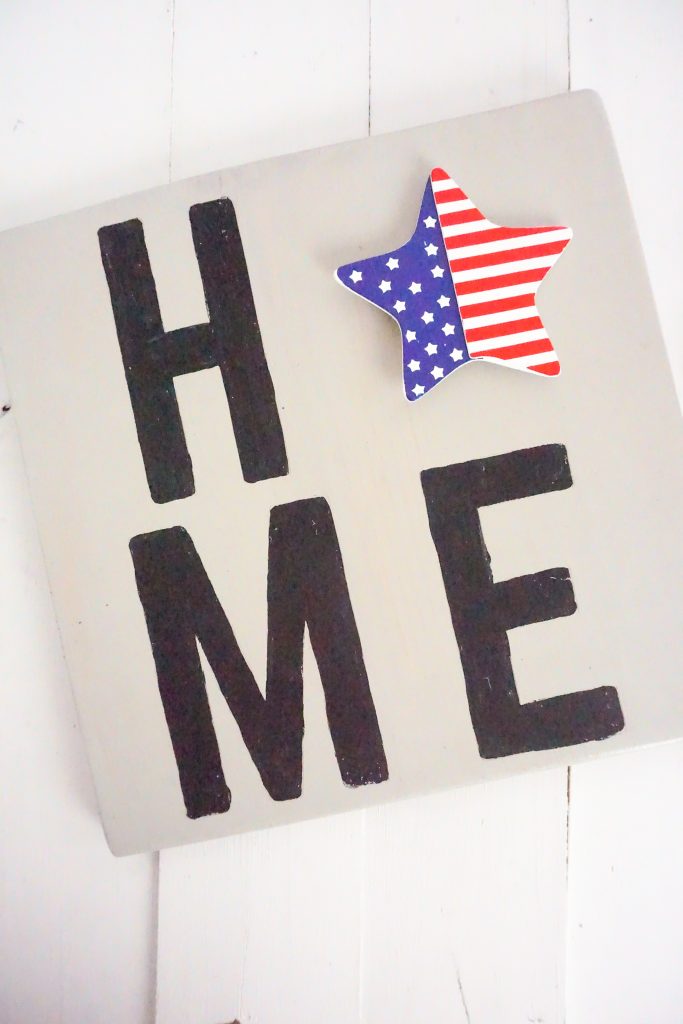
With the random home renovations projects we have in various stages around here, there is not shortage of scrap wood! Perfect for getting a little crafty with on a weekend! This DIY Home Sign is perfect for celebrating any occasion, especially in the summer!
To make your own DIY home sign, no fancy machines or tools are required.
Supplies:
- Scrap Wood Approximately 11-inches by 11-inches
- Grey Wood Stain
- Black Craft Paint
- Wipe-on Polyurethane to Seal (optional)
- Mounting Tape (to affix to the wall)
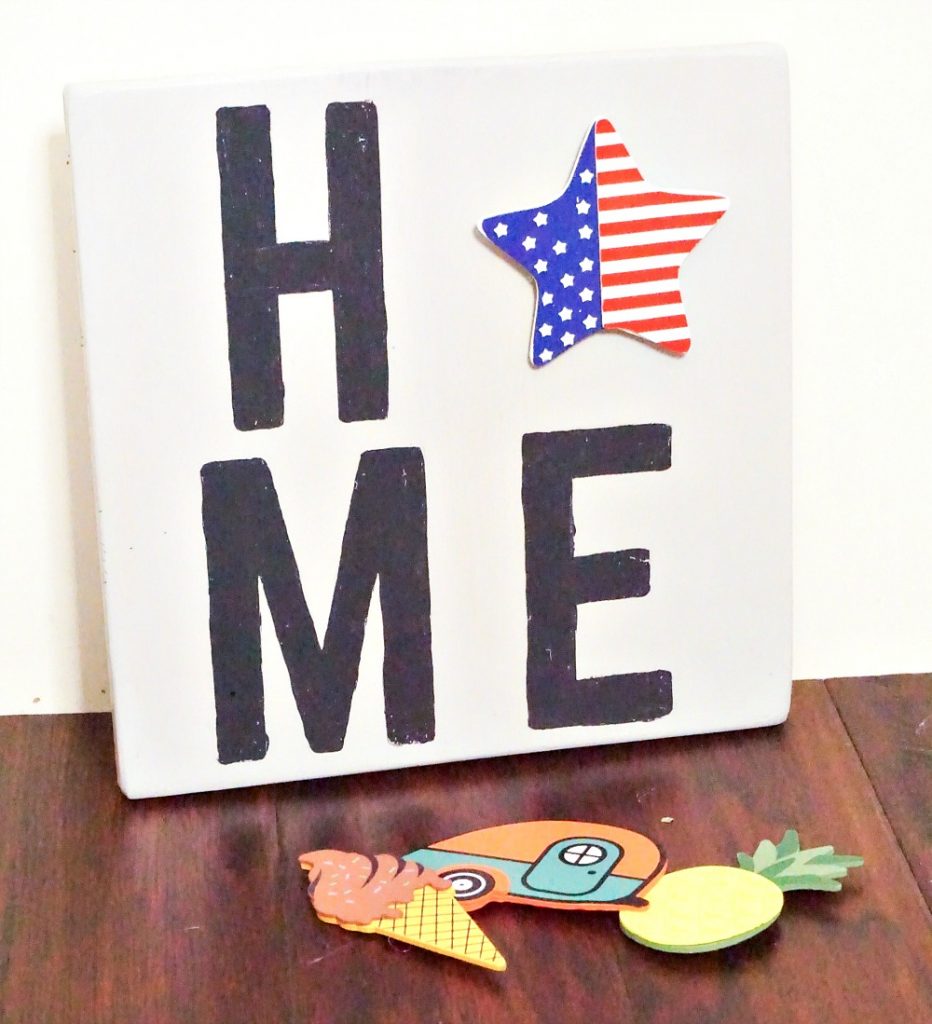
- Four “Summer” Wood Shapes (found at my local craft store)
- Velcro
Tools:
- Printer, ink and paper
- Design Template Download
- Sand Paper
- Pencil
- Paintbrush
- Exacto Knife
- Painter’s Tape
Instructions:
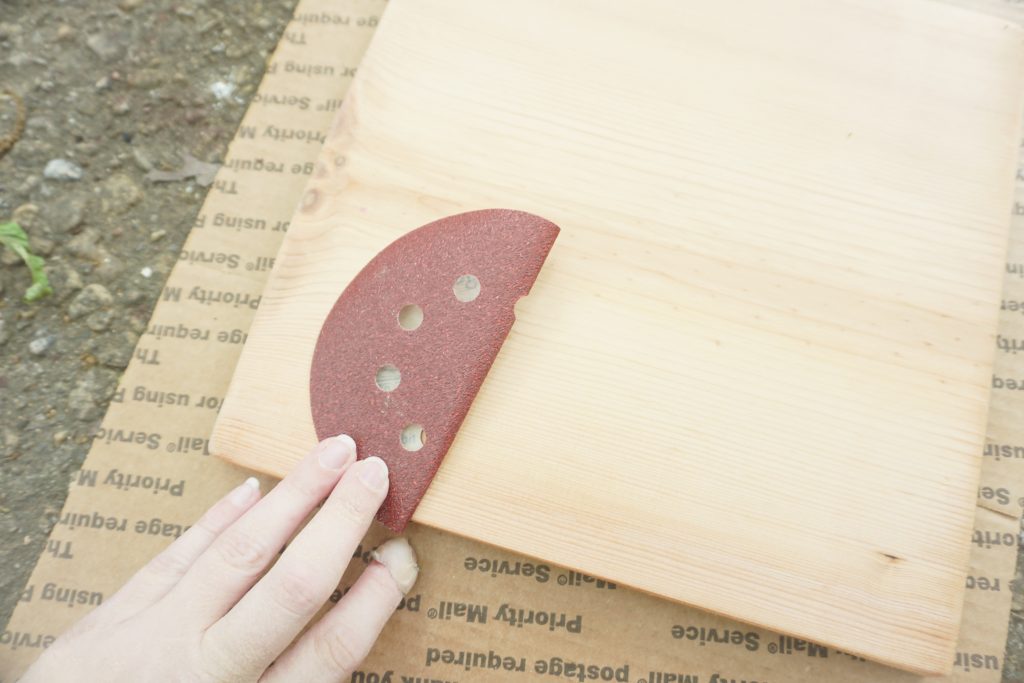
Step 1: To make the sign, start by lightly sanding the scrap wood.
Step 2: Paint sides and front with the grey wood stain.
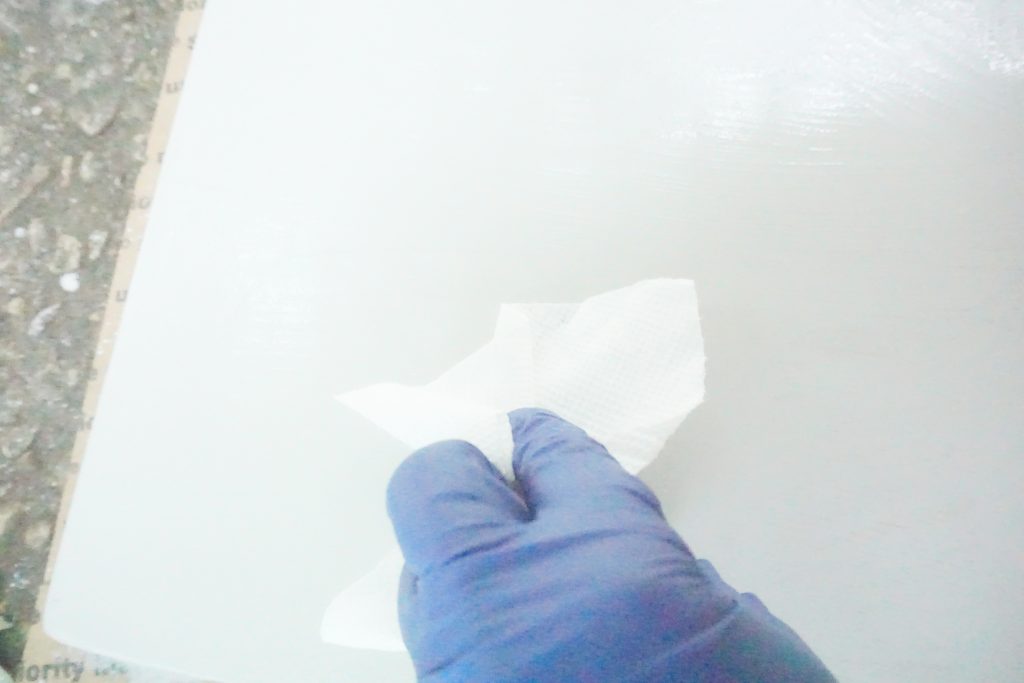
Step 3: Immediately wipe as much of the wood stain off to get the desired finish.
Step 4: Allow to dry fully.
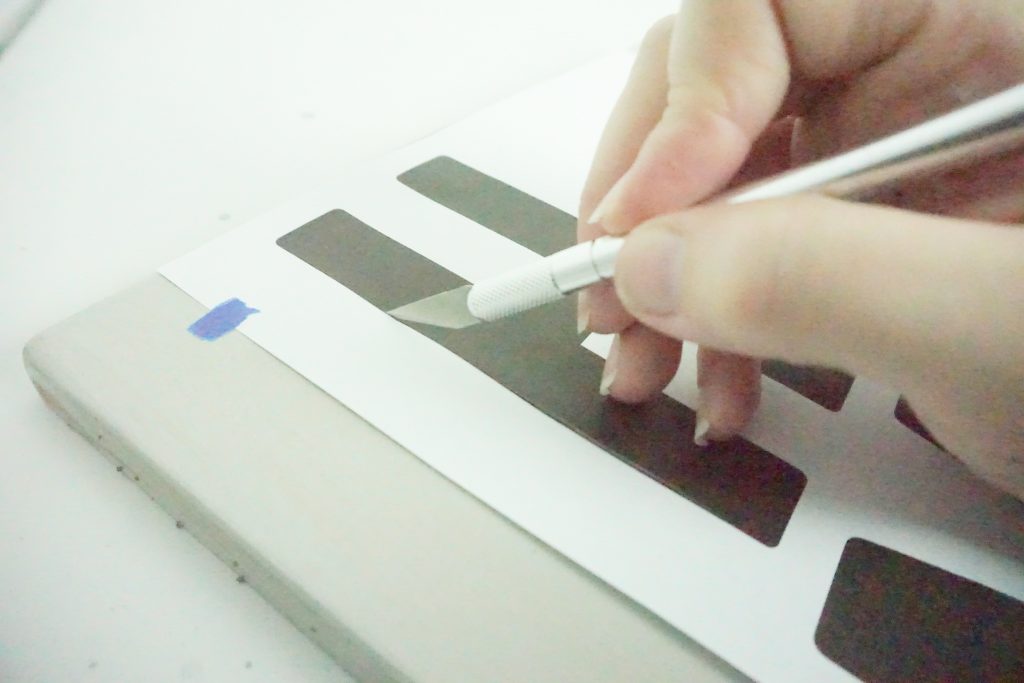
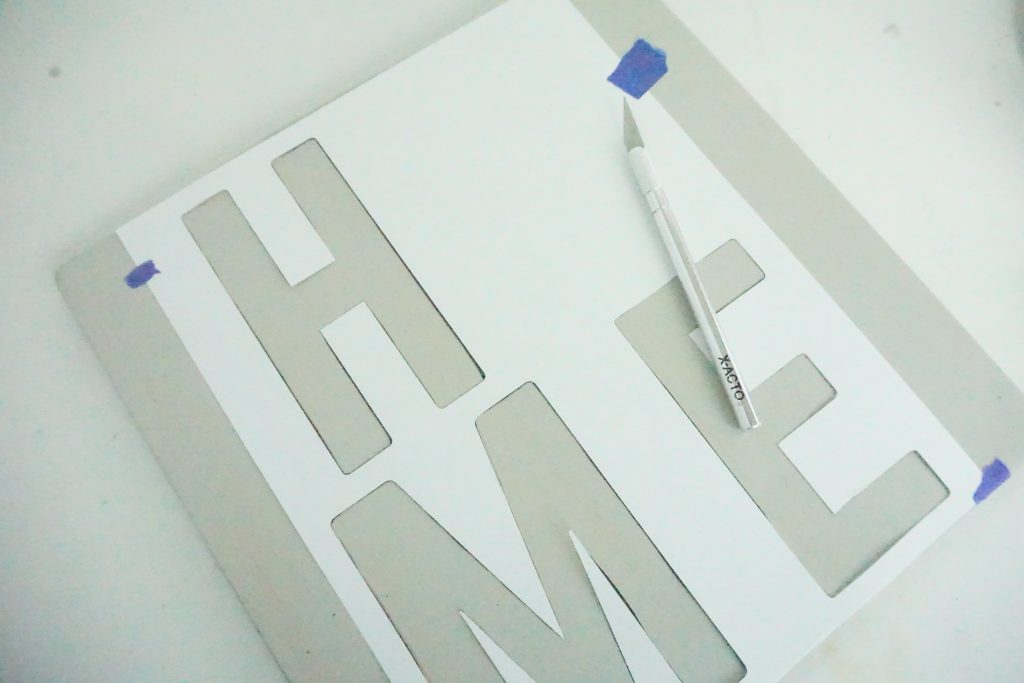
Step 5: Using the exacto knife, cut out the “H,” “M” and “E” from the printable template.
Step 6: Tape this template in place on the wood with the painter’s tape.
Step 7: With the pencil, trace the outlines of the “H,” “M” and “E” onto the wood.
Step 8: Remove the template from the wood.
Step 9: Paint the “H,” “M” and “E” with the black craft paint.
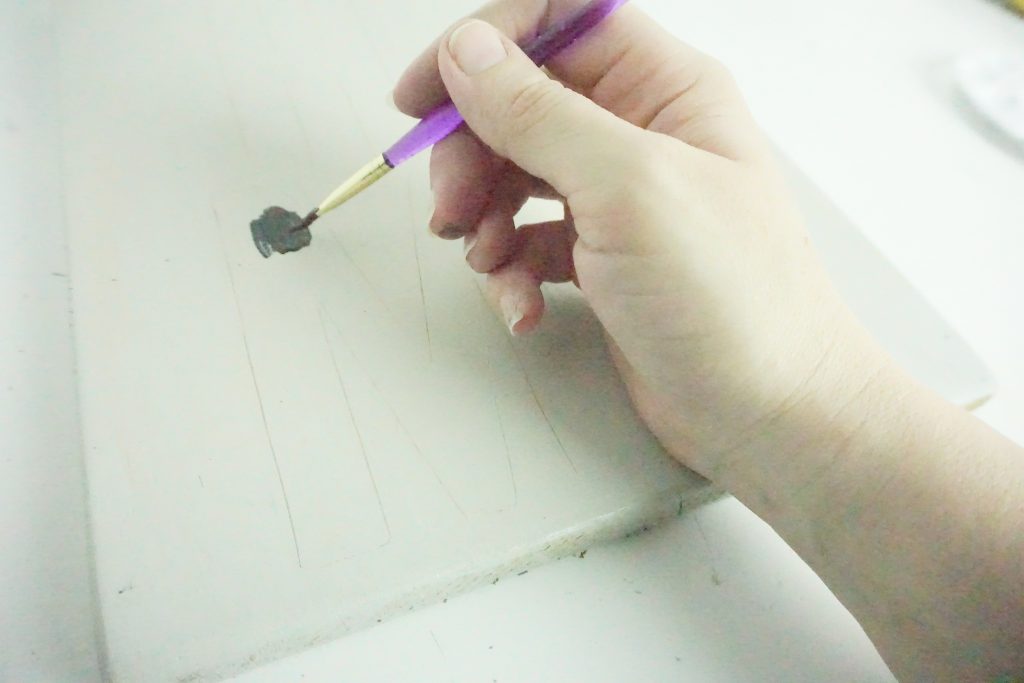
Step 10: Allow paint to dry.
Step 11: Seal with wipe-on polyurethane, if desired.
Step 12: Glue a piece of the soft-side velcro to the back of each of the wood summer shapes, in the center.
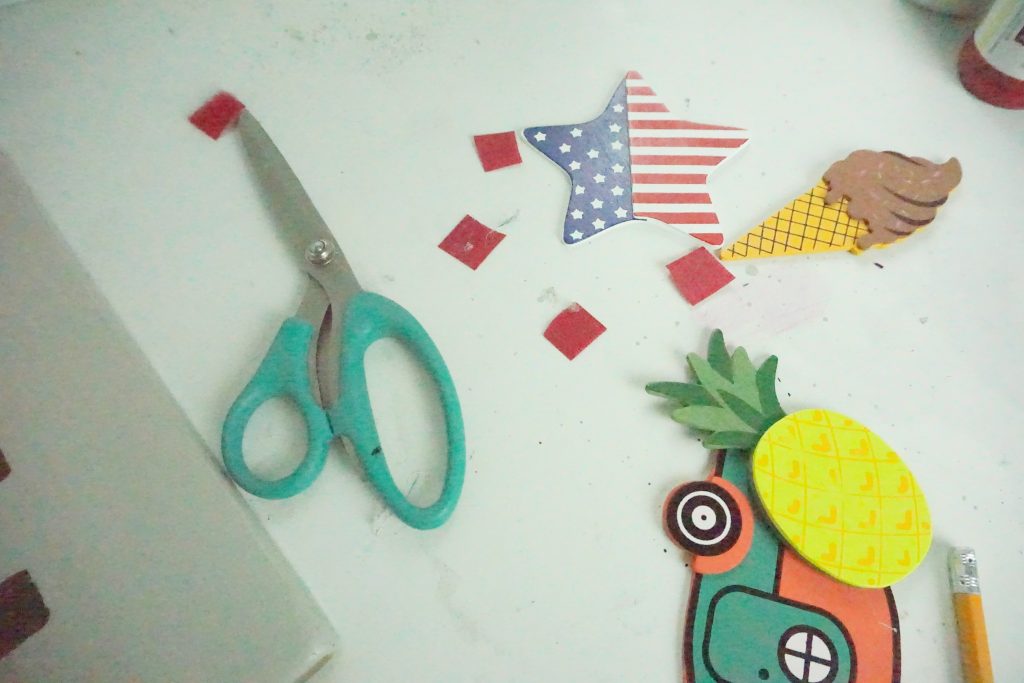
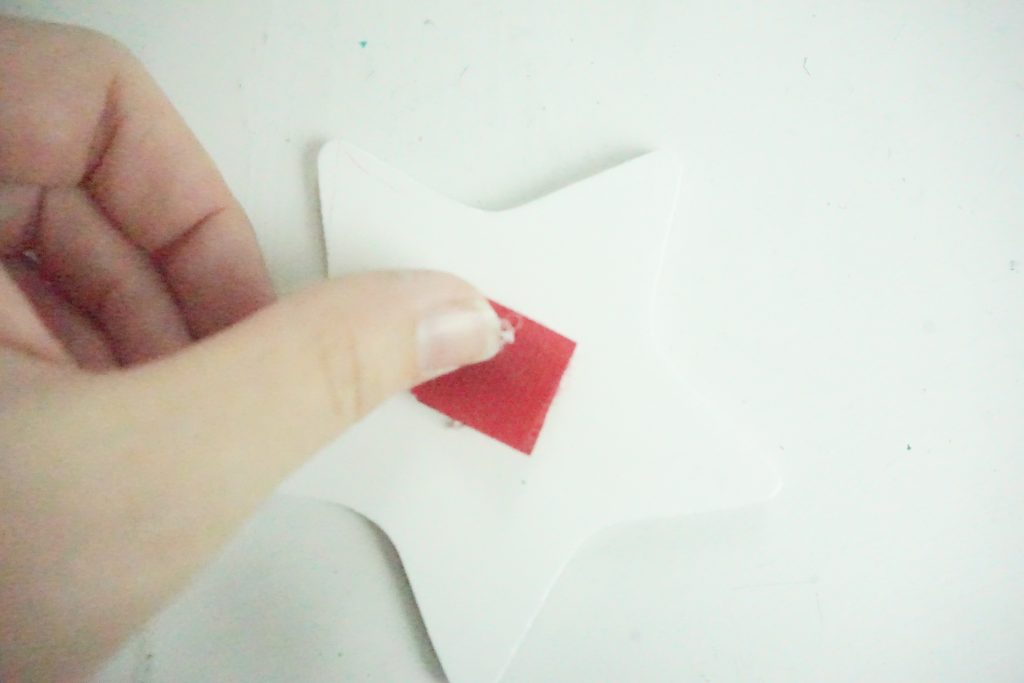
Step 13: Glue a piece of the spiky/sharp side velcro to the center of the space where the “O” would be in “HOME” on the sign.
Step 14: Place mounting tape in each of the top corners on the back of the sign.
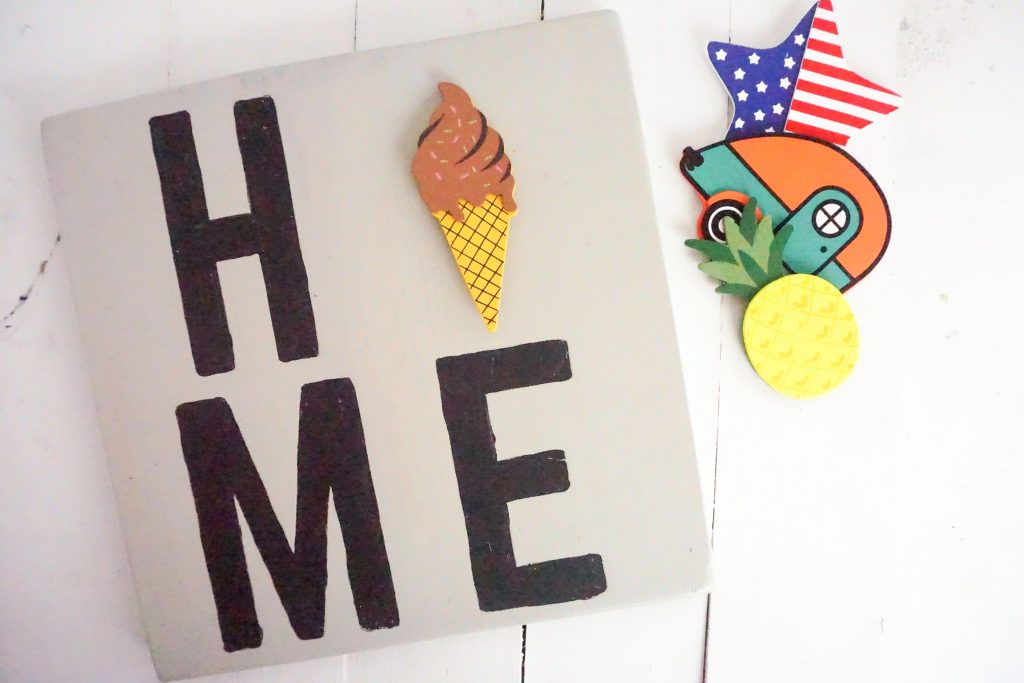
Now you can mount your completed DIY Home Sign to a wall, door, or prop it up on your mantle! The handy and adorable festive shapes can be swapped out for each month or celebration! I’m definitely going to be on the hunt for some holiday shapes for later this year
Isn’t this such a fun project? It’s an easy craft project that will add some fun and charm to your home decor each season!
Pin for Later:
Need more DIY Sign ideas fro your home? Check out this Fall Sign and this Established Sign!
I like this idea. I recently started crafting with wood too as we are re-purposing pallets into home decor for our house. Thanks for sharing your idea with us at #OMGHWW.
Very cute! I need to get back to crafting now that my kids are about to start school again!
A very nice idea , seems doable too. Thanks for sharing in The Bloggers Pit Stop!
Pit Stop Crew