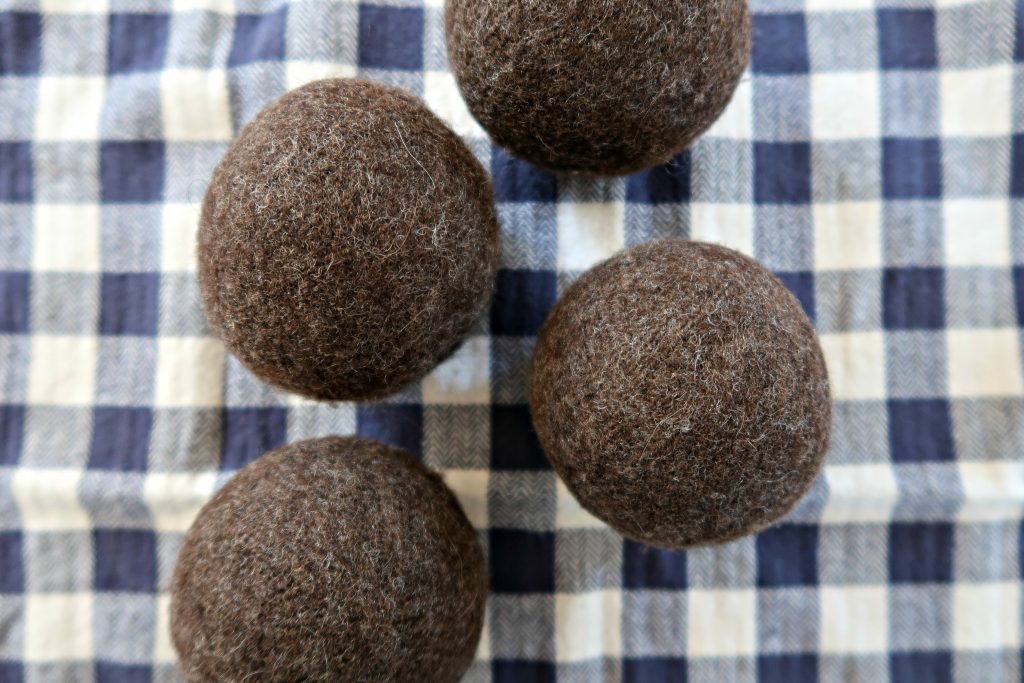
Working towards reducing chemicals in your home? These easy DIY wool dryer balls are an awesome way to reduce chemicals when you do your laundry!

These easy DIY wool dryer balls are fabulous! Put a bunch of these wooly wonders in your dryer and reap all the benefits–without the use of fabric softeners. Wool dryer balls will take the static out of your clothes, taking the place of dryer sheets, and decrease the time it takes for your laundry to dry.
If you like for your laundry to be scented you can put a few drops of your favorite essential oil right on the ball and toss it in with your drying clothes.
Wool dryer balls can cost you up to $10 each. If that’s more than you’re willing to spend then you can easily make your own for around $2.50 a piece using these simple instructions for easy DIY wool dryer balls.
I think it’s worth noting, though, if you’re allergic to wool this is probably not going to work for you, so you might alpaca (which works great and acts just like wool) or even cotton yarn (although the felting process won’t produce the same result as with wool or even alpaca yarn). You just need a ball that is hefty and able to break up lumps in your load of laundry–they can even be plastic, as long as they’re dryer-safe.
A lot of people prefer to use natural fibers instead of synthetic, but if you have allergies, you have allergies…so make it work for you. Heck, you can even use tennis balls to reduce static in each dryer load, if you’re just in that kind of spot.
Let’s get on to making our felted balls though.
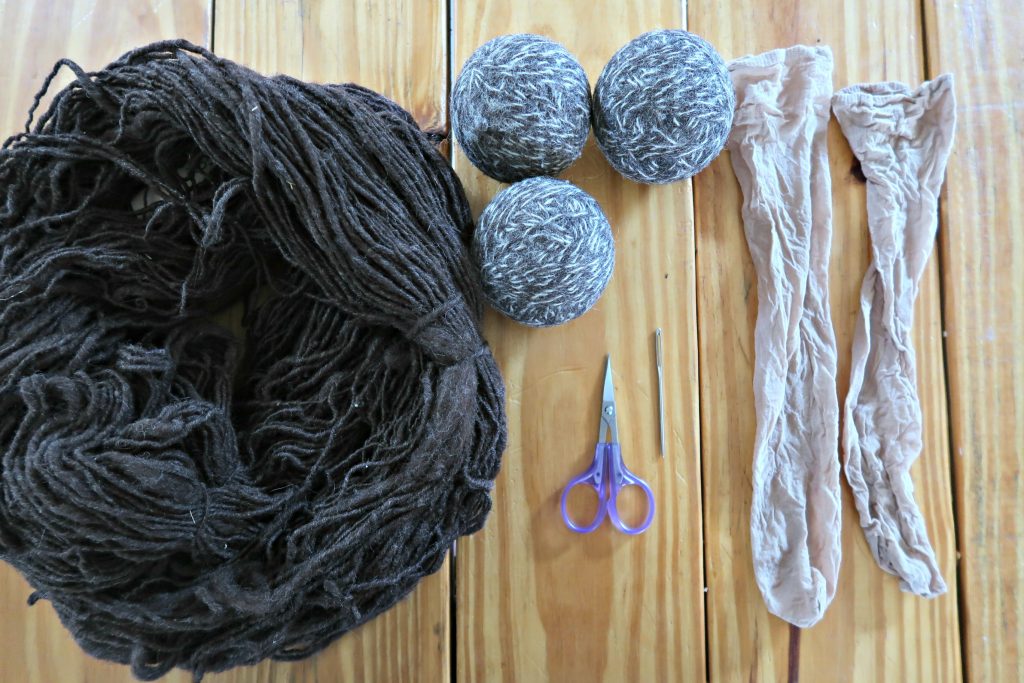
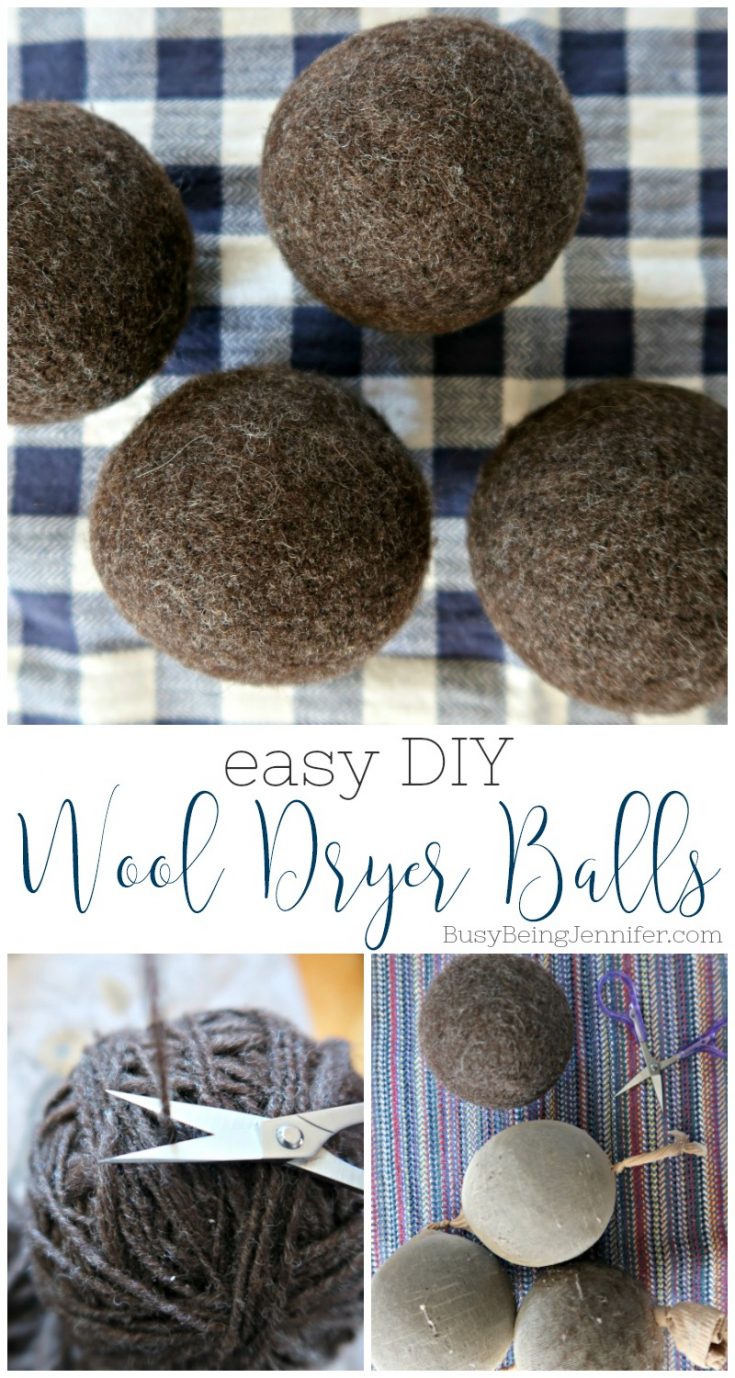
What You Need to MakeEasy DIY Wool Dryer Balls
(affiliate links below)
- 100% Wool Yarn
- Scissors
- Yarn Needle
- Nylon Stockings
- Washing Machine
- Laundry Soap
How to Make Easy DIY Wool Dryer Balls
Step 1
Loosely wrap the yarn into large balls. It is very important to wind the balls loosely because that allows the fibers to felt more easily in the fourth step. The exact size of the ball is not important but you want to err on the large size because small wool balls can get lost in laundry much more easily than larger ones.

Step 2
Once your yarn ball has reached a proper size, cut the yarn leaving a tail that is a few inches long. Thread that tail onto your yarn needle (or you can even use a crochet hook if you want) and weave the tail back through the ball several times to lock the end in place. Cut any remaining tail yarn flush with the ball.
Step 3
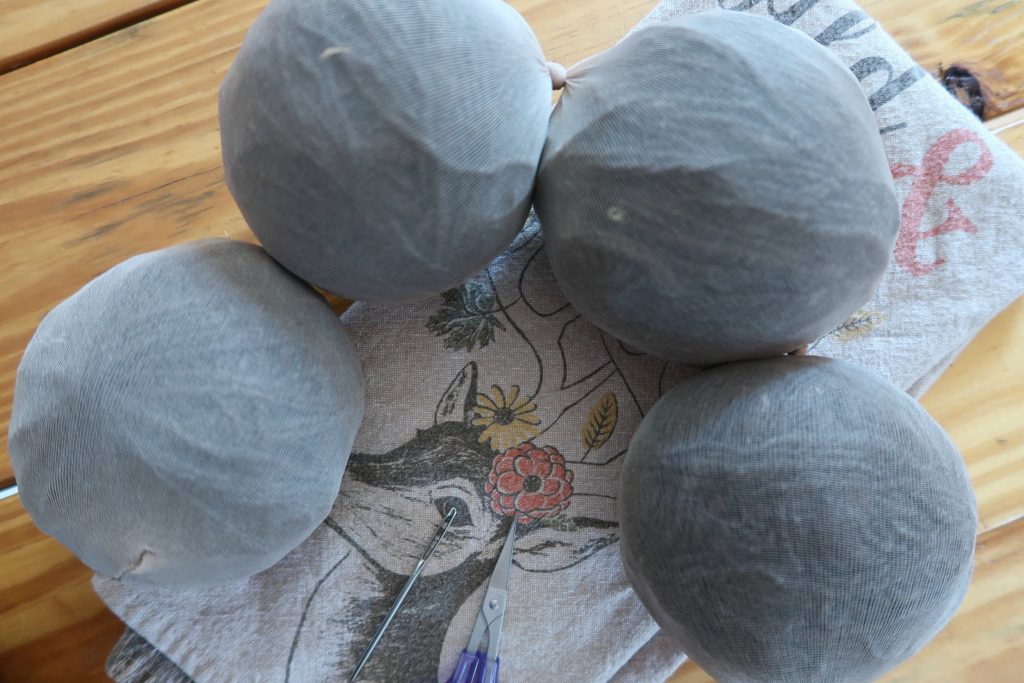
Slide the yarn ball all the way to the toe of the nylon stocking. Knot the stocking so that the first yarn ball is completely surrounded by stocking. Slide the next yarn ball in as far as it will go and tie another knot. Continue in this fashion until all yarn balls are in stocking cocoons.
Step 4
Hot wash the worm of wool balls in very hot wash cycle with your regular laundry soap. You can wash the balls with your regular laundry so you’re not wasting water or electricity. Send the balls through several wash and dry cycles with your regular laundry for best results. The hot water and the soap will cause the wool to felt onto itself meaning that the yarn ball will not unravel.
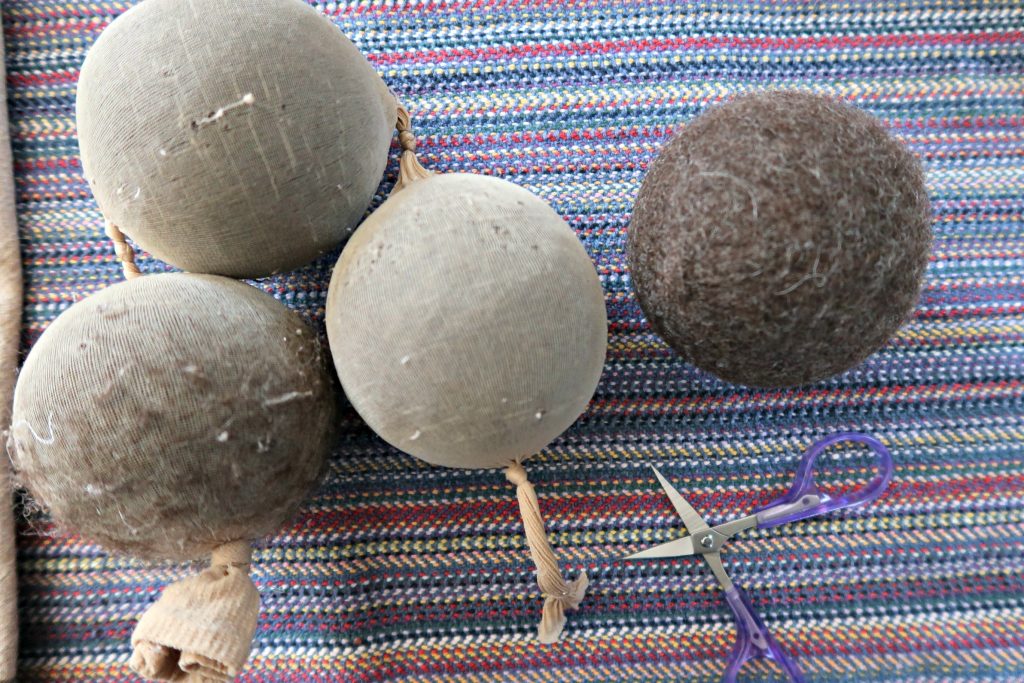
Cut the stocking away from the balls. If the wool doesn’t look completely felted simply tie the balls back into another stocking as in step 3 and repeat step 4. Once the wool balls are completely felted you can start using them in your dryer.
I love using my Easy DIY Wool Dryer Balls! I add a few drops of lavender or lemon and our laundry comes out of the dryer smelling amazing!!
Easy DIY Wool Dryer Balls
Working towards reducing chemicals in your home? These easy DIY wool dryer balls are an awesome way to reduce chemicals when you do your laundry!
Materials
- 100% Wool Yarn
- Nylon Stockings
Tools
- Washing Machine
- Laundry Soap
- Scissors
- Yarn Needle
Instructions
- Loosely wrap the yarn into large balls. It is very important to wind the balls loosely because that allows the fibers to felt more easily in the fourth step. The exact size of the ball is not important but you want to err on the large size because small wool balls can get lost in laundry much more easily than larger ones.
- Once your yarn ball has reached a proper size, cut the yarn leaving a tail that is a few inches long. Thread that tail onto your yarn needle (or you can even use a crochet hook if you want) and weave the tail back through the ball several times to lock the end in place. Cut any remaining tail yarn flush with the ball.
- Slide the yarn ball all the way to the toe of the nylon stocking. Knot the stocking so that the first yarn ball is completely surrounded by stocking. Slide the next yarn ball in as far as it will go and tie another knot. Continue in this fashion until all yarn balls are in stocking cocoons.
- Hot wash the worm of wool balls in very hot wash cycle with your regular laundry soap. You can wash the balls with your regular laundry so you’re not wasting water or electricity. Send the balls through several wash and dry cycles with your regular laundry for best results. The hot water and the soap will cause the wool to felt onto itself meaning that the yarn ball will not unravel.
- Cut the stocking away from the balls. If the wool doesn’t look completely felted simply tie the balls back into another stocking as in step 3 and repeat step 4. Once the wool balls are completely felted you can start using them in your dryer.
Thank you for this easy way to make felt balls! I’ve done some felting but didn’t realize they could be made this way. So, here’s another thing to add to my list of to dos. I’ll be back often to find more useful stuff.
These look fairly easy to make. It seems like a good way to save money instead of using dryer sheets all the time.
Dry clothes more effectively and save energy!
How cool! I have some plastic dryer balls that I love – they help SO MUCH with our ancient dryer. I’ll have to try making these and see how they compare.
Thanks for sharing with the Share Your Style link party 🙂
I really need to take the time to make some of these! Thanks for sharing with SYC.
hugs,
Jann
Hi Jennifer! What a great idea!!! I just did a load of laundry while up at my son and daughter-in-law’s home while on a short vacation and they had small hedgehogs inside their dryer. We sure could use something to help with the humidity we have here in Texas, so I definitely will be trying this out. Pinned and tweeted for you. <3
Oh, and congratulations on being featured this week at Share Your Style! I am one of the other hostesses and saw your photo there.
Hugs,
Barb Chapman 🙂
http://www.frenchethereal.net
Great gift idea! I love mine.
These are great! Right up my alley! You were my favorite pick for this weeks Waste Not Wednesday.
Shared your dryer balls again at this week’s Share Your Style #207. Thanks for sharing them this past week!
Hugs,
Barb 🙂
I wondered how to make these! Sounds pretty easy! Pinned & sharing! Thank you for sharing on Merry Monday! We hope you will join us again next week!
Kim