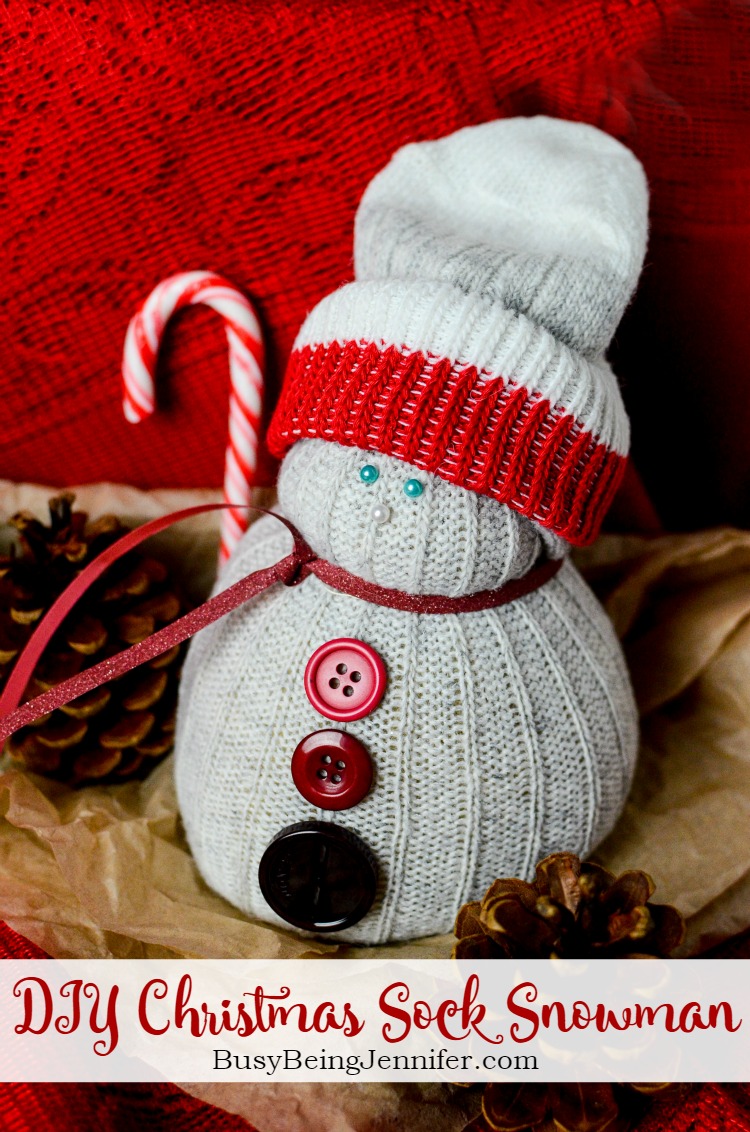
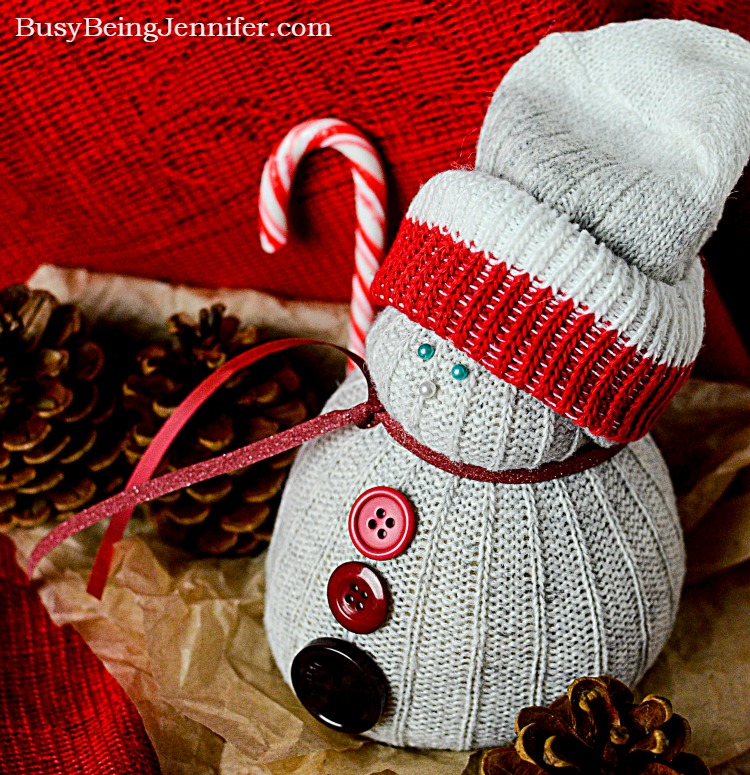
The cutest little DIY Christmas Sock Snowman made from just a few items you probably have around your home! He’s the cutest addition to your holiday decor!
I love a good EASY holiday craft, especially when they turn out as cute as this little guy did! There is something about the holiday season that makes me want to get extra creative when it comes to my home and gifts.
Maybe its the love of handmade instilled in my by my Nana? Maybe its the crafting family traditions I remember from my childhood? Maybe its a little bit a both with a dash of nostalgia and Christmas spirit?
Regardless of the why, I’m getting all kinds of Christmas crafty over here!
I’ve got a bunch of different projects in the works, but today I’m sharing this adorable DIY Christmas Sock Snowman!
What do you need to make your own DIY Christmas Sock Snowman?
1 Pair Work Socks
2 – 3+ Cups of Rice (depends on how big your sock is)
3 Straight Pins (2 the same color )
Ribbon or fabric strip for the snowman’s scarf
1 spool Thread that matches the sock color
1 Pair Scissors
3 Buttons (optional)
1 tube Super glue (for sticking on the buttons)
DIY Christmas Sock Snowman Instructions:
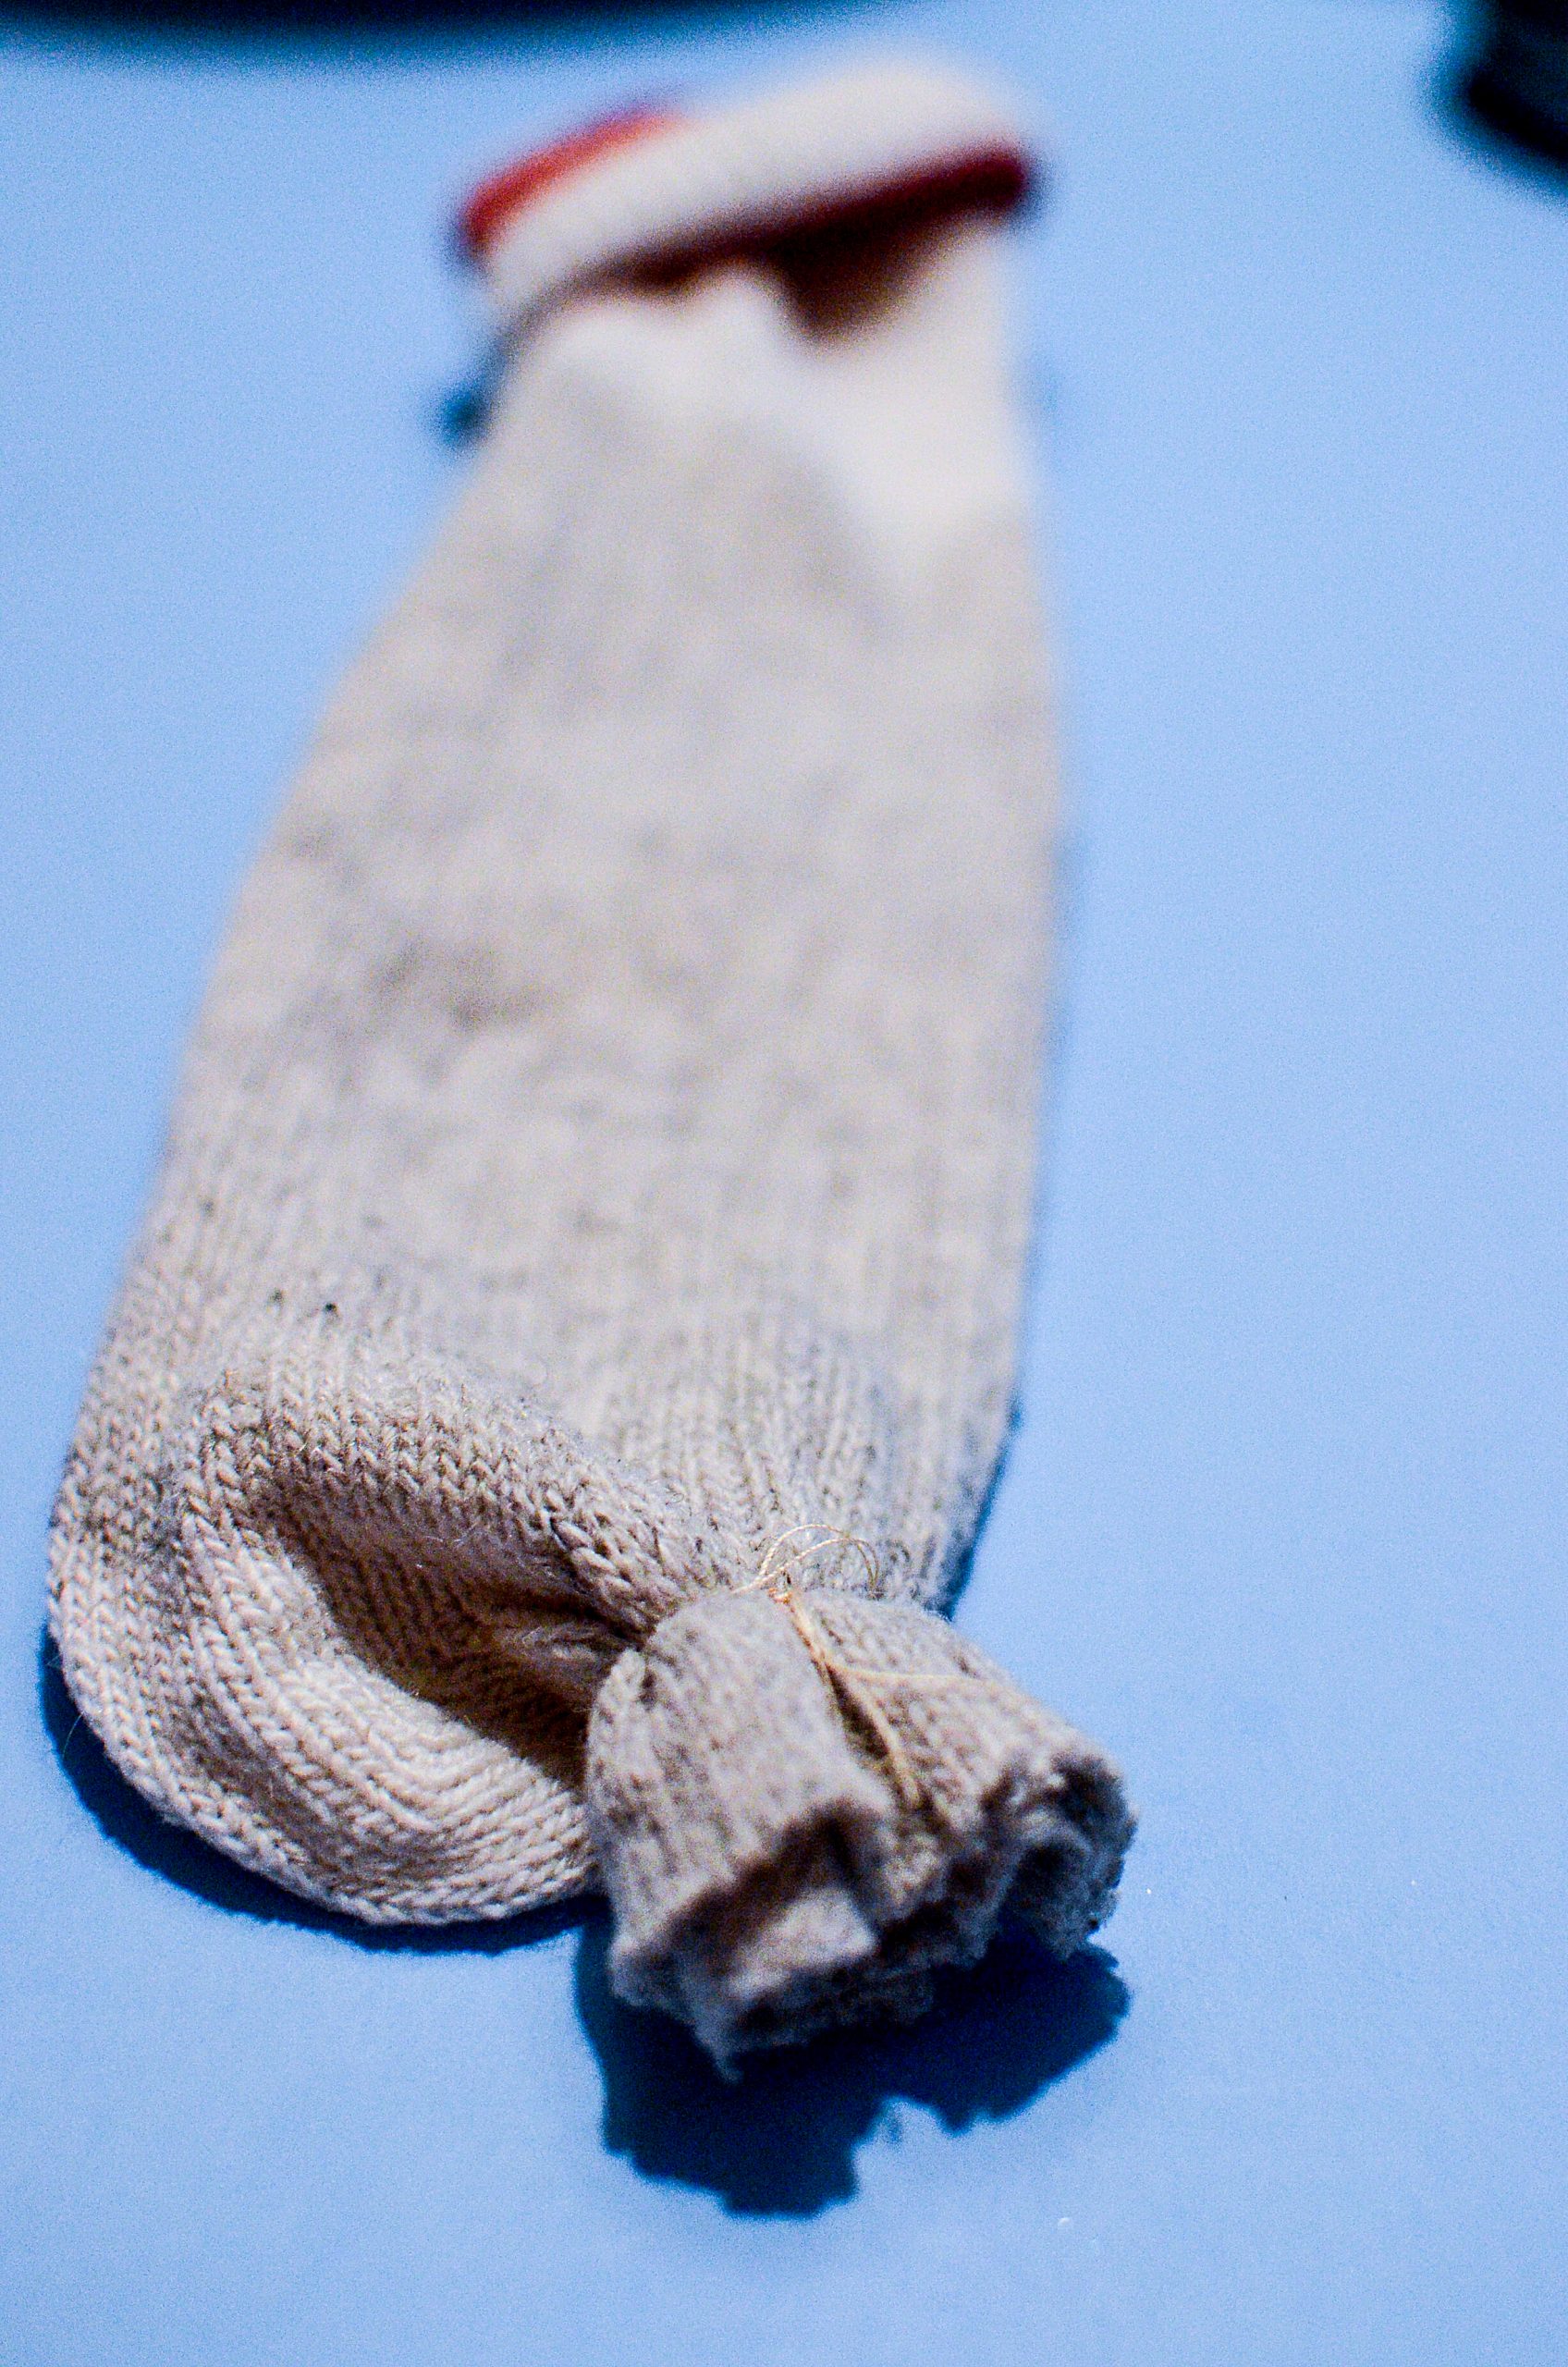
Cut the sock in half just past the ankle area towards the toes. Set aside the toe portion for now.
With the thread, tie closed the cut end of the sock. Turn the sock inside out so the tied portion is now on the inside of the sock.
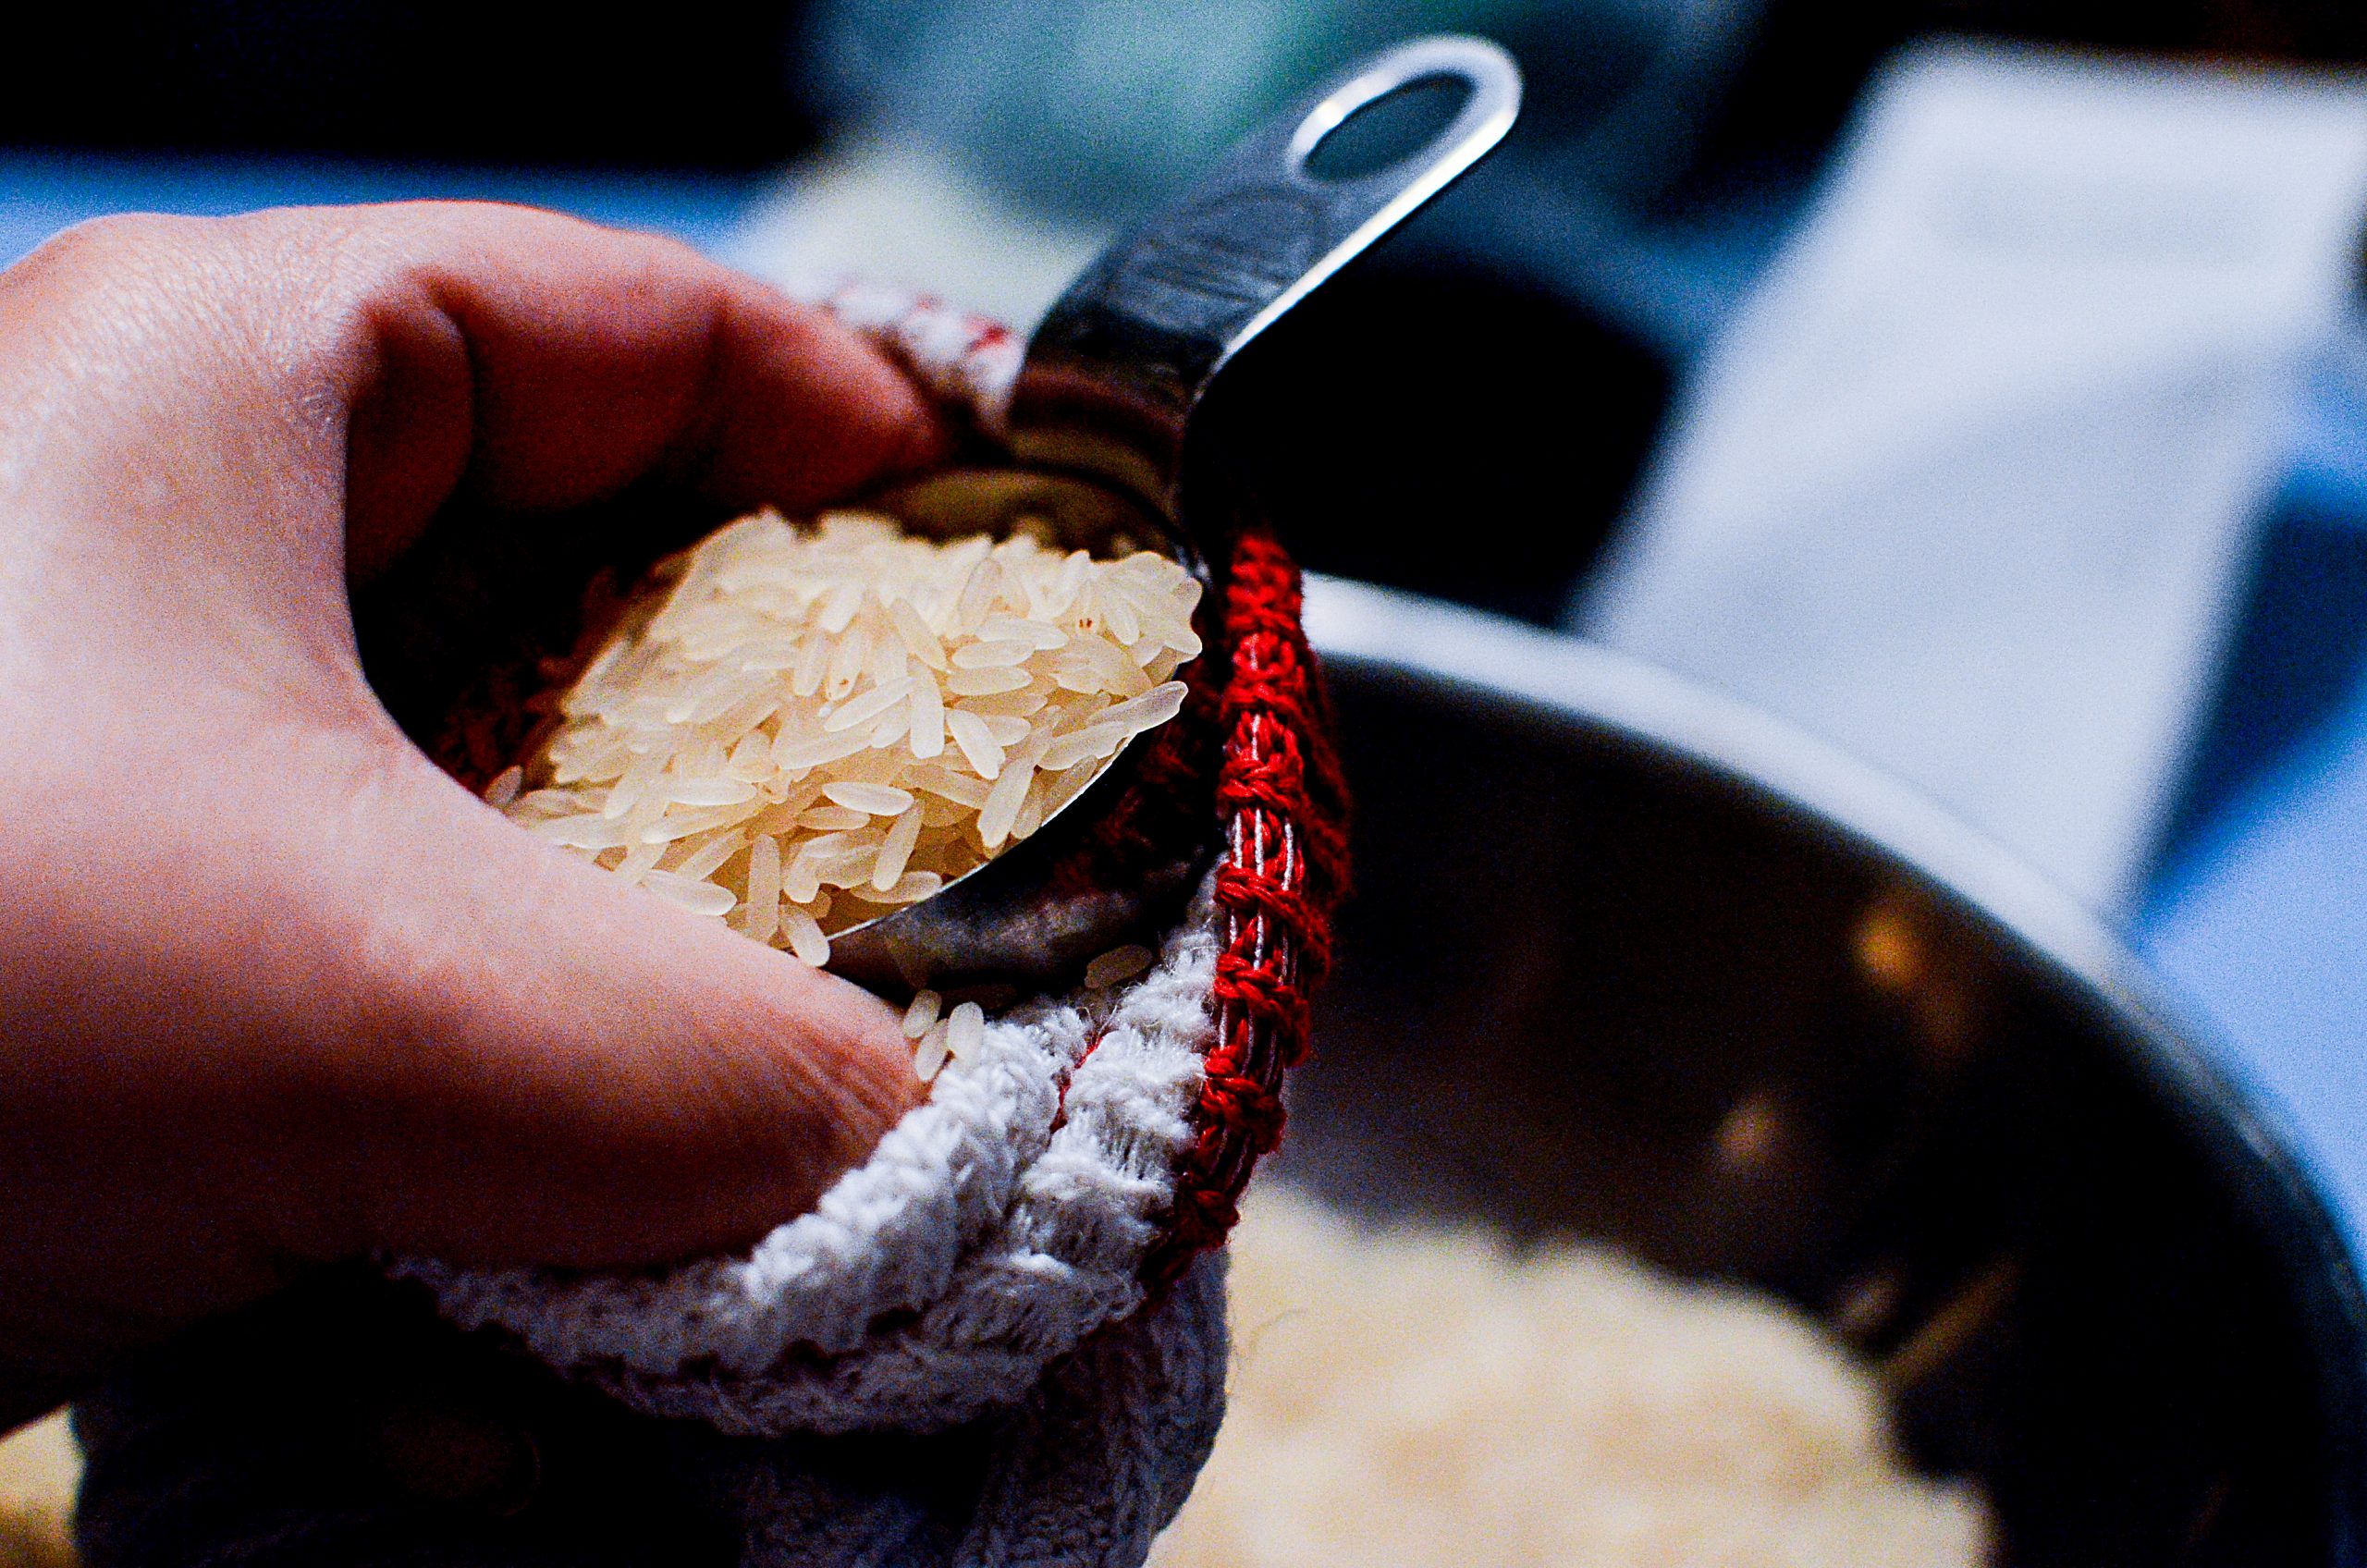
Start filling the open end of the sock with rice. Fill till it’s almost full, but with some room to tie it closed.
As you fill, lift the sock to distribute more rice near the lower half of the sock to form the body of the snowman.
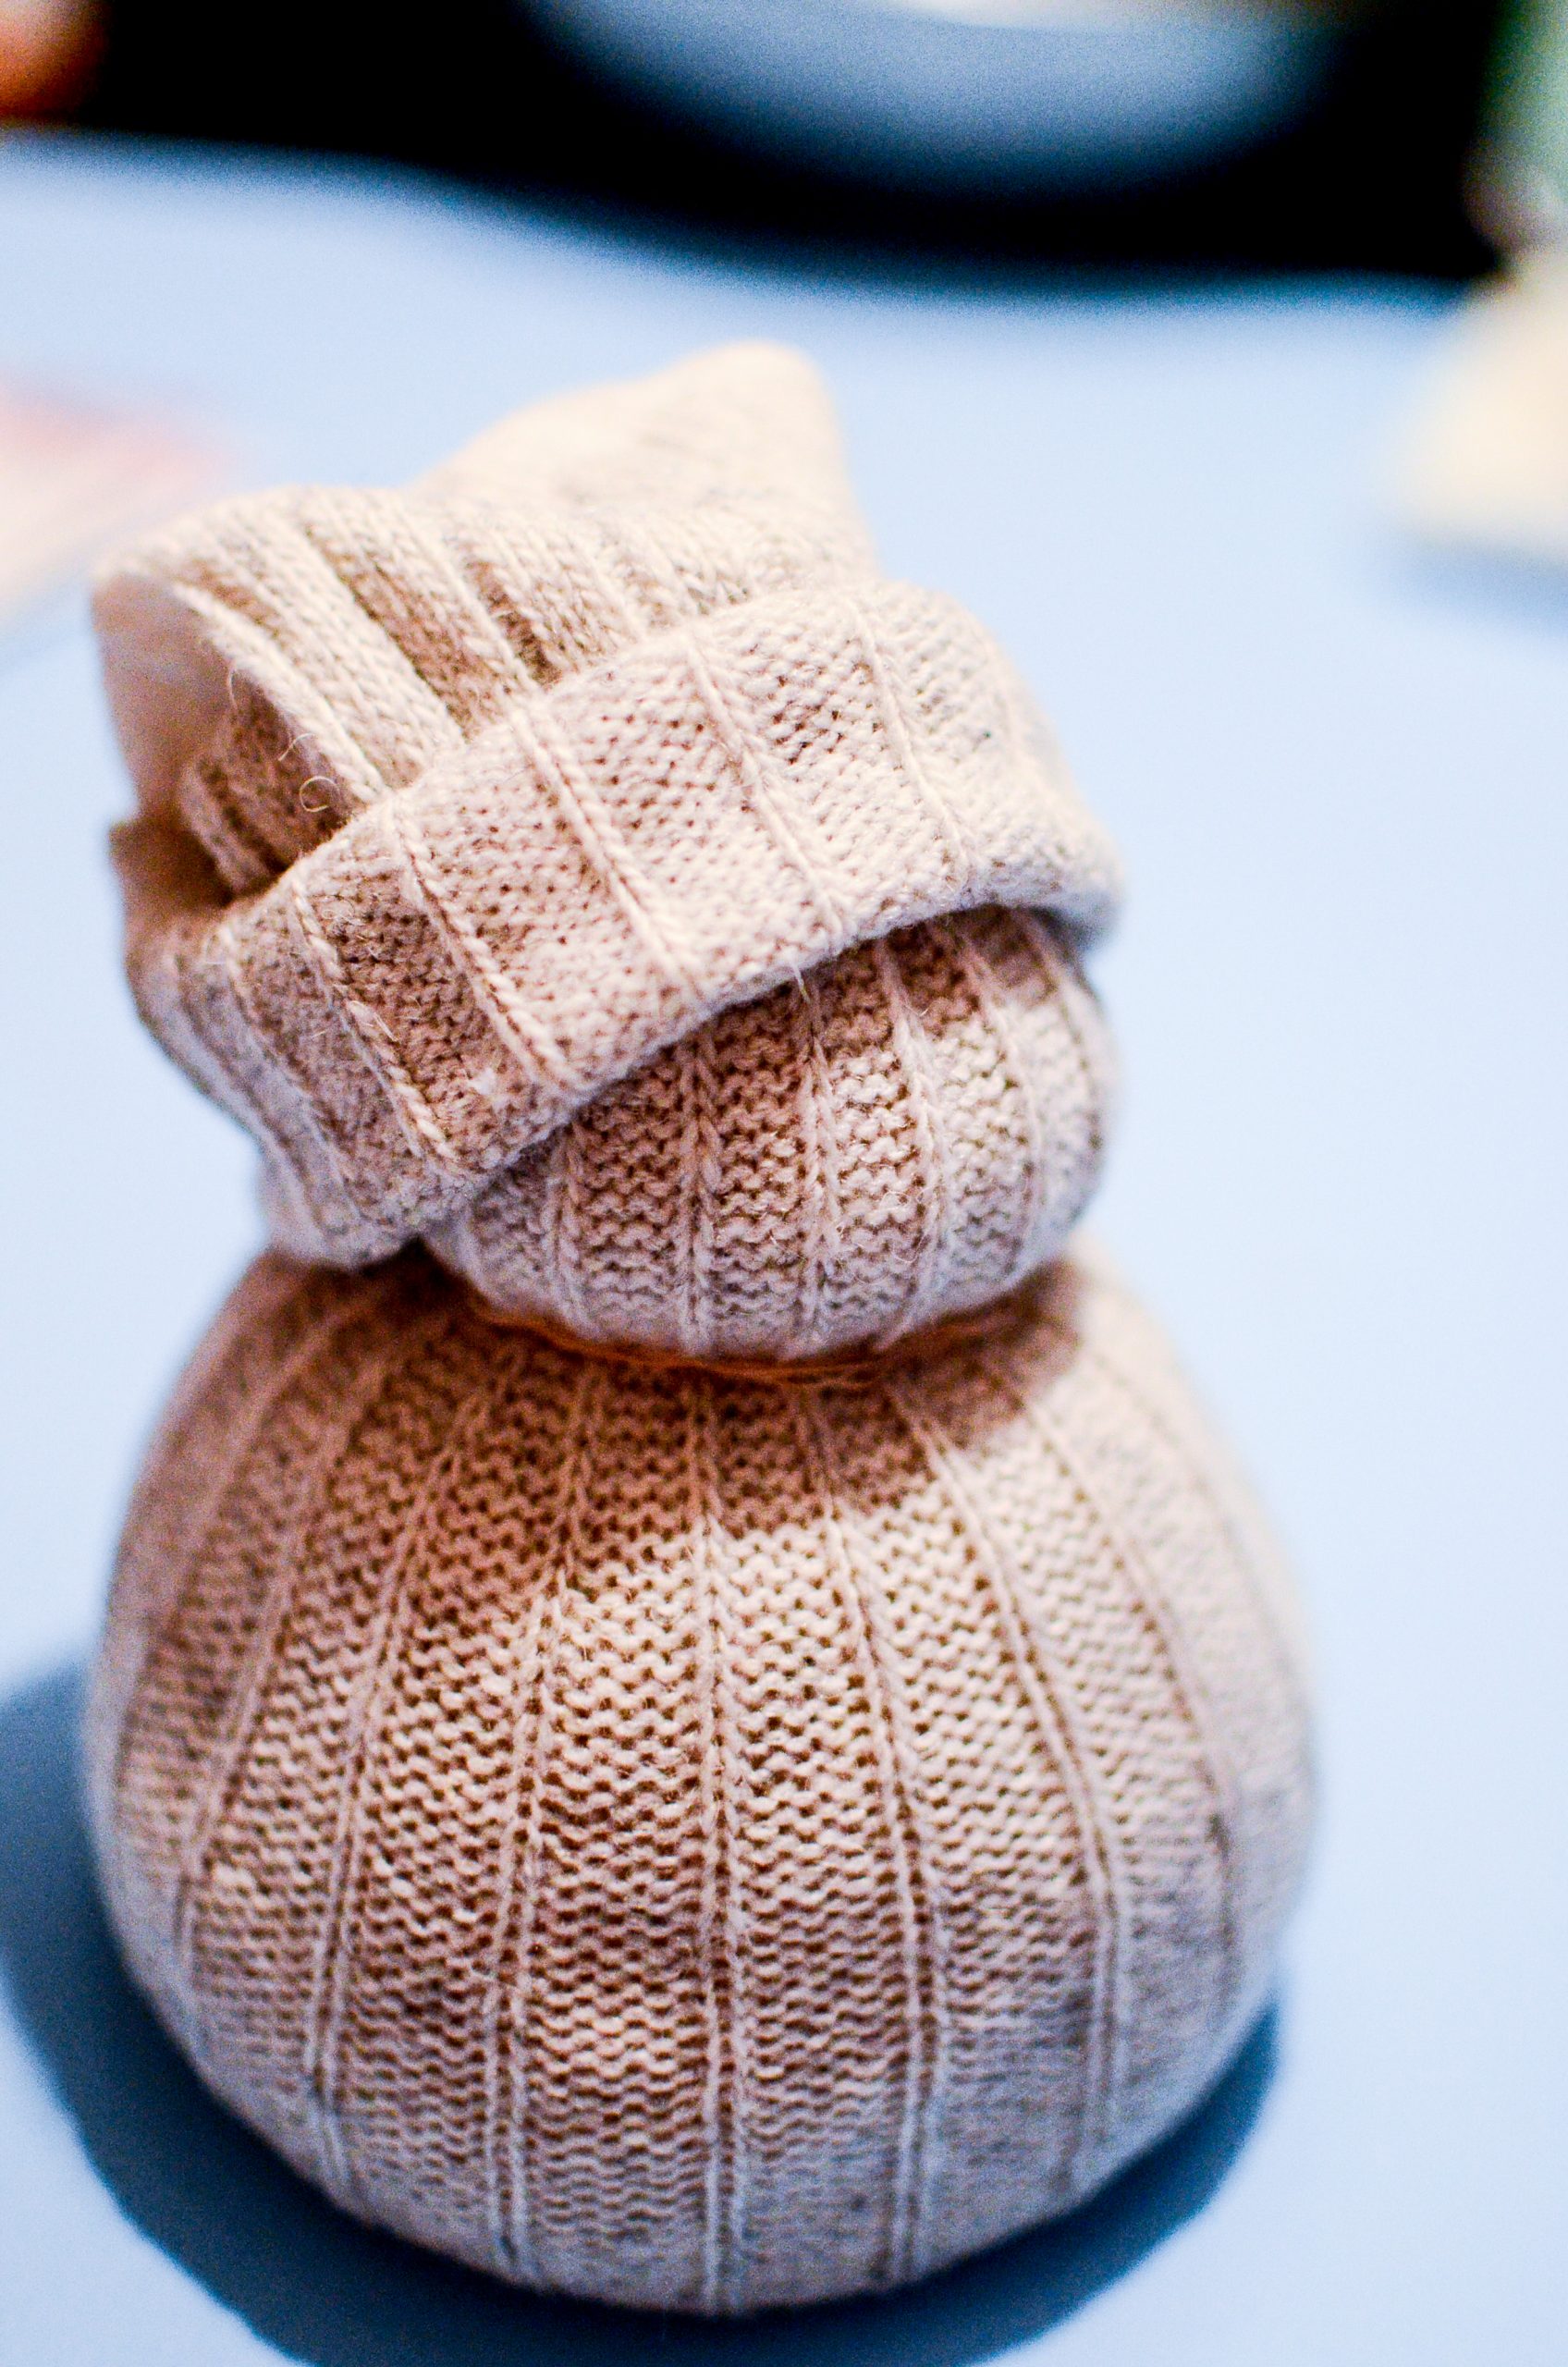
Tie the top of the sock closed with thread. With your hands, slightly squish and form the head of the snowman and give definition to the body.
Using thread again, tie a piece of thread around the neck and tighten it to give it further definition.

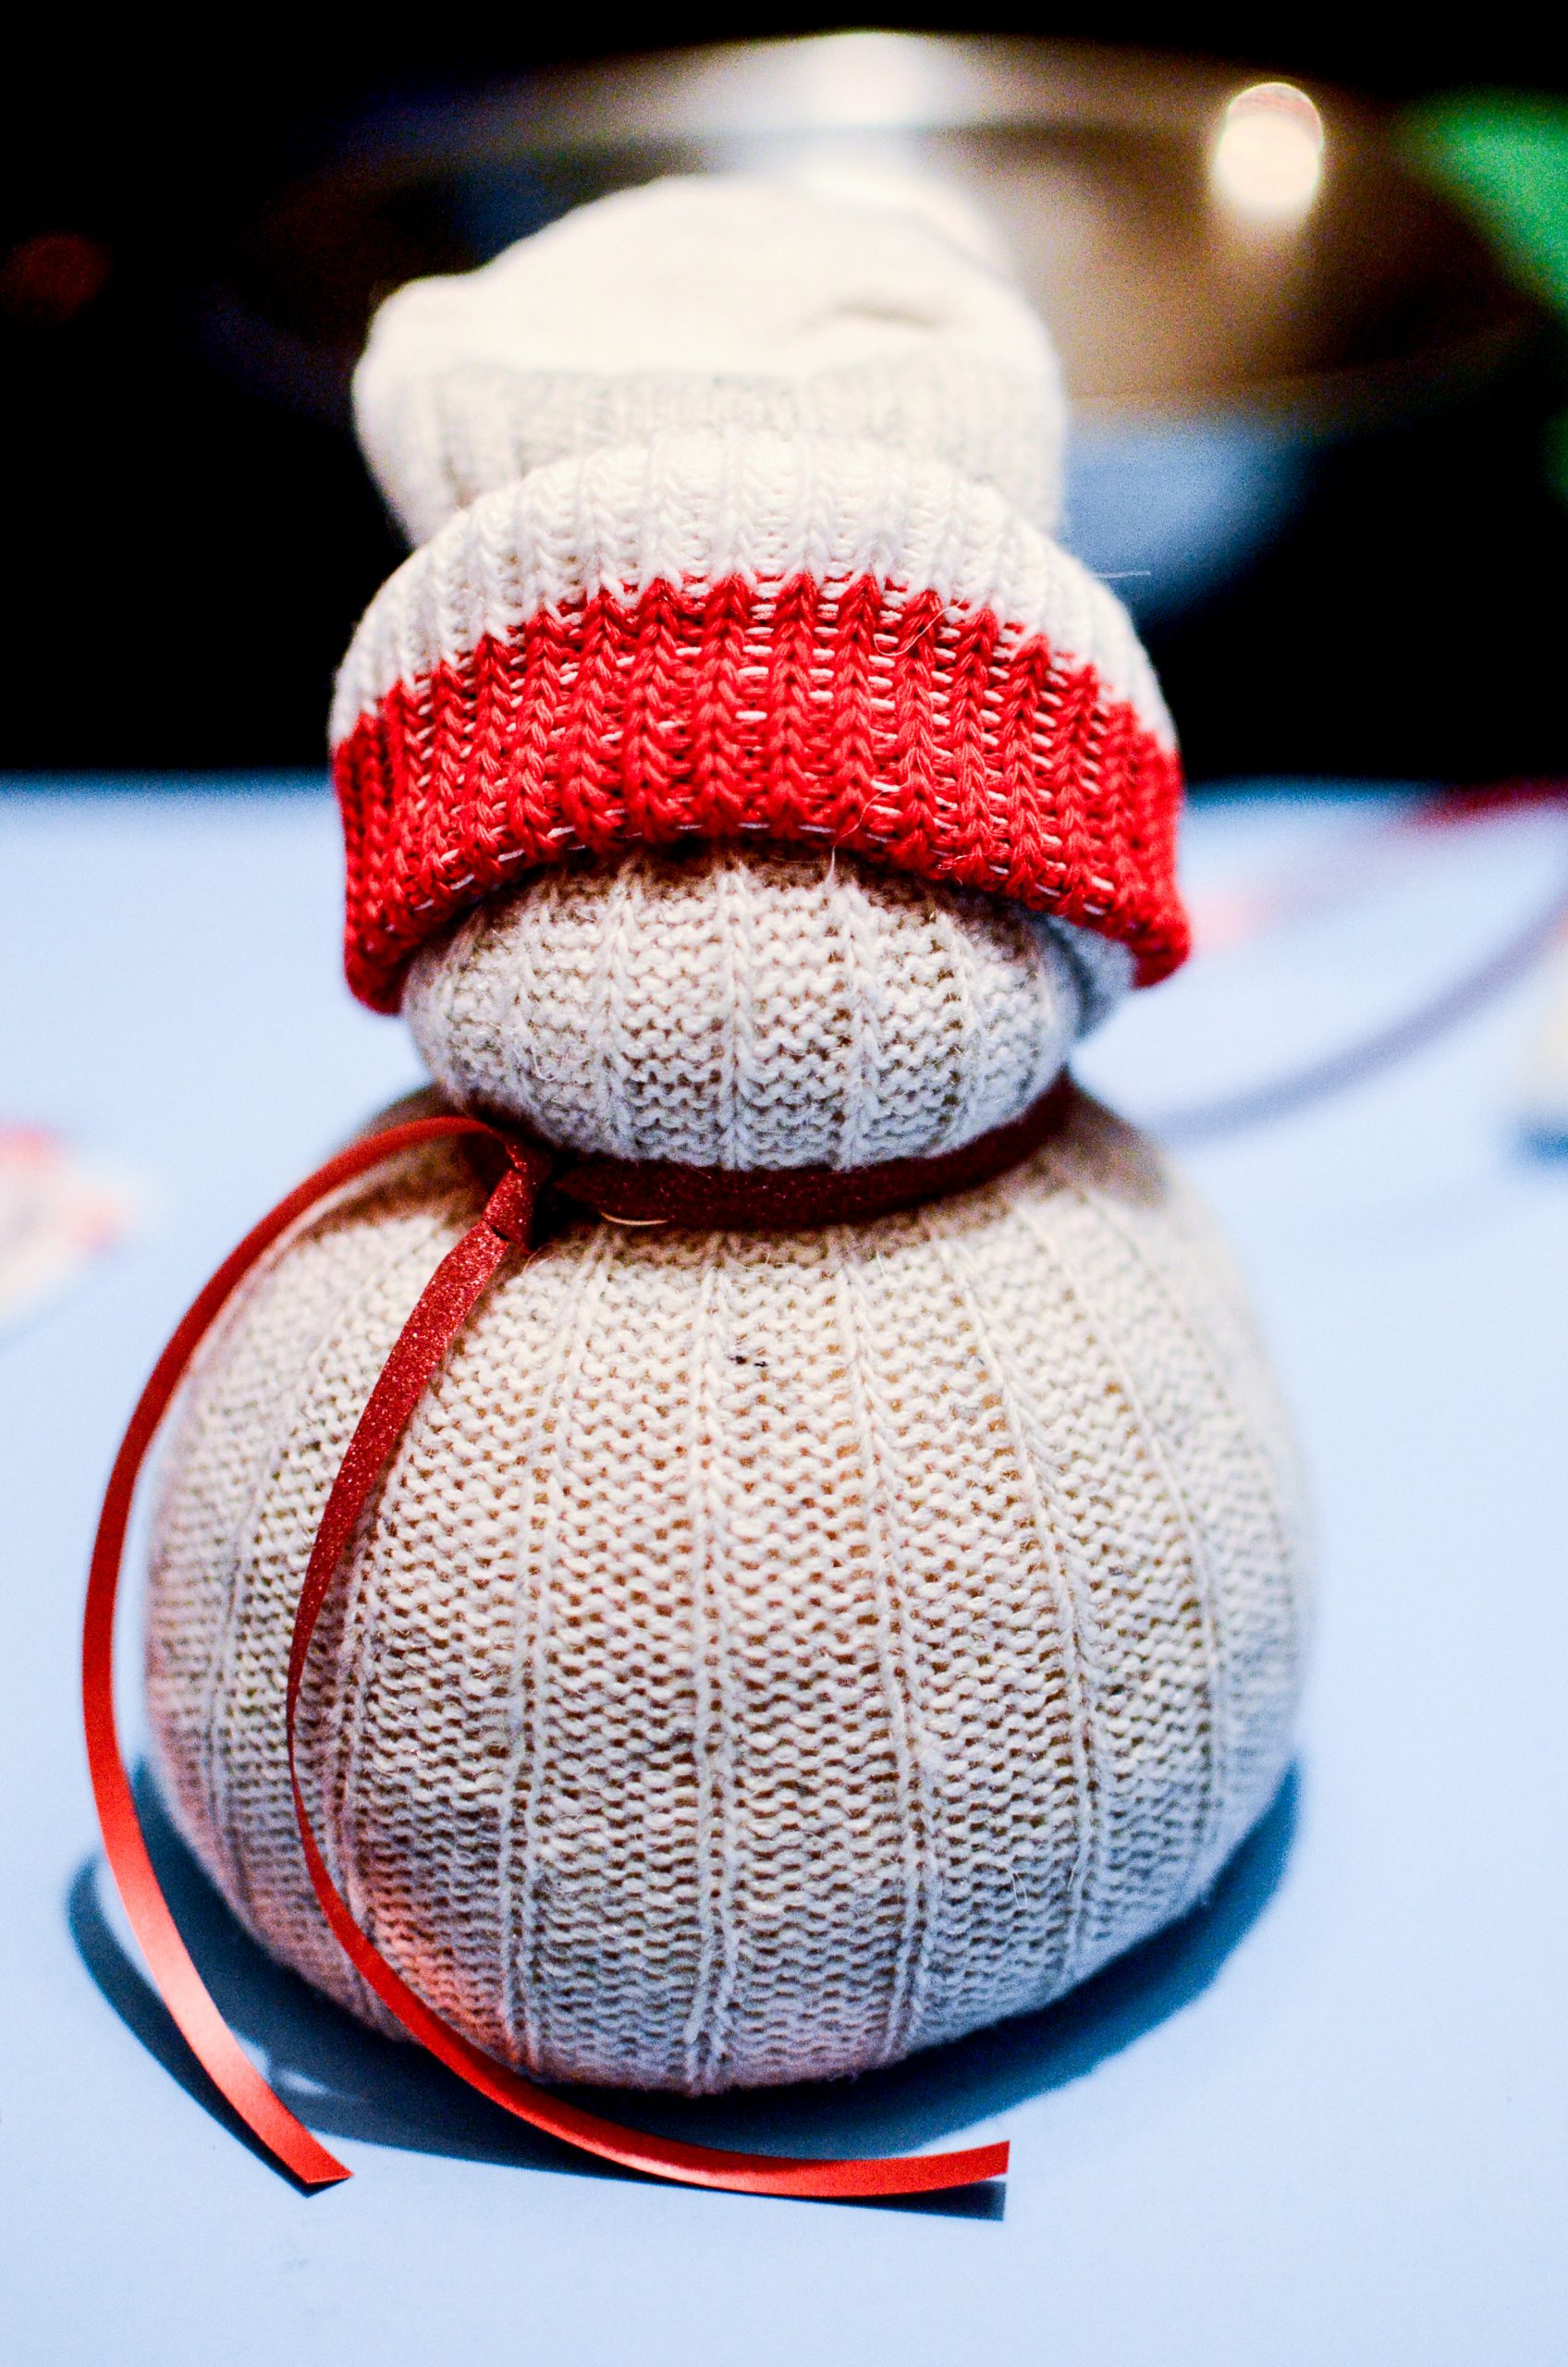
With the toe portion of the sock, cut off the red strip portion of the sock, leaving equal margin on the cut side than there is on the open end of the sock.
With the toe portion of the sock, fold over the open end once or twice. This is the hat.
Fit the hat on the snowman and adjust where you feel looks good.
With the strip of red sock portion, fold over to hide the white edges and fit over the rim of the snowman’s hat. You are basically using the red portion of the sock to hide the “brim” of the hat you just put on.
Remember to leave room for eyes and a nose!
Using the two pins that are the same color, pin them in the head of the snowman to form his eyes. Then use the third pin for the nose.
Take your ribbon/fabric and tie it around the neck of the snowman. The last pin can be used to hold the scarf in place.
At this point, you can choose to glue on the buttons.
When carrying the snowman, you will want to support him from the bottom, as the rice moves around a lot and will distort his body.

I mean, really… Isn’t he just the cutest little snowman?
And this DIY Christmas Sock Snowman is so easy and quick to make! Perfect for a crafty girls night in or making with older kids!
I want to make a whole family of DIY Christmas Sock Snowman for my Christmas decor and stick them on my holiday decorated buffet!
DIY Christmas Sock Snowman
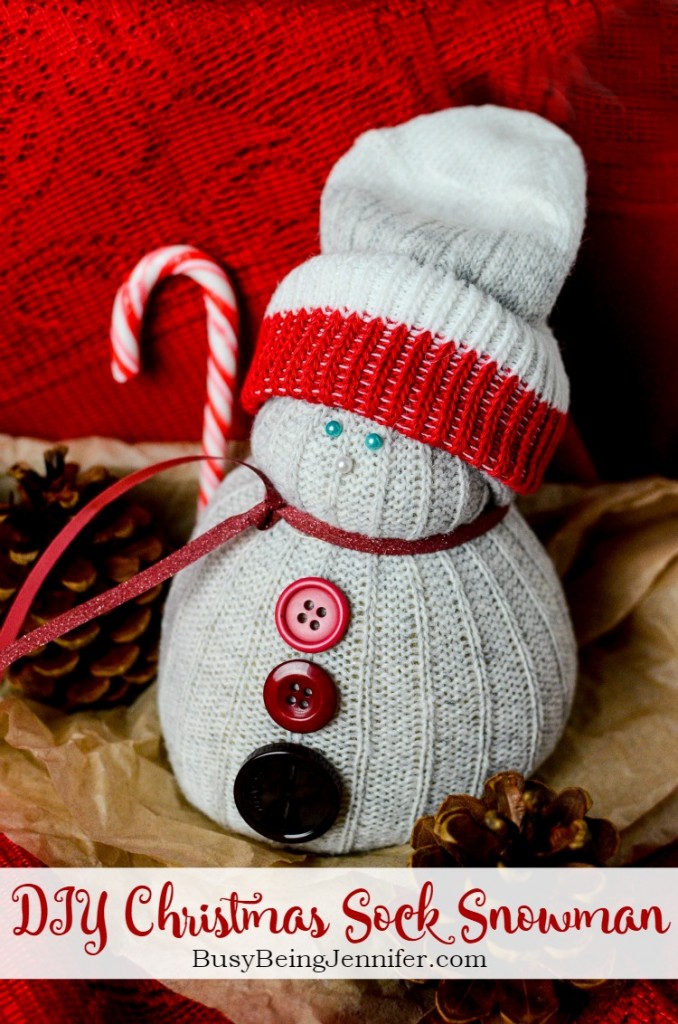
The cutest little DIY Christmas Sock Snowman made from just a few items you probably have around your home! He’s the cutest addition to add to your holiday decor!
Materials
- 1 Pair Work Socks
- 2 – 3+ Cups of Rice (depends on how big your sock is)
- 3 Straight Pins (2 the same color )
- Ribbon or fabric strip for the snowman’s scarf
- 1 spool Thread that matches the sock color
- 3 Buttons (optional)
- 1 tube Super glue (for sticking on the buttons)
Tools
- 1 Pair Scissors
Instructions
Cut the sock in half just past the ankle area towards the toes. Set aside the toe portion for now.
With the thread, tie closed the cut end of the sock. Turn the sock inside out so the tied portion is now on the inside of the sock.
Start filling the open end of the sock with rice. Fill till it’s almost full, but with some room to tie it closed.
As you fill, lift the sock to distribute more rice near the lower half of the sock to form the body of the snowman.
Tie the top of the sock closed with thread. With your hands, slightly squish and form the head of the snowman and give definition to the body.
Using thread again, tie a piece of thread around the neck and tighten it to give it further definition.
With the toe portion of the sock, cut off the red strip portion of the sock, leaving equal margin on the cut side than there is on the open end of the sock.
With the toe portion of the sock, cut off the red strip portion of the sock, leaving equal margin on the cut side than there is on the open end of the sock.
With the toe portion of the sock, fold over the open end once or twice. This is the hat.
Fit the hat on the snowman and adjust where you feel looks good.
With the strip of red sock portion, fold over to hide the white edges and fit over the rim of the snowman’s hat. You are basically using the red portion of the sock to hide the “brim” of the hat you just put on.
Remember to leave room for eyes and a nose!
Take your ribbon/fabric and tie it around the neck of the snowman. The last pin can be used to hold the scarf in place.
At this point, you can choose to glue on the buttons.
When carrying the snowman, you will want to support him from the bottom, as the rice moves around a lot and will distort his body.
My nieces and nephews would be all OVER this!
I made something similar to this when I was in kindergarten. My mom still uses it as a decoration every Christmas! (It doesn’t look as cute as this one, though.)
What an adorable craft! This would be fun to do with kids.
That is the most adorable use for a solo sock I have ever seen. We might have to try this during the Thanksgiving break!
This snowman is so cute!!! Great way to repurpose those old lone socks!! 🙂
I can’t get over how adorable this is! I’m going to rummage through my sock drawer tonight to find just the perfect sock to use!
This is adorable! I want to make some of these with my boys this year. Thanks for sharing!
I love your snowman, you did a wonderful job!
If you have time, I would love for you to share this post over at the Holidays Celebration link party that is live right now! It’s such a neat idea, I’m sure our readers would love it too! (http://keepingitrreal.blogspot.pt/2015/12/holidays-celebration-link-party-4.html)
Thank you for sharing! Pinned!
Just a quick note to let you know that I’ve featured this post today on the Holidays Celebration Link Party Features. Come and grab an “I was featured” button and browse around for the other features here: http://keepingitrreal.blogspot.com.es/2015/12/holidays-celebration-link-party-4_11.html
Congratulations!
I will definitely be making these next year! I love snow people!
What a cute little snowman!!
It’s one of the best Christmas projects i have seen this year and definitely the cutest snowman!
Your snowman is adorable. This will be our Snickerdoodle Special of the Week at tomorrow’s party. Thanks so much for sharing.
So cute! And he could stay out all winter long, and not melt! Have a Merry Christmas!
Do you know how many people I know that have these, but BOUGHT them!!? Who knew!!! 🙂 Thanks for sharing on Throwback Thursday and I’ll be pinning this to our TBT pinterest! Hope to see you next time!!
So adorable. Pinned & shared. Thanks for joining the Inspiration Spotlight party.
Oh aren’t these cute? I have one my DIL made! I’ll have to make a whole family since you gave the DIY.
Thanks for sharing!
Stepson’s class is making these for their Christmas crafts! FUN!
Oh wow these are SO adorable! I am not crafty, as hard as I try, but this is something I could do with the kids! Thanks so much for this tutorial.
This is adorable! This would be super easy. Thanks for sharing with us at Family Joy Blog Link Up Party this week!
He is just too dang cute 🙂 I am pretty sure we have a few extra socks about…I can use husband’s socks for the mommy snowman and the little guy’s socks for the baby! Now I am too excited.
Who knows that the cute beautiful snowman is made out of socks filled in with rice. Yeah, we have a lot of rice here. It is our main course. I think we will do this craft. Thank you for sharing in Family Fun Friday.
This guy has really captured my heart. Thank you for bringing him to Saucy Saturdays.