Busy Being Jennifer

What doesn't kill you make you blonder

  • Home
  • Blog
  • Shop
  • Contact
  • Recipes
  • DIY Projects
  • Crafts
  • Essential Oils
  • Every Day Boss

August 17, 2015 by Jennifer

101 Handmade Days: Wood Slice Fridge Chalkboard

This post may contain affiliate or brand partner links. Read our full disclosure here.

A couple of weeks ago I tried to convince the hubs to hop the fence into our neighbors back yard and cut me a couple slices from the tree that had fallen during a storm. He didn’t believe me when I said I had some projects in mind… and my efforts to convince him were in vain. So imagine my utter joy when I stumbled across some gorgeous and craft-ready wood slices at Hobby Lobby! My friend Taylor thought I had lost my mind when I squealed, grabbed a wood slice and did a little dance 😀 I new exactly what I wanted to do with it! When I came home this weekend I got to work on my new Wood Slice Fridge Chalkboard!

Wood Slice Fridge Chalkboard - BusyBeingJennifer.com #101handmadedays

I also happened to find the coolest “gold lieaf” letters and I might have done another little dance. Can you tell I’m from a small town and don’t get out for some serious shopping often? *giggles*

Wood Slice Fridge Chalkboard - BusyBeingJennifer.com #101handmadedays

Here’s what you need to make your own Wood Slice Fridge Chalkboard:

Wood Slice – any size. If you’re cutting it yourself, be sure to give it a really good sanding on both sides.
Chalk paint – I went with a classic black
Sponge Paint Brush
Gold Leaf Letter
Metallic Gold Paint Pen
Magnets

Wood Slice Fridge Chalkboard - BusyBeingJennifer.com #101handmadedays

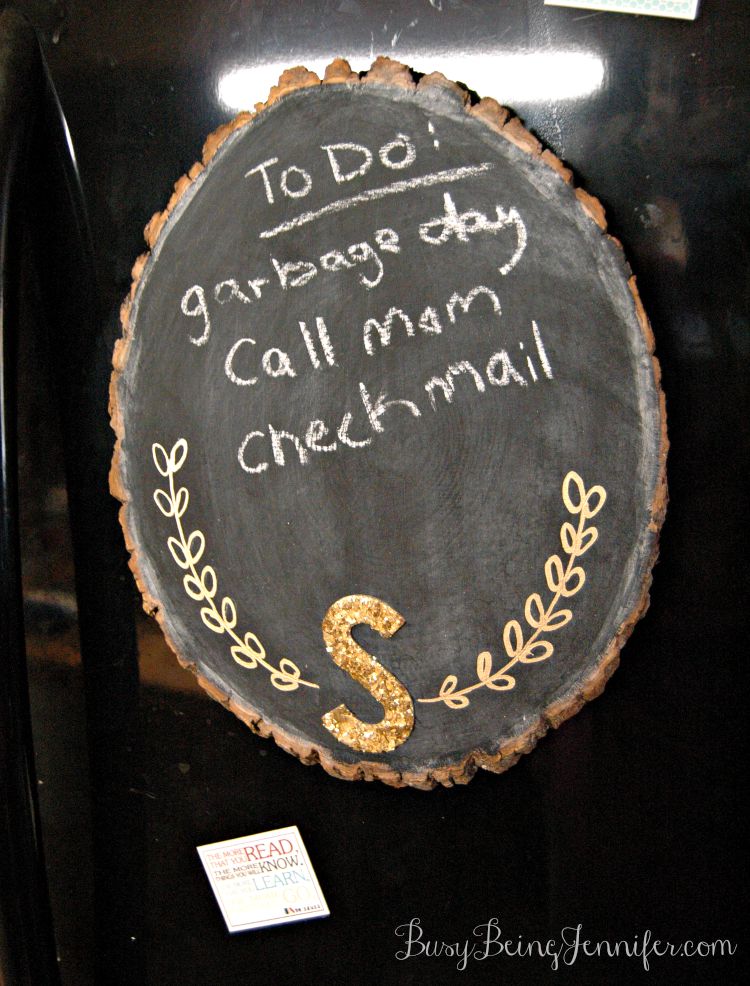
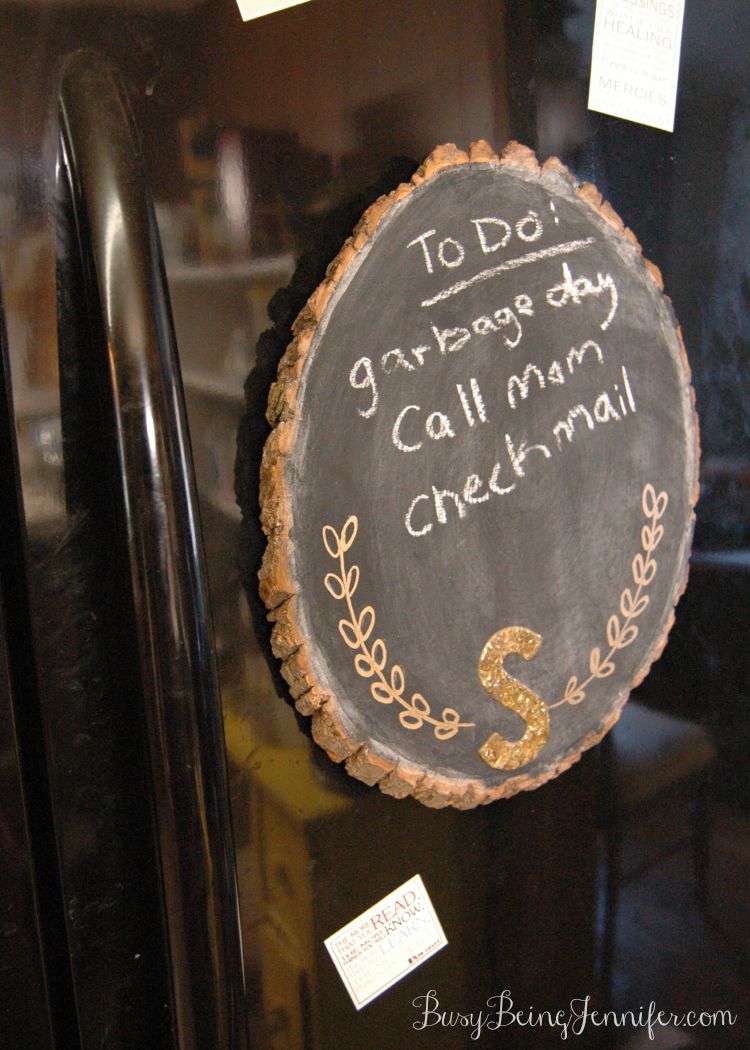
Step One: Apply a liberal coat of chalkboard paint to your prepared wood slice. Allow to dry. Add another liberal coat of chalk paint. Allow to dry completely.

Step two: Prepare your chalkboard surface. Rub chalk all over the chalkboard surface. Wipe clean with a slightly damp cloth.

Step 3: Add your embellishment. For me it was the “gold foil” letter S and a little vine detailing. I added the vine detail with a metallic gold paint pen. Allow to dry completely.

Step 4: Add you magnets. LOTS of them! Wood can be a littl heavy, so make sure your wood slice fridge chalkboard will be secure with lots and lots of magnets glued to the back side of the wood slice.

Wood Slice Fridge Chalkboard - BusyBeingJennifer.com #101handmadedays

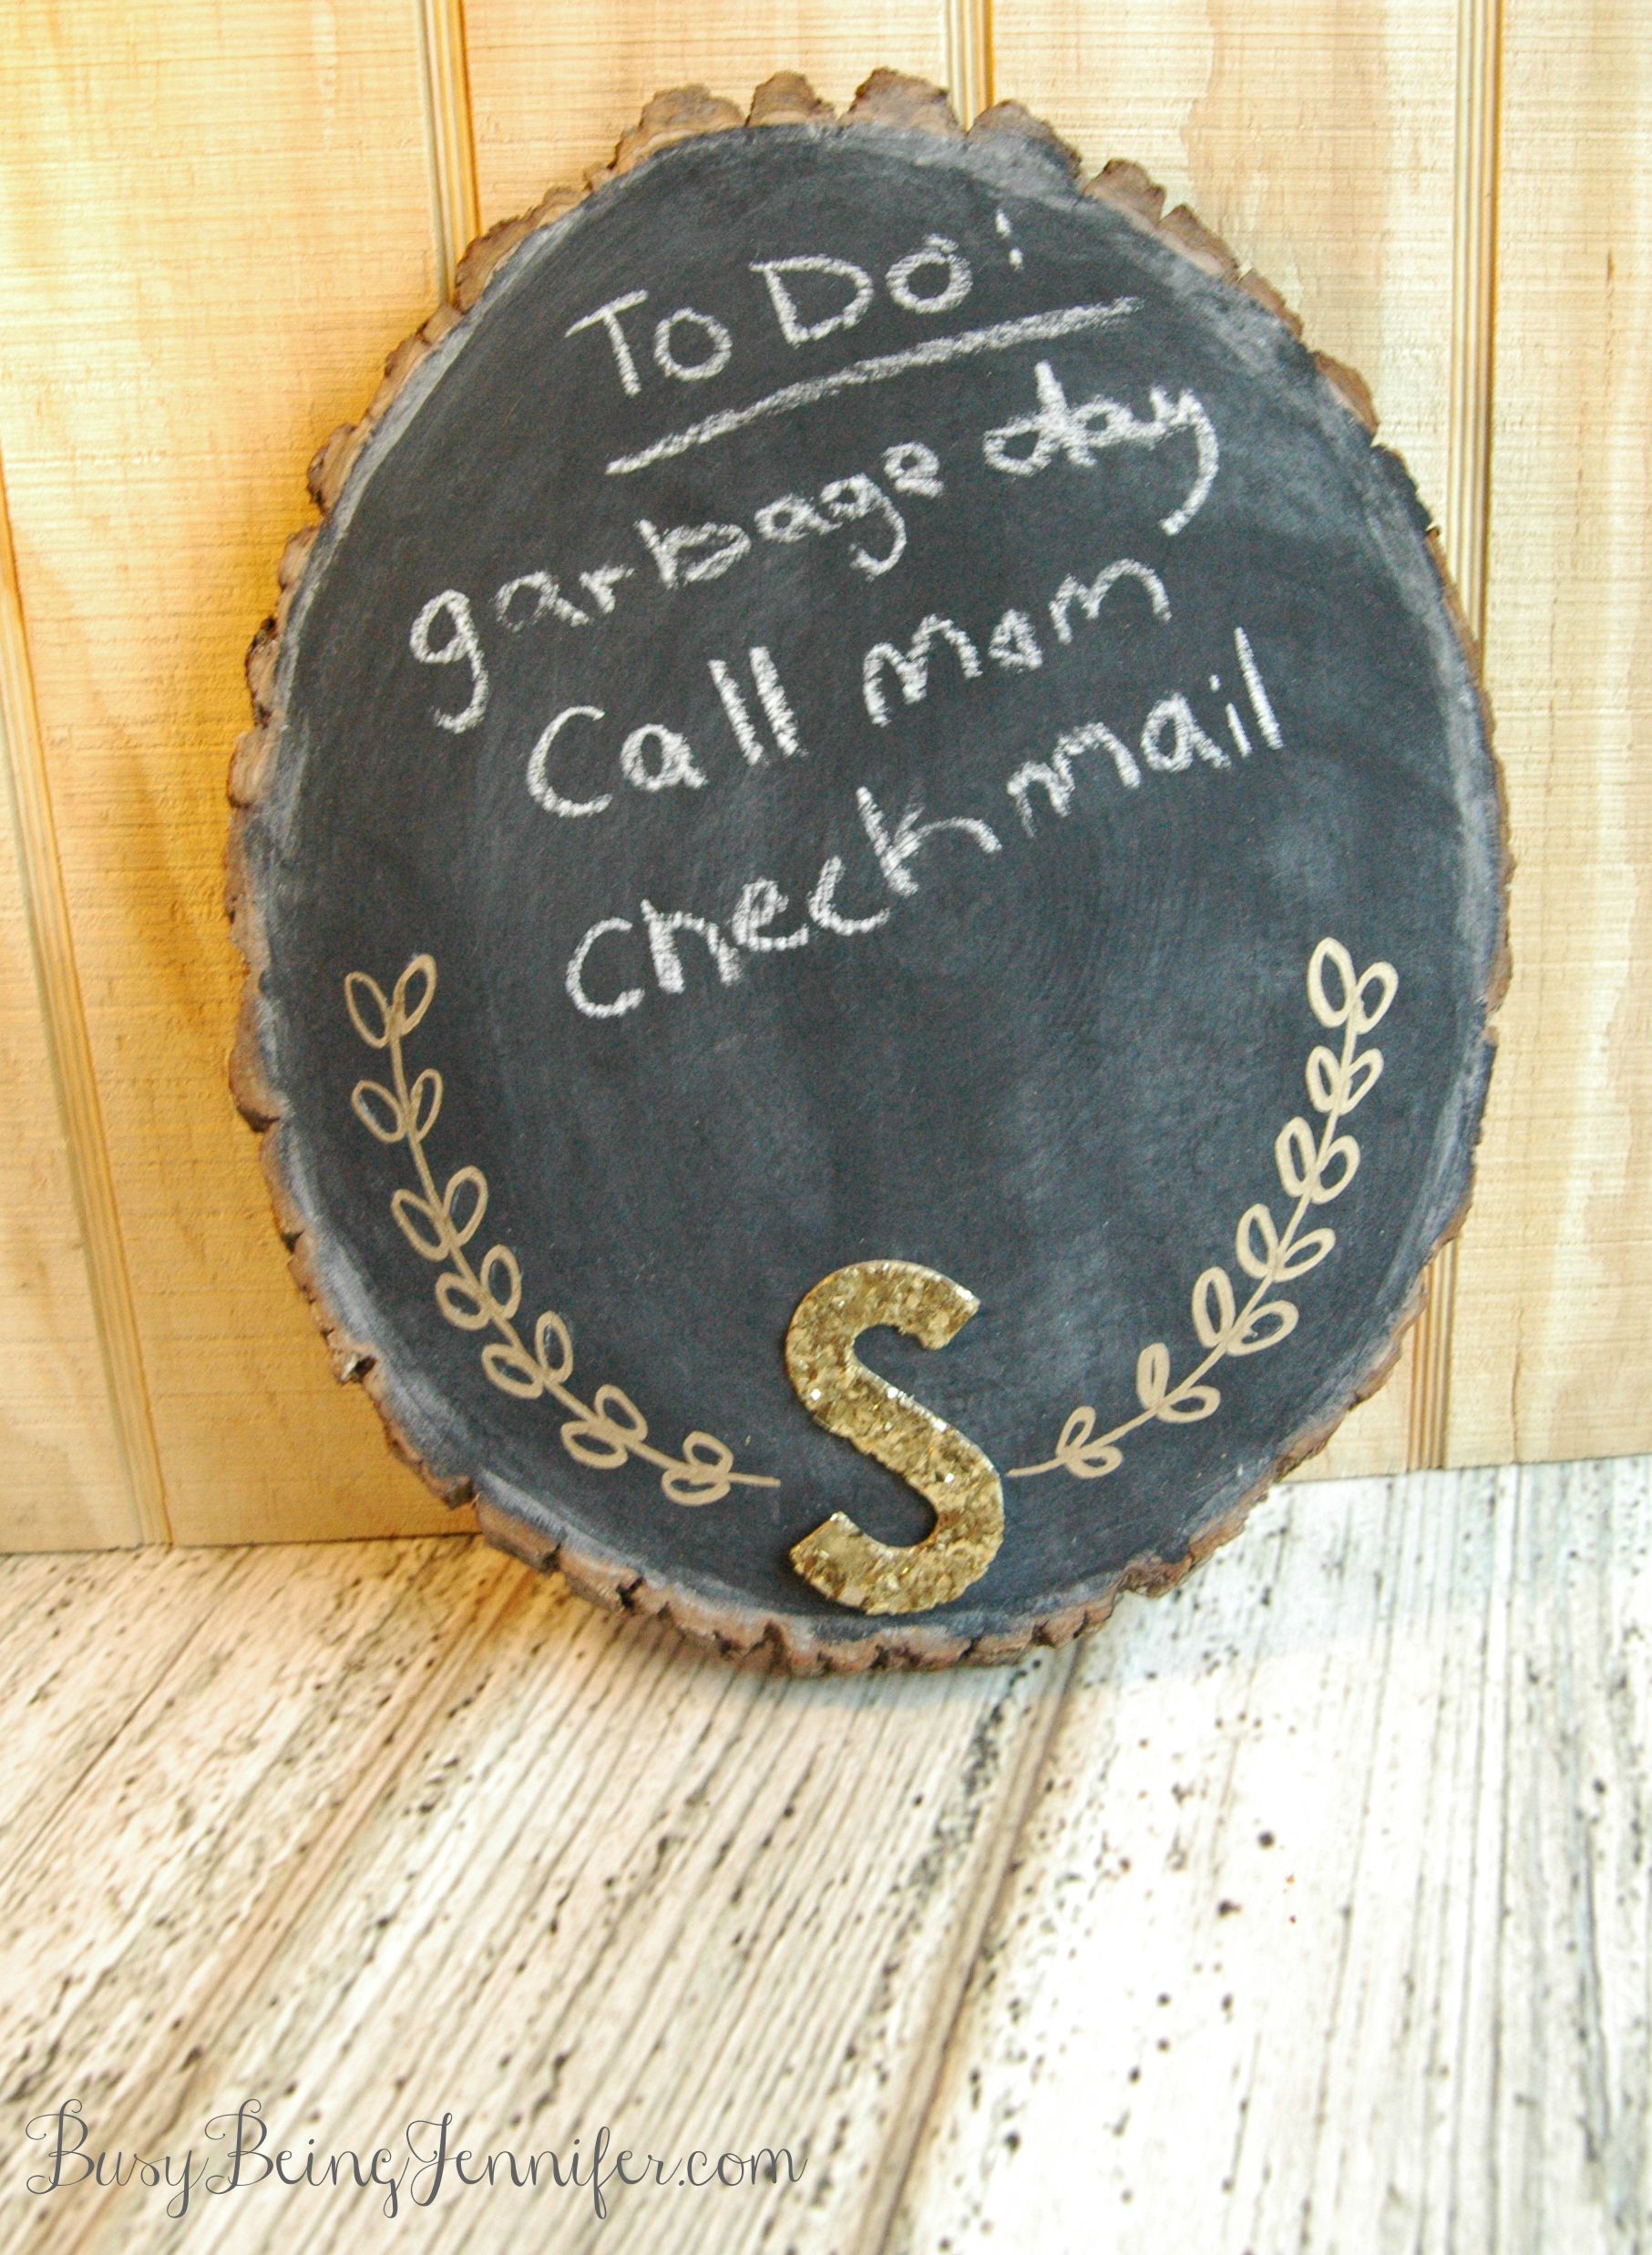
Isn’t this wood slice fridge chalkboard project fun? I have to admit though, I am kind of kicking myself for only purchasing one wood slice… *sigh* Hindsight – am I right?

A Wood Slice Fridge Chalkboard is the perfect place to write your To-Do or Grocery List!

Click To Tweet

Filed Under: Crafts + DIY's, DIY Projects Tagged With: 101 Handmade Days, Crafts + DIY's, DIY Project, easy diy, FUN, tutorial

❮❮ Previous Post
Next Post ❯ ❯

Comments

  1. Stacie says

    August 18, 2015 at 12:16 pm

    LOVE IT! Had to tweet it! Stacie xo

    Reply
  2. Kathryn Curling says

    August 19, 2015 at 9:50 am

    I love this! I love anything made from wood slices like this

    Reply
  3. cuteheads says

    August 20, 2015 at 7:04 am

    Another awesome DIY! I love a rustic touch like that, it’s so cute!

    xo,
    Esther
    The Cuteness

    Reply

Leave a Reply Cancel reply

Your email address will not be published. Required fields are marked *

About Me
  • Facebook
  • Instagram
  • Pinterest
  • RSS
  • Twitter

Search

Categories

As an Amazon Associate I earn from qualifying purchases.

Places I Party...

[instagram-feed]

© 2022 · Busy Being Jennifer · Privacy Policy

We are using cookies to give you the best experience on our website.

You can find out more about which cookies we are using or switch them off in settings.

Busy Being Jennifer
Powered by  GDPR Cookie Compliance
Privacy Overview

This website uses cookies so that we can provide you with the best user experience possible. Cookie information is stored in your browser and performs functions such as recognising you when you return to our website and helping our team to understand which sections of the website you find most interesting and useful. Read our complete privacy policy here.

You can adjust all of your cookie settings by navigating the tabs on the left hand side.

Strictly Necessary Cookies

Strictly Necessary Cookie should be enabled at all times so that we can save your preferences for cookie settings.

If you disable this cookie, we will not be able to save your preferences. This means that every time you visit this website you will need to enable or disable cookies again.