I’ve had my neon flower wreath on the front door for far too long now! Its October for heaven’s sake! Neon Pink isn’t exactly a fall color 🙂 So before I get CRAZY busy with market and shop stuff, I decided it was time for a new wreath, a painted burlap flower fall wreath to be exact 🙂
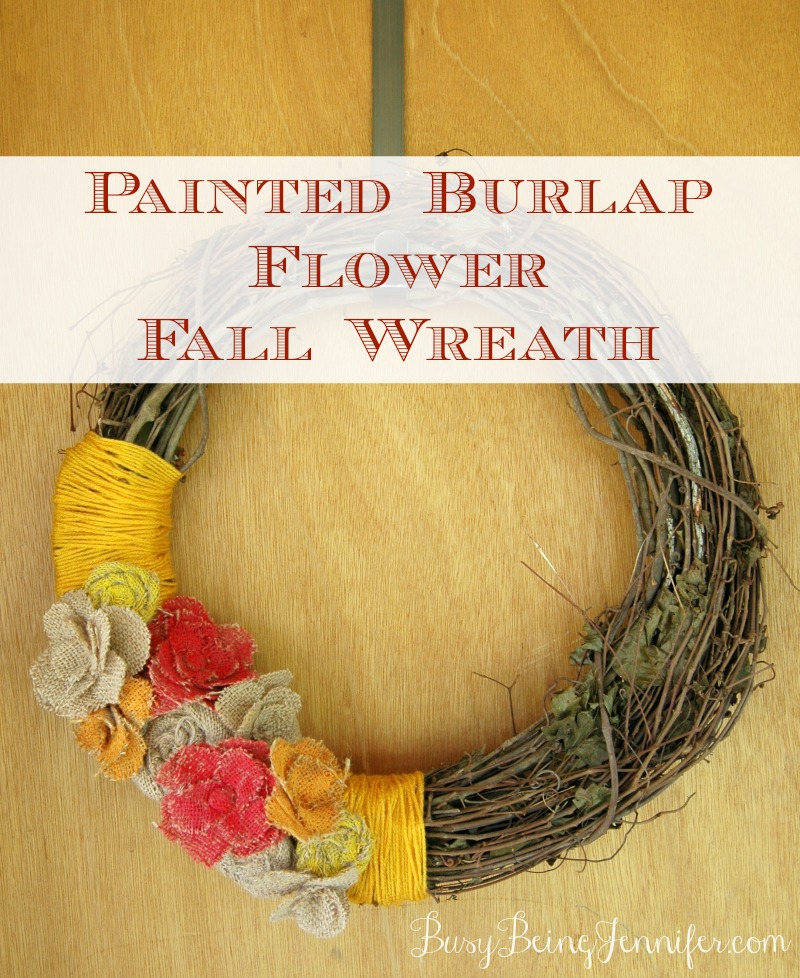
Pretty sure this is one of the best wreaths I’ve made. I’m very much in love with it! 😀
It was nice to whip out the glue gun and go to town… it had been way too long since I was creative for fun… not for the shop and this was so good for my soul!
Here’s how I made it…
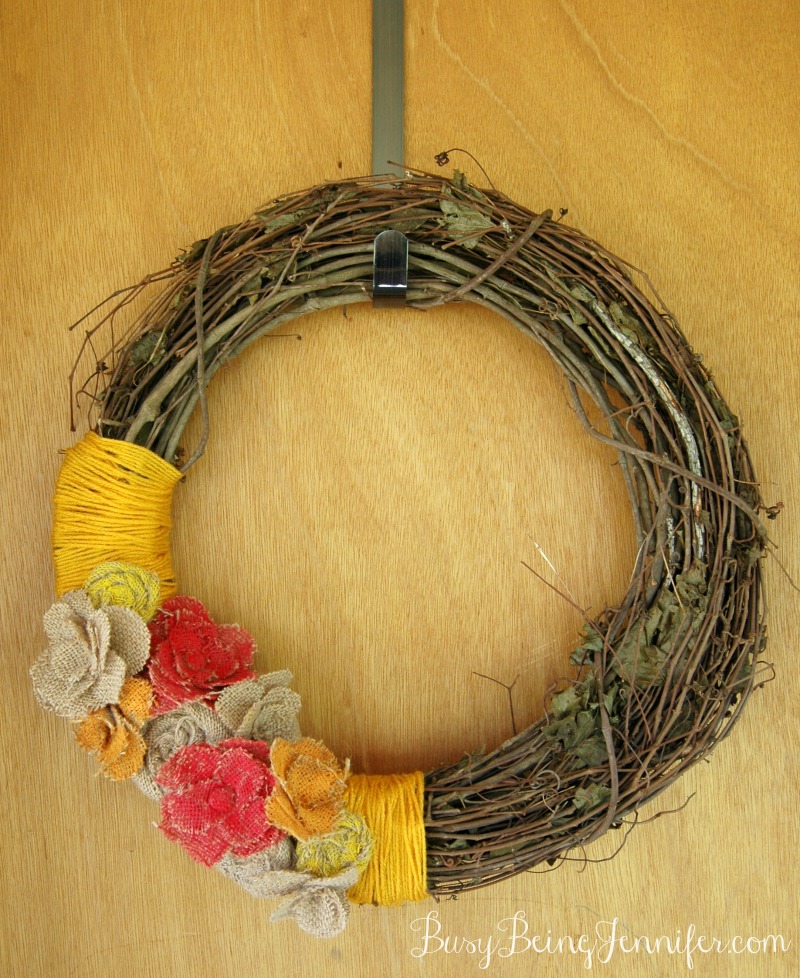
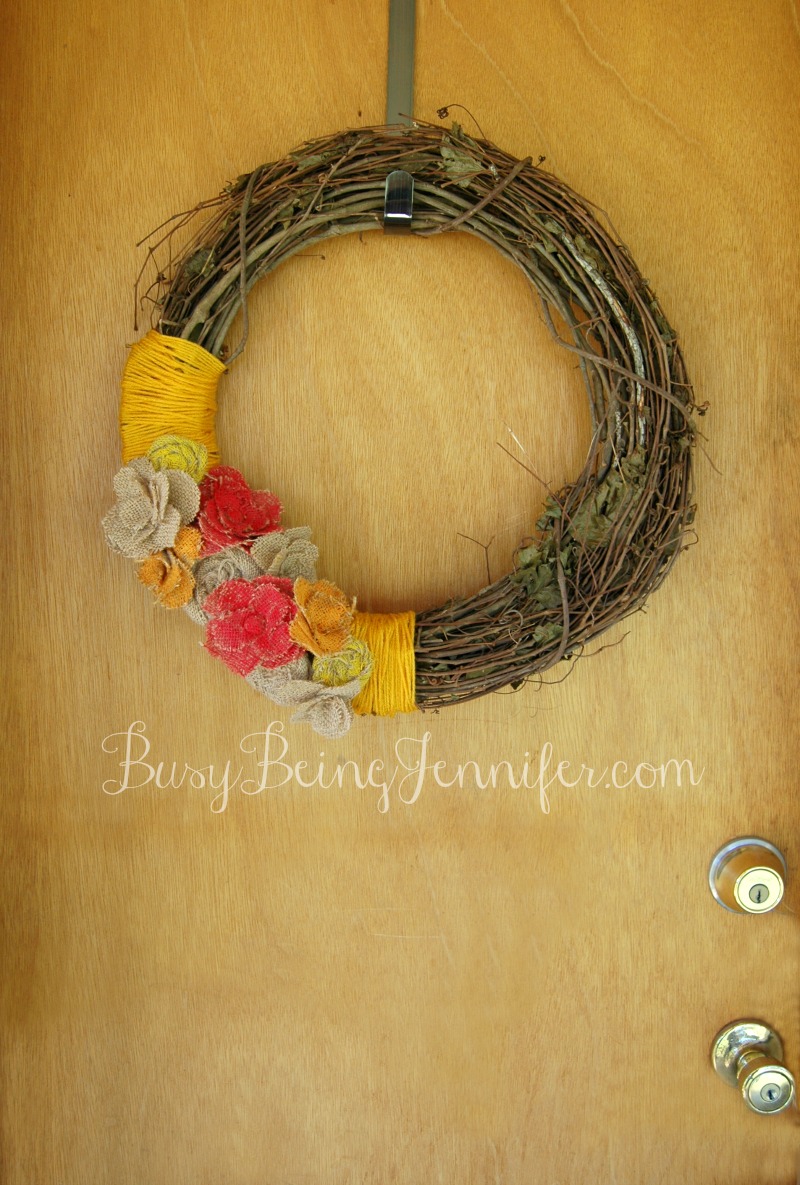
I got a “grapevine” wreath from walmart. It was less than 5 bucks.
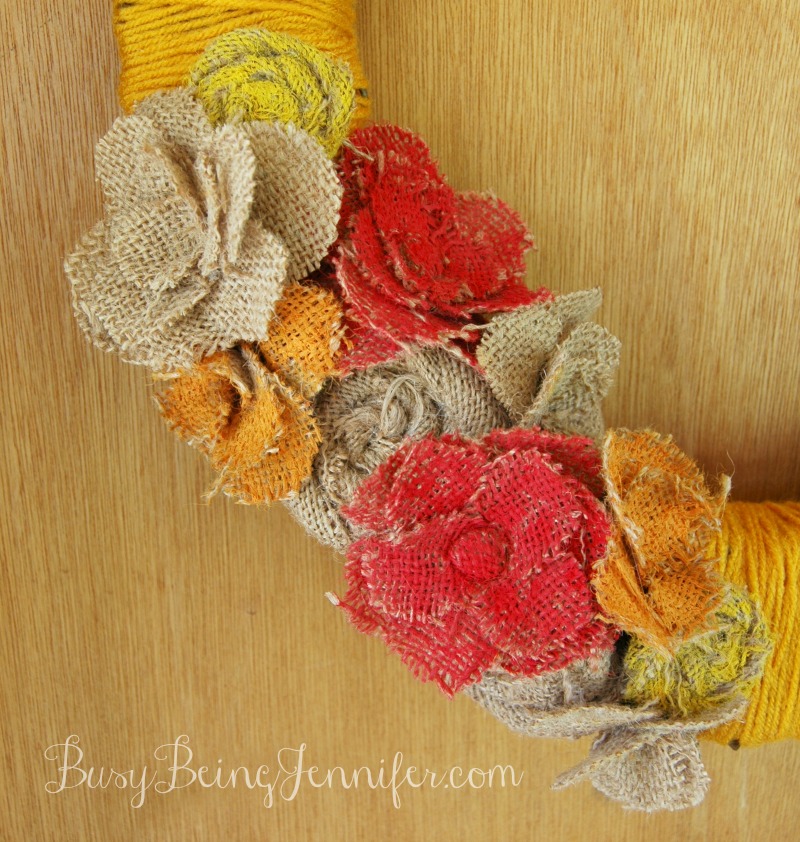
Then I wrapped about a third of the wreath with “Gold” red heart yarn. Around and around and around. Slightly time consuming and definitely boring.
Once the wreath was wrapped, I got out my burlap, glue gun and paints.
I knew that I wanted a mix of flower styles and colors. There are 2 basic styles of fabric flowers used – rolled rosette and petal roses. Rolled rosettes are pretty simple. Roll, glue, roll some more and there are lots of tutorials for this style. For the petal roses, I cut 3 petal templates (small, medium and large), traced the templates onto the burlap and then cut out 20 to 30 petals in each size. Using 3 inches of jute string folded in half as the stem, glue one of the small petals completely around to start the flower center. Glue and wrap and glue some more gradually going up in size. Again, there are tutorials out there for this style of fabric flower and they’re pretty simple. You’ll get hot glue all over your fingers though, so not recommended as a project for children.
Once the flowers were made I mixed up some red and yellow PLAID acrylic paints to get the mix of colors I wanted. For the petal roses, separate the petals, place the petal you’re painting against a covered surface and paint starting at the base and working out. Have fun.. it’s not complicated and the results are worth the mess!
Yep. I definitely love it!
Do you have a fall wreath on your door?
love!
Love the colors in this Jennifer!
I love the simplicity and the burlap originality. WIN WIN!
I love it! I never thought to paint burlap! Pinned it, too, so I could remember to make one 🙂
It is so fun making wreaths for each season!
I love this! Gorgeous wreath!
It's beautiful! The colors, the rustic feel – it's ALL perfect!
I LOVE wreaths!!! It looks awesome! So pinning it to my "wreath obsession" board!
That's gorgeous! Thanks for sharing how you did it- I hear wreaths are easy, but I lack the chutzpah to try making one myself. Instead, I'll just admire how you did yours, and how easy you made it sound. 🙂
We may or may not have a Halloween wreath on the door by this weekend… someone keeps getting distracted from finishing it. And for once I don't mean me.
This is so cute! I went and pinned it! 🙂
Love it!!
Cute!
very pretty and so creative. LOVE it
Thanks!
I like the wreath. I don't think I'd have the patience to cut all of the petals though. Nice work.
It actually didn't take as long as you might think. Burlap is thick, but you can still cut through 2 or 3 layers at a time 🙂 Its the itchiness that got to me first lol
I love your Painted Burlap Flower Fall Wreath!!! I want it! I have a pretty wreath my front door but not compared to yours 🙂
Thanks! My hubby is not a fan of wreaths in general, but he's learning to live with them 🙂 Maybe when I'm done with this one you can have it for next fall 🙂
Painted burlap- NEVER occurred to me. But it adds a whole new layer of awesome to those flowers. Also I was all upset because when I attempt grapevine wreaths, they don't ever not once look nice like yours. A bit relieved to see you bought yours. Great job on this- I adore it.
I've never tried a grapevine wreath before and I was definitely nervous! I try to only buy crafty things like wreaths that I know I can get at least 2 versions of… hoping to turn this into a Christmas wreath soon 🙂
This is so pretty! I LOVE LOVE LOVE it! You gave me an idea for a fall wreath!
Hurray! Glad to have inspired you 🙂
I've never thought of painting burlap, what a cool idea for a Fall wreath!! Looks great!!
Thanks! 🙂 You'll probably be seeing more painted burlap from me soon. LOL 🙂
I love this idea. I had never thought of painting a burlap wreath. It is very rustic and would fit wonderful into my country decor. I might have to give this a try.
I hope you do try and that you'll let me know when you do! I'd love to see what you create 🙂
I love this wreath. I love to make things at my house and always looking for new ideas.
Very pretty idea. Even though I don't do wreaths, this is pretty.
You did a really great job with this wreath! Thanks for linking to Less Laundry, More Linking party!
Beautiful and simple fall wreath! I love it! Thanks for sharing at Merry Monday, hope to see you at the party next week.
Very cute, and clever idea to paint it! Thanks for sharing with SYC.
hugs,
Jann
Cute. Thanks for sharing at the To Grandma’s House We Go DIY, Crafts, Recipes and More Link Party! Pinned this! Hope to see you again next week.
This is really cute, I need to make a new fall wreath. Thanks for the inspiration. Thanks for sharing at #HomeMattersParty