Busy Being Jennifer

What doesn't kill you make you blonder

  • Home
  • Blog
  • Shop
  • Contact
  • Recipes
  • DIY Projects
  • Crafts
  • Essential Oils
  • Every Day Boss

June 26, 2014 by Jennifer

No Sew Party Bunting

This post may contain affiliate or brand partner links. Read our full disclosure here.

No Sew Fabric and Burlap Party Bunting from BusyBeingJennifer.com

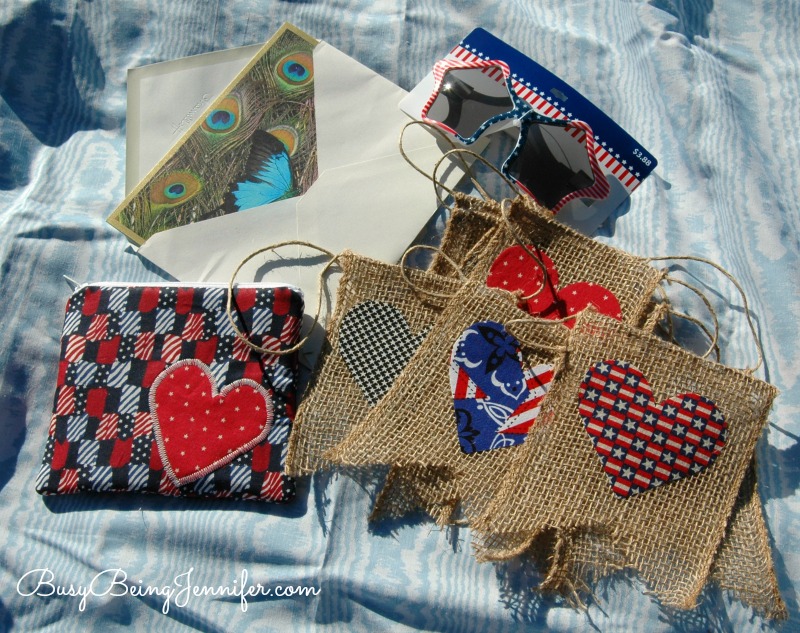
On Tuesday when I was sharing about staying connected with family and the surprise girt I left on my friends front porch I shared this picture of the goodies inside… I’ve gotten a bunch of comments and questions about the No Sew Burlap Party Banner, so I’m sharing the How To Details today! 🙂

What I included in a friends 4th of July Hostess Gift - BusyBeingJennifer.com

First –  Your Supplies…

Heat’n’Bond
5 Fabrics of your choice
Card Stock
5 inch wide Burlap Ribbon
Jute String
Scissors
Glue Gun
Iron

No Sew Party Bunting - BusyBeingJennifer.com

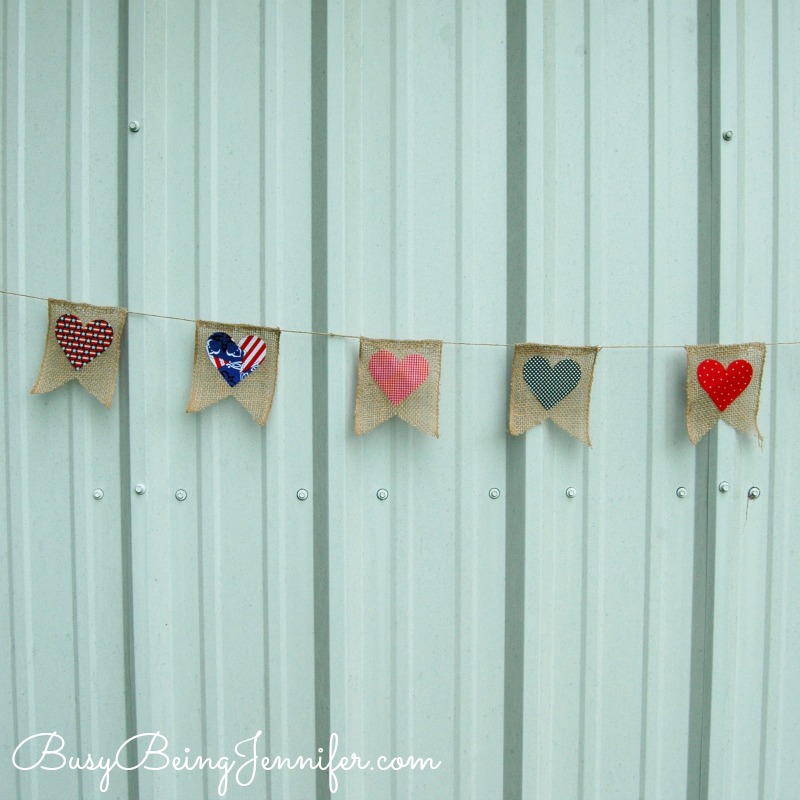
Following the instructions, apply the heat’n’bond to a portion of fabric big enough to cut 2 hearts from (My hearts were roughly 3.5 inches)

Cut 10 8 inch long sections from the burlap ribbon. Fold the ribbon in half-length wise and cut on an angle, roughly 1 inch from the middle.

Using the card stock cut a heart template and trace onto the back of the heat’n’bond-ed fabric. Cut out the hearts and iron onto the center of the burlap pieces.

Now to string it on the jute!  Using the hot glue, add a thin line on the back of the burlap, 1 inch from the top. Place your string on top and let set. Once it has cooled a little, add a few dots of hot glue along the under side of the jute string. Then fold the top over, covering the string. Leave a 3-4 inch space between each of the burlap pieces. Be sure to leave a nice long “tail” at the beginning and end so you can hang or tie it!

Patriotic Party Banner - busybeingjennifer.com

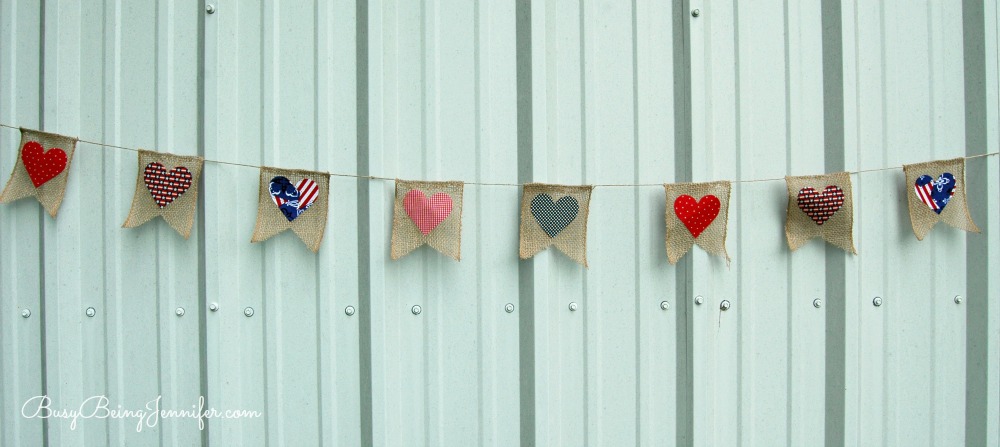
Not a hard project at all! And the best part is that No Sew Bunting that takes roughly 30 minutes to make! 😀


What are your favorite quick and easy projects?

Filed Under: Crafts + DIY's, DIY Projects Tagged With: Crafts + DIY's, handmade

❮❮ Previous Post
Next Post ❯ ❯

Comments

  1. Sarah says

    June 26, 2014 at 11:04 am

    This is great, Jennifer! So easy and quick and I'm thinking of bringing it for a hostess gift. Pinned it!

    Reply
  2. bosserhouse says

    June 26, 2014 at 1:13 pm

    So cute! I just pinned it!

    Reply

Leave a Reply Cancel reply

Your email address will not be published. Required fields are marked *

About Me
  • Facebook
  • Instagram
  • Pinterest
  • RSS
  • Twitter

Search

Categories

As an Amazon Associate I earn from qualifying purchases.

Places I Party...

© 2026 · Busy Being Jennifer · Privacy Policy

We are using cookies to give you the best experience on our website.

You can find out more about which cookies we are using or switch them off in .

Busy Being Jennifer
Powered by  GDPR Cookie Compliance
Privacy Overview

This website uses cookies so that we can provide you with the best user experience possible. Cookie information is stored in your browser and performs functions such as recognising you when you return to our website and helping our team to understand which sections of the website you find most interesting and useful. Read our complete privacy policy here.

You can adjust all of your cookie settings by navigating the tabs on the left hand side.

Strictly Necessary Cookies

Strictly Necessary Cookie should be enabled at all times so that we can save your preferences for cookie settings.