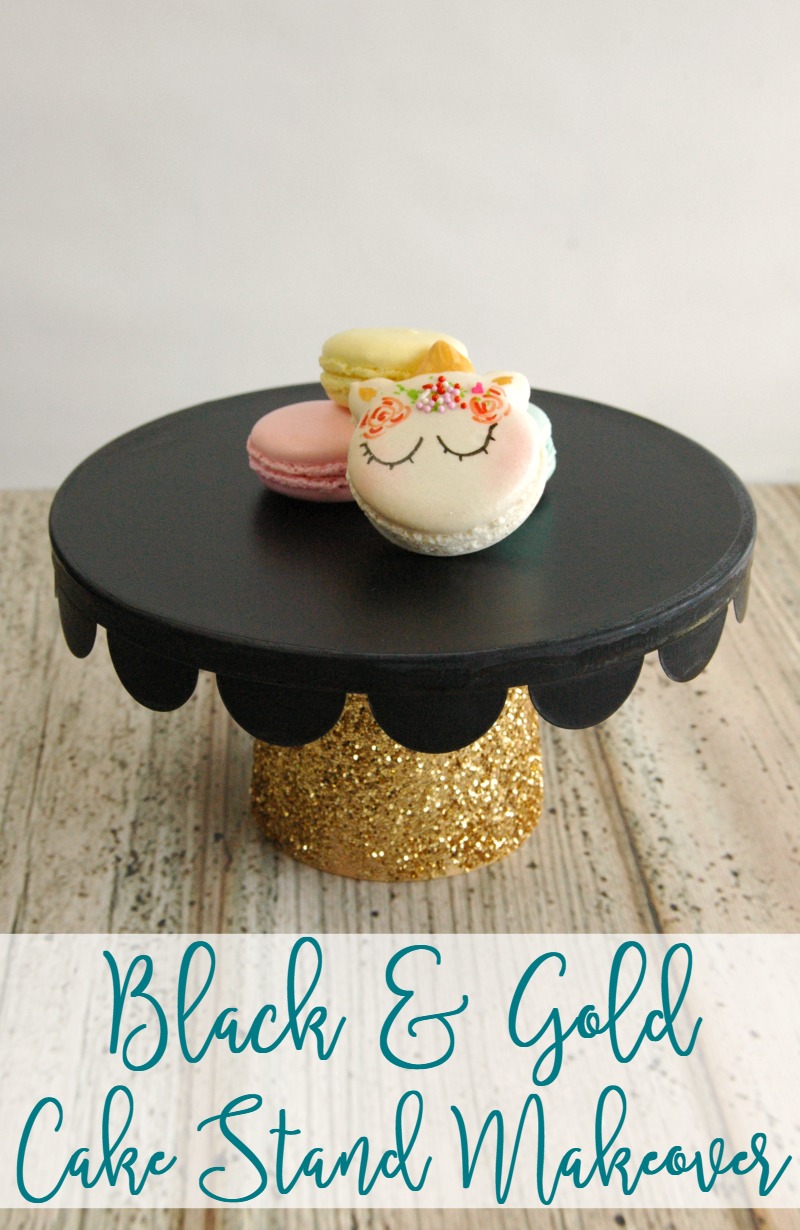
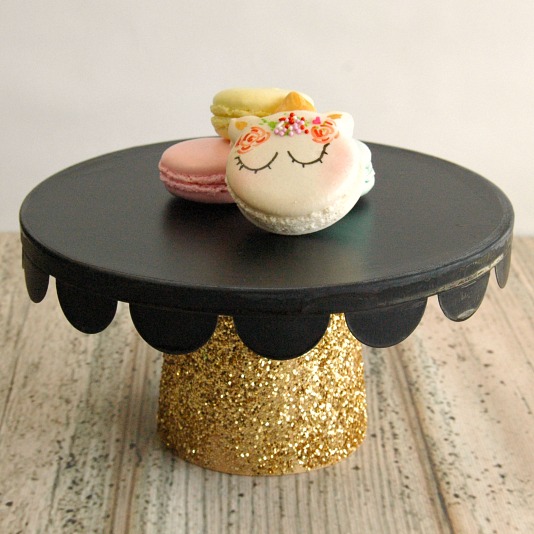
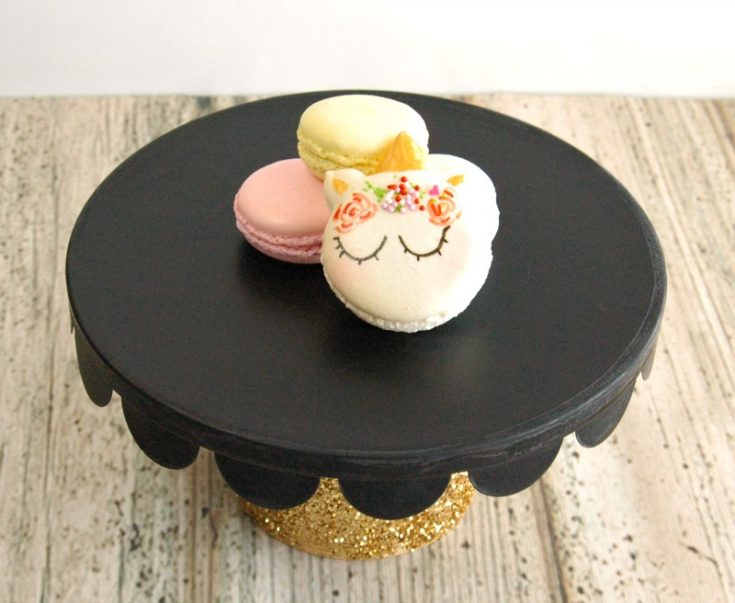
This adorable DIY Black and Gold Cake Stand Makeover is a fast and fun craft you can do in just a few minutes–and it’s cheap. I’ll let you in on a little secret: everything came from the Target Dollar Spot.
I love the Target Dollar Spot! And I know that I am not alone with my obsession 😉 A couple of months ago I snagged a cute little cake stand with a wooden base, but I was NOT a fan of the red and boring light colored wood base. Sooooo…. This DIY Black and Gold Cake Stand Makeover was born!
This is the BEFORE cake stand. Practical. Sort of ok. But I am sure that you’ll agree its a little lack luster…
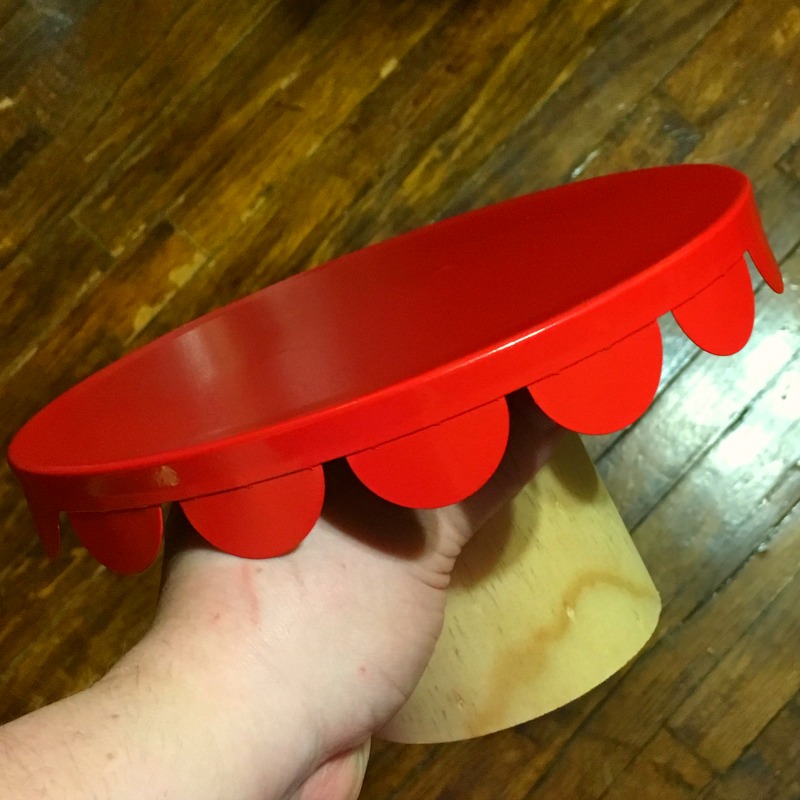
Boring!
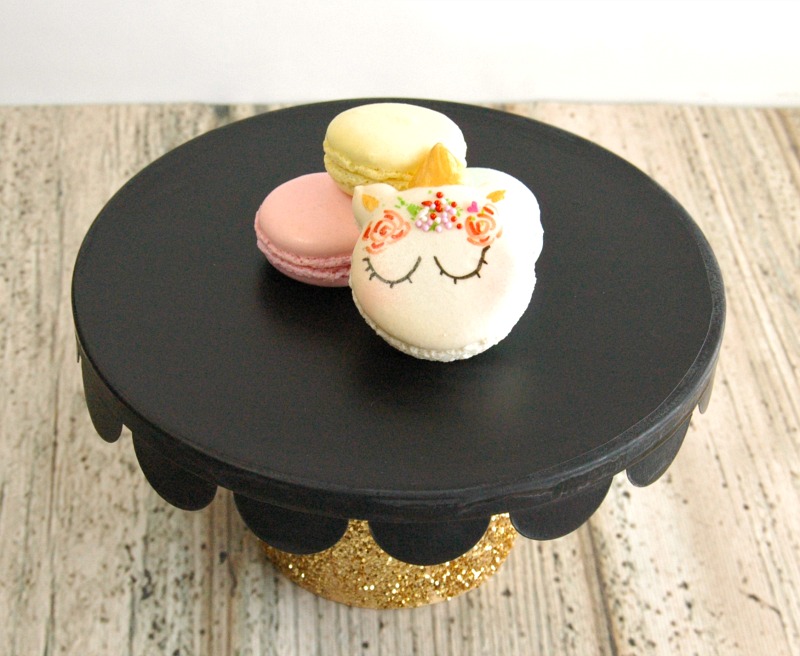
So with a little chalk paint, gold glitter and ingenuity, this fun and sparkly DIY Cake Stand quickly replaced the previous boringness!
This post includes affiliate shopping links. Purchasing through them, at no cost to you, helps keep this blog running and coffee in my mug 😀
What You Need for This DIY Black and Gold Cake Stand Makeover
This a really easy project, and goes fairly quickly, with the exception of letting things dry. Want to give your own boring cake stand a glittery makeover? Here’s what you need (most of which you can find at the craft store):
- Chalkboard contact paper
- Black acrylic paint
- Gold glitter
- mod podge (or some kind of glue)
- clear spray paint
Step #1 – Use the black acrylic paint to cover the bottom and sides of the cake plate part of your stand. I also went up and over the top edge by about half an inch to make sure there was no red showing through. Set aside to dry.
Step #2 – Coat the stand with mod podge and sprinkle with glitter. Set aside to dry.
Step #3 – Spray the whole thing with clear spray paint to seal and protect. I doubled up, with 2 coats to seal and keep the glitter from falling out.
Step #4 – Place the cake stand upside down on the contact paper and trace the top. Cut out the circle, inside the line so that its slightly smaller than the cake stand top. Carefully peel the backing off and apply the contact paper to the top, smoothing out bubbles as you go.
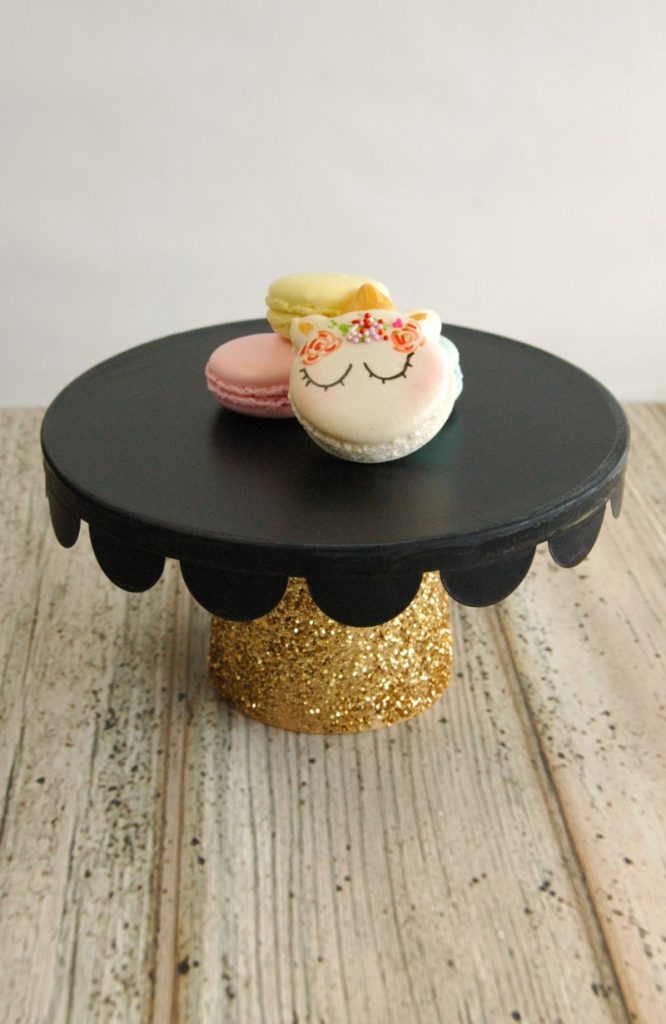
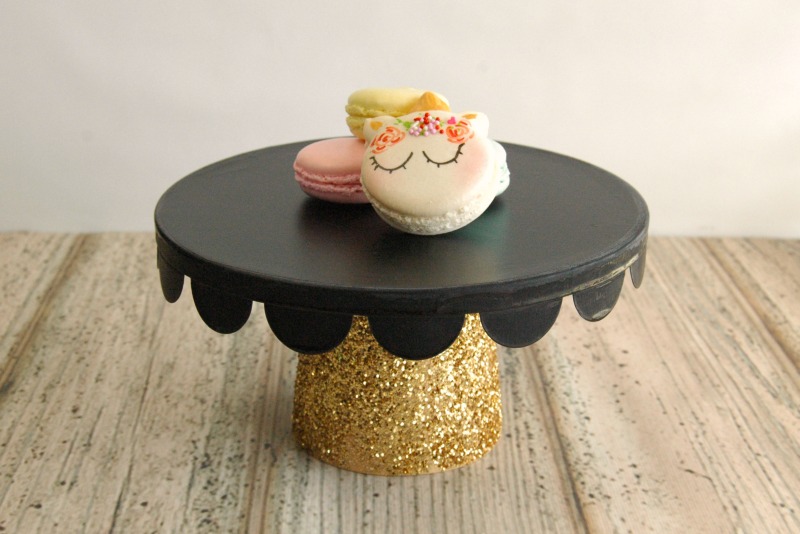
Voila! Now you’ve got your own DIY black and gold glitter cake stand! And the best part is that the contact paper is food safe and wipe-able! You can place your cake directly on top of this cake stand and not have to worry about any ickiness or chemicals touching your food 🙂
This is one of those great ideas that’s perfect for birthday parties and baby showers, but it also works great for every day. And if you’re don’t love cake the way that I do, this DIY project can be used as a candle holder, a nice standing idea you can use for a coaster for tea cups or wine glasses.
But don’t stop if you can’t find this cute base at the Dollar Spot. Grab a plastic plate and a paper tube from the thrift store or dollar store–don’t overthink it! You have got this.
DIY Black and Gold Cake Stand Makeover
This adorable DIY Black and Gold Cake Stand Makeover is a fast and fun craft you can do in just a few minutes--and it's cheap. I'll let you in on a little secret: everything came from the Target Dollar Spot.
Materials
- Chalkboard contact paper
- Black acrylic paint
- Gold glitter
- mod podge
- clear spray paint
Tools
- Paintbrush
Instructions
- Step #1 - Use the black acrylic paint to cover the bottom and sides of the cake plate part of your stand. I also went up and over the top edge by about half an inch to make sure there was no red showing through. Set aside to dry.
- Step #2 - Coat the stand with mod podge and sprinkle with glitter. Set aside to dry.
- Step #3 - Spray the whole thing with clear spray paint to seal and protect. I doubled up, with 2 coats to seal and keep the glitter from falling out.
- Step #4 - Place the cake stand upside down on the contact paper and trace the top. Cut out the circle, inside the line so that its slightly smaller than the cake stand top. Carefully peel the backing off and apply the contact paper to the top, smoothing out bubbles as you go.
I am so in love with this DIY black and gold glitter cake stand! I want to use it every day! Hmmm… cake every day… not a bad idea 😉
Love it too…..and it could be cute as a plant stand as well. Thanks for sharing on craft schooling sunday!
I want to have a party just so I can have an excuse to make and use this cake stand! I love it… especially the gold glitter! Great idea, and thanks for sharing!
Cheers,
Lisa
The black and gold is definitely an improvement!
I love you girls who can see the possibilities in a “meh”item from the Target dollar section. Your makeover is so pretty and fancy!
What an easy but effective way to revamp your cake stand. Thanks so much for sharing with us at #overthemoon link party. I’ve shared on social media. Have a great week and see you next week.
Sue
Sizzling Towards 60 & Beyond
What a beautiful cake stand! I love the glitter base 🙂
Such an awesome upcycle! Thanks for sharing at the #InspirationSpotlight party @DearCreatives Pinned & sharing. Have a happy 4th of July.
That is gorgeous!
Thats a lot cuter!
What a great makeover Jennifer. Thanks for sharing at Creative Mondays, pinned and featured on this weeks blog hop.
This is so pretty! Pinned. Thanks for sharing at Merry Monday!
Love the makeover! It looks so festive now and great for so many occasions. Thanks for sharing on To Grandma’s House We Go!
They certainly look nice with black and glitter, Jennifer! Great job indeed..