Can you believe its already August and some kids are already back in school?!?! This time of year always seems to creep up and suprise me out of nowhere! While I don’t have kids of my own, I do love all the deals on the school supplies! I love to stock up on pens, paper, and notebooks! But of course once I’ve got them, I can’t leave well enough alone! I’ve got to put my personal flare on it, like this DIY notebook cover!
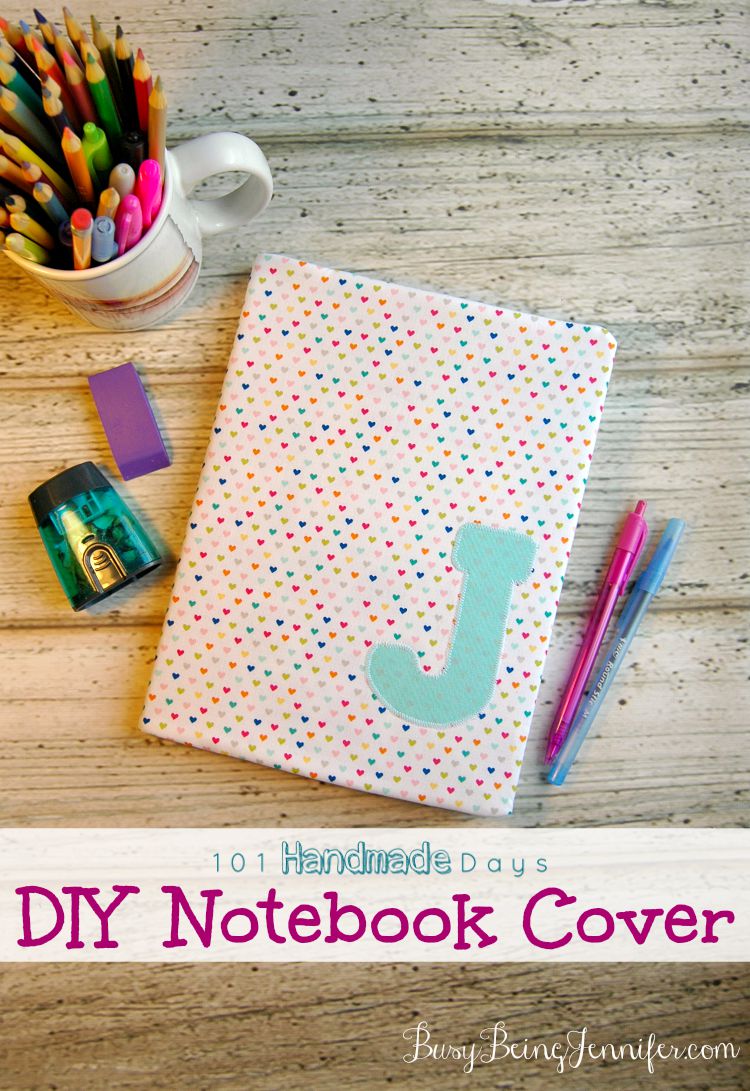
No boring composition note books around here!! I’ve recovered mine, and the best part? This DIY notebook cover is reusable! Yup!! When this particular notebook is full of thoughts and random scribbles, I can slide this notebook cover off and slip it right onto a new notebook!
Want to make an awesome DIY notebook cover for yourself? Here’s what you need…
Regular size composition notebook
1/2 yard of your chosen fabric
scrap piece of coordinating fabric at least 4 inches square
4 inch square piece of heat’n’bond fabric adhesive
1/2 yard batting or felt
ruler
cutting mat
rotary cutter
fabric marker
iron
thread
scissors
straight pins
sewing machine
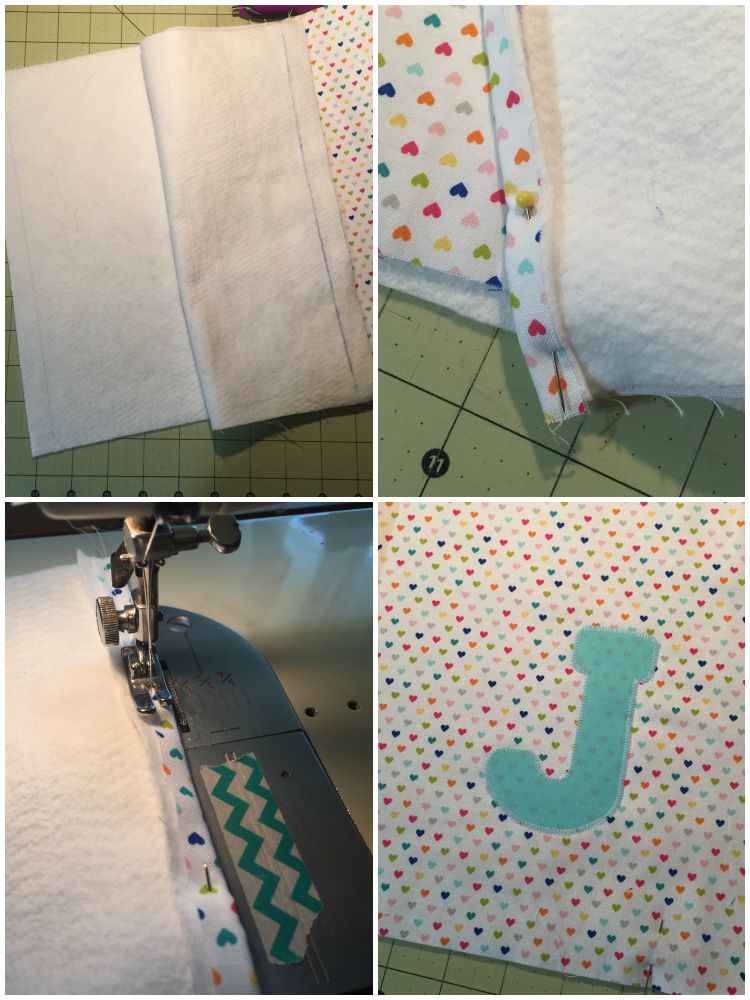
Start by cutting a 28 by 12 inch rectangle piece out of the fabric and the batting. Iron them flat.
Layer the fabric on top of the batting. On the back side of the batting, draw a line 1/2 from both ends with the fabric marker. Fold both the batting and the fabric to that line to create a straight 1/4 inch fold. Iron flat, pin in place and sew down.
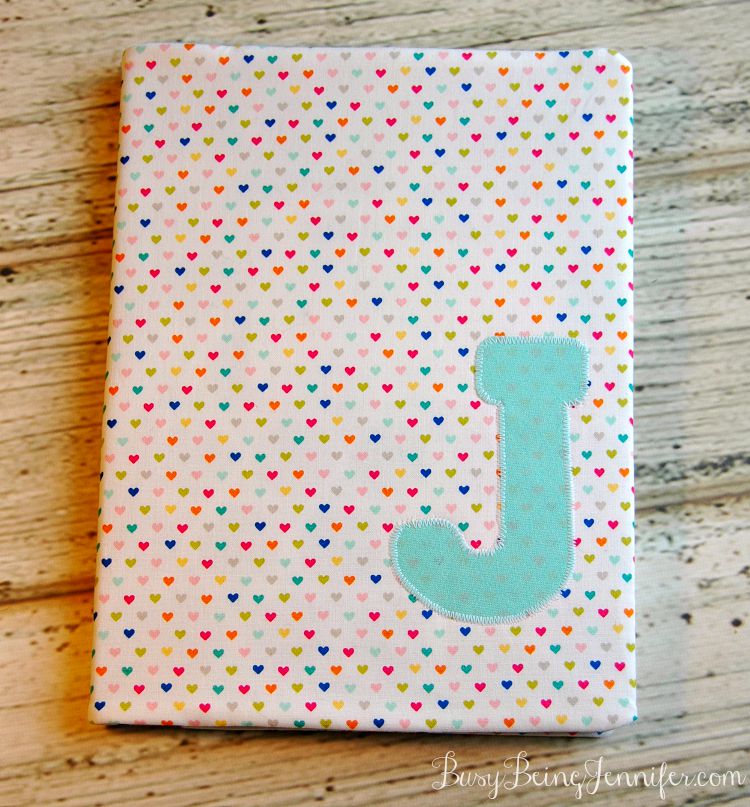
I wanted to personalize my notebook cover, so I decided to add my first initial! To do this you’ll need that scrap of coordinating fabric, some sort of stencil to trace and the heat’n’bond.
Apply your heat’n’bond to the back side of your coordinating fabric. Using the fabric marker, trace your letter onto the right side of the fabric. Cut out and set aside. To find the right spot on the front of your notebook cover, place your cover fabric side down, then grab the composition notebook and place it on top of the batting. Fold the ends of the cover in and then carefully close the notebook, temporarily covering the book. Decide where you want the letter to go and pin in place.
Remove the note book. Following the directions for your heat’n’bond, apply the letter to your note book cover. Zig Zag stitch in place. **Tip: Go slowly around the corners, it helps keep the stitching even!
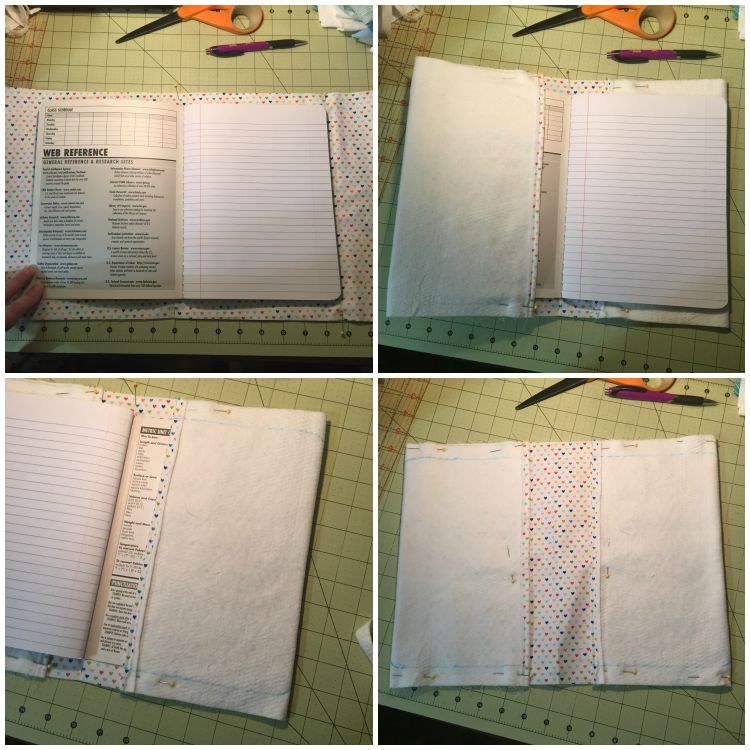
Once you’ve applied you initial, Fold your cover in half and mark the center with a straight pin. Now lay the cover on a flat surface, fabric side down. Open your notebook and lay it on top, centering the spine to the straight pin.
Fold the end of the cover in and snug it up against the edge of the notebook. Pin in place. Repeat on the other side.
While the notebook is still in there, use your fabric marker to trace its outline. On the batting only.
Carefully slip the note book out. Add a few more straight pins to secure.
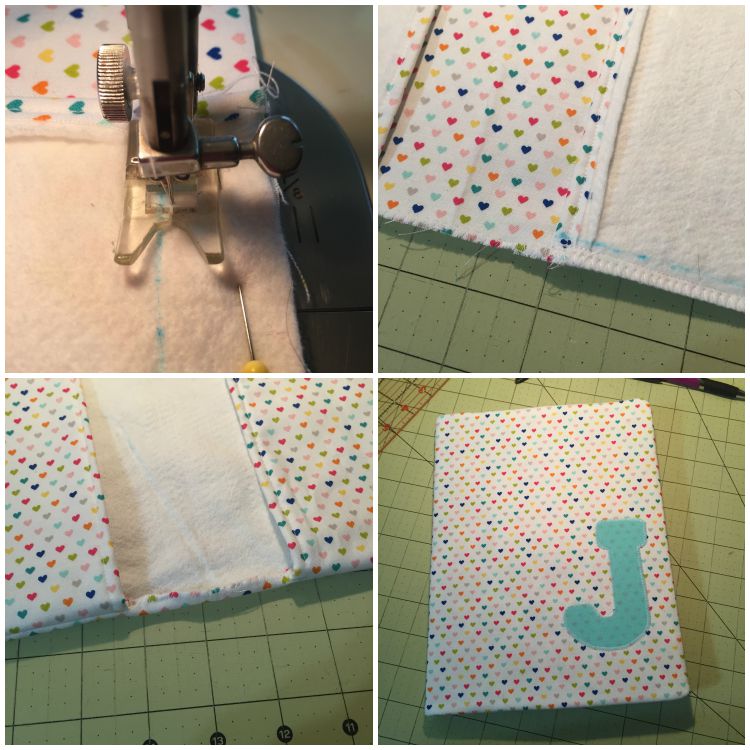
Using the traced line as a guide, sew just to the outside. This leaves enough room for the seam. Reinforce the “pocket” ends where the folded edge is.
Trim away the access fabric, leaving a 1/4 seam.
Zig Zag stitch all the way along the seams from one end to the other. (Shown above) This secures the center fabric and batting in place and adds a little more stability and durability to the notebook cover.
Turn right side out.
Carefully slip over your notebook.
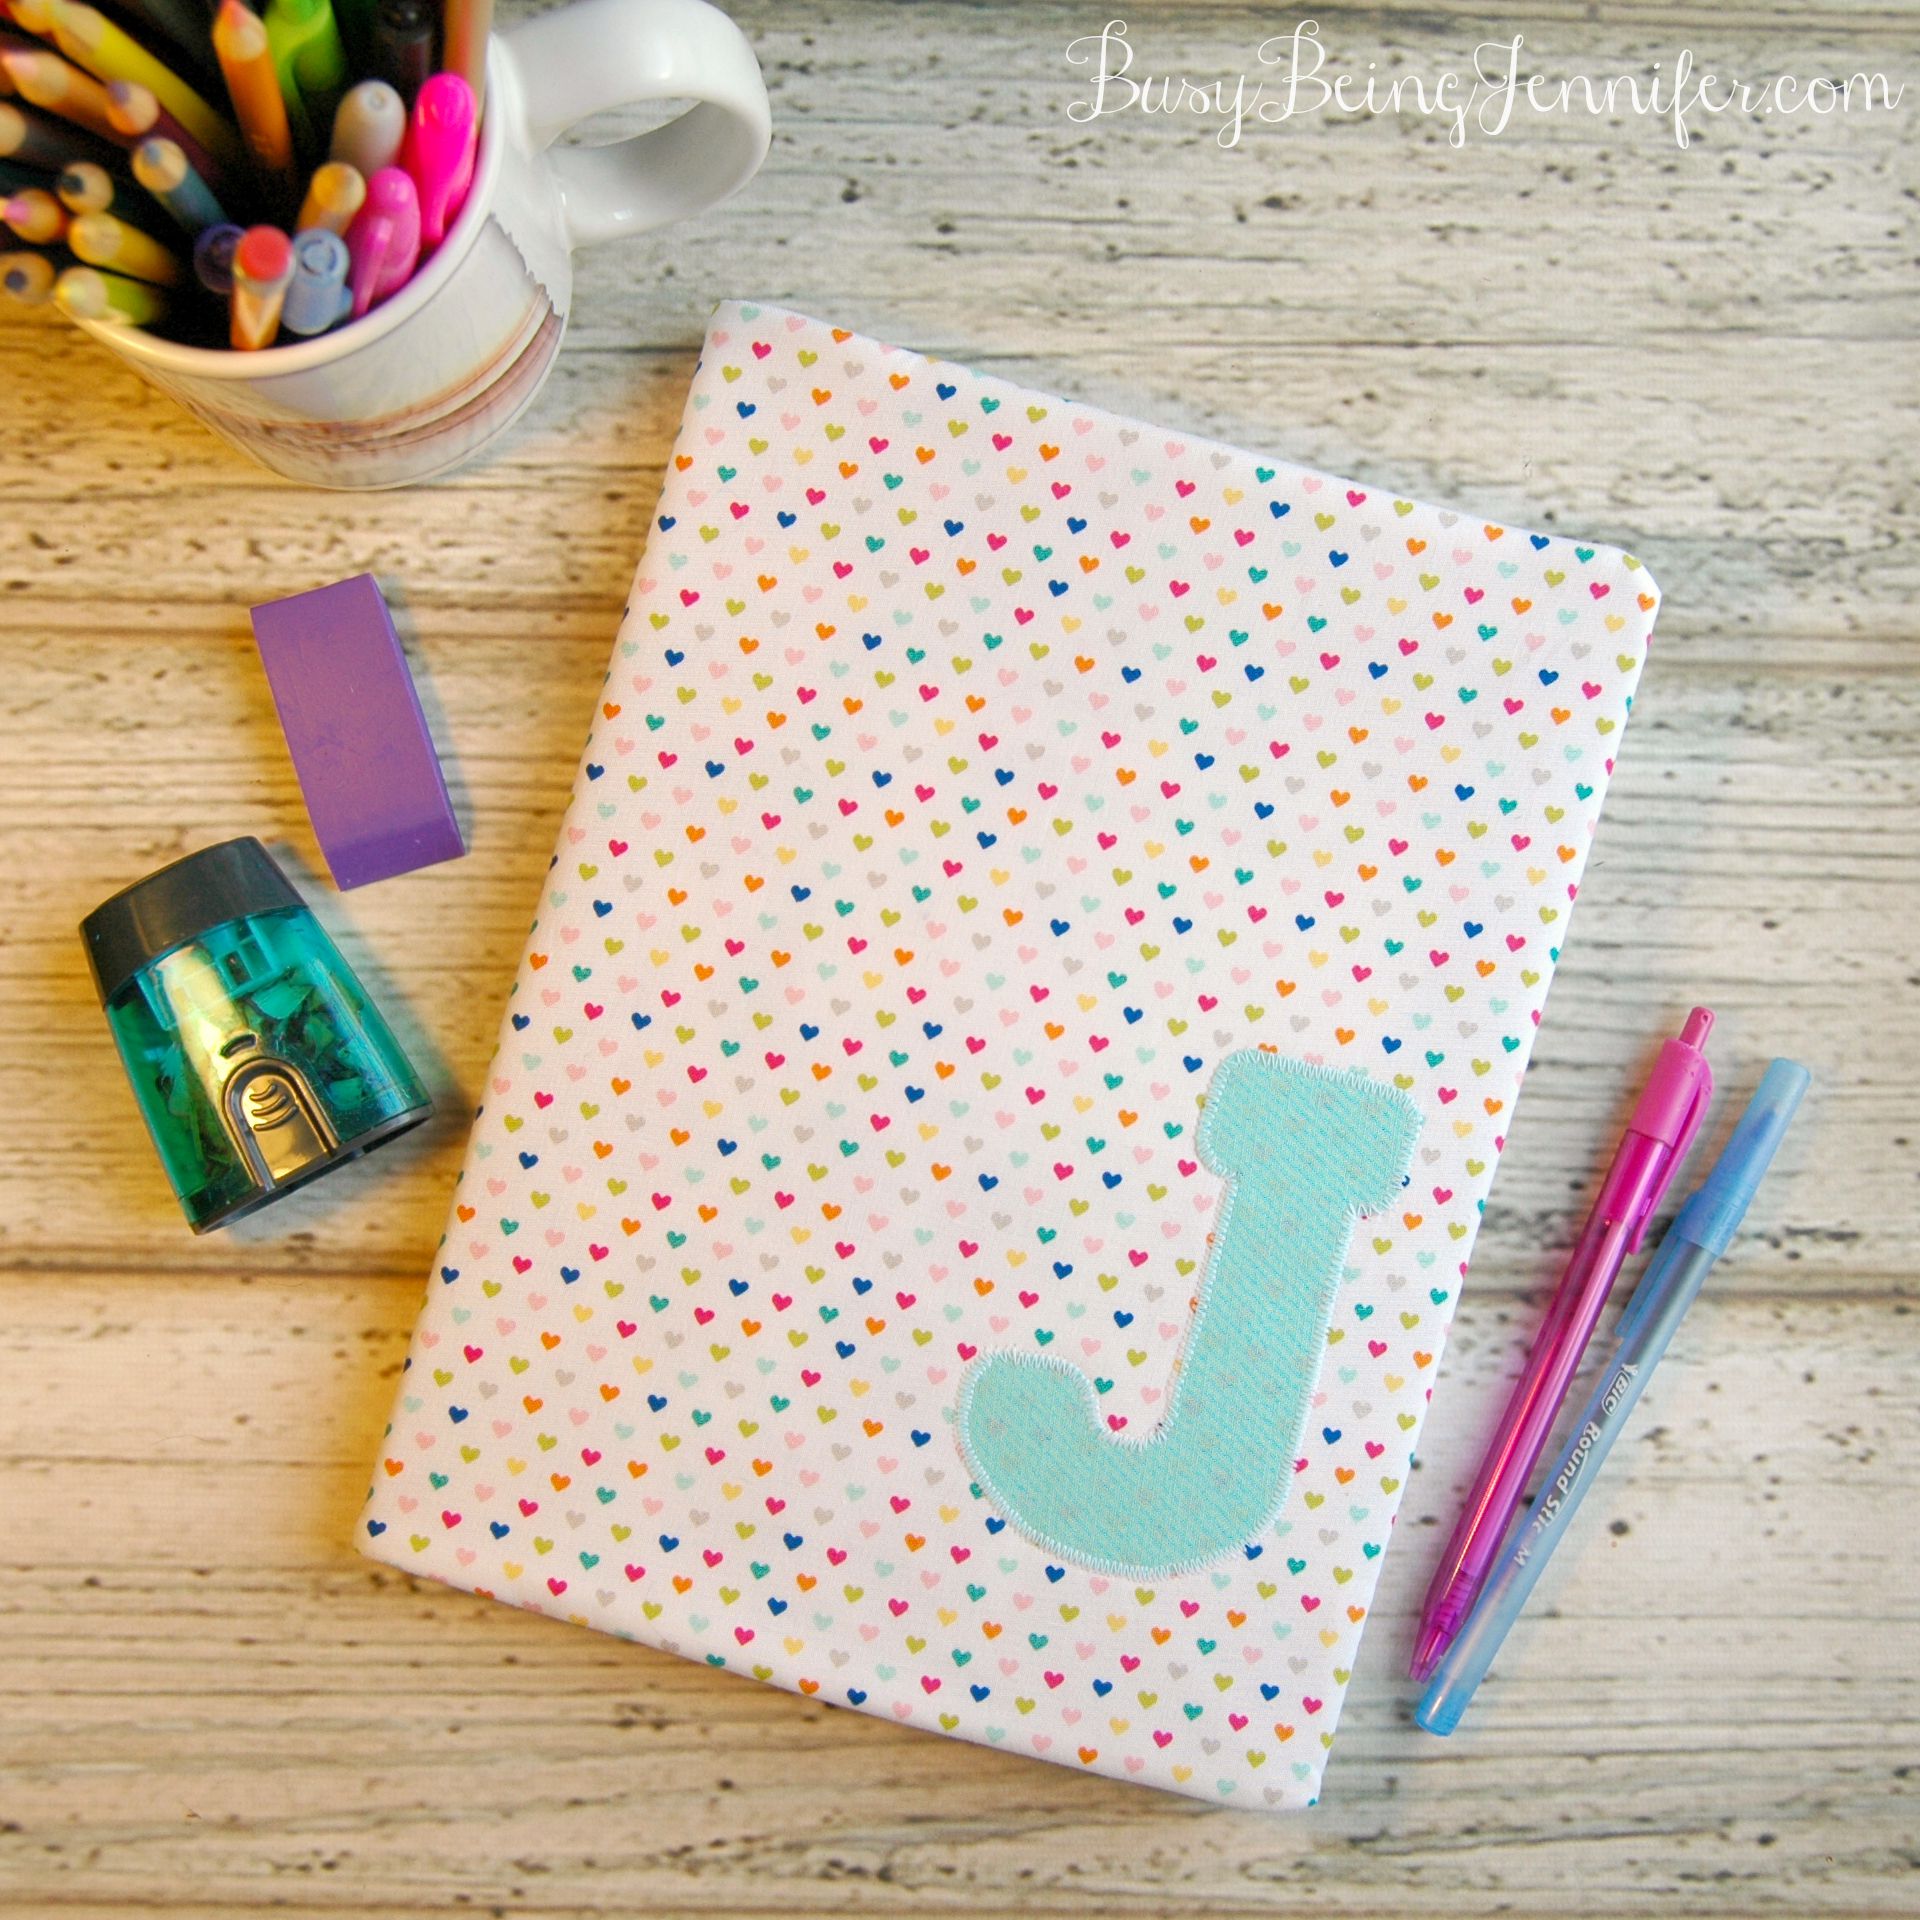
You’ve completed your DIY note book cover!! OH and you can use the flaps that cover the cardboard of the note book as pockets too!
If you use this tutorial to make your own DIY Notebook Cover, I’d love to see it! Leave a comment below with a link! 🙂
Oh my gosh! Can you PLEASE sell these in your shop?! I really want one!!! Stacie xo
I adore these!!! 🙂 It’s so hard to find a cute notebook/spiral these days and this is the perfect fix!
PS – I think my camera strap is that same (or very close to) fabric. Love it!
This is so cute! When I started school, I stopped all of my extra creative to-do’s and haven’t been able to pick them up since I graduated. I must get back to them…Thanks for sharing…
Such a cute idea! I am a total notebook hoarder so I love this! Looks easy to do. Thank you for sharing!
Oh my! I never thought to applique them before! Love it, thanks for the tutorial. Going to pin it for Christmas Presents!
Love this idea! Love the simplicity and I love that is reuseable!
Ooh, very pretty! I have yet to learn how to use the sewing machine, but that is one of my goals this year. So I will save this project on my DIY Pinterest board for later. I am a notebook addict, I just have to try this!
Very cute! My skill set is not quite there. I’ll have to buy it!
That is just adorable! And I’ve been seeing the need for bookcovers (I’ve been repairing books as I pack them…so many just falling apart). I really need to learn to sew.
This is so adorable! I’m terrified of the sewing machine or I’d try my hand at it lol.
Super Cute Idea! I love how yours turned out. Thanks for sharing!
we are going to make these today… i’ll share a pic when we are done
YAY!!! I can’t wait to see them!
Love this now I don’t feel bad buying the cheap ugly notebooks lol
This turned out so nicely! I hadn’t thought to use batting, so I love that idea! 🙂
What a great idea! Now you can just buy the cheap, ugly notebooks and save money. I love using pretty things, it makes me feel so much more productive!
What a cute notebook cover!
Fun idea! And looks pretty straighforward too. My 11 year old is into projects of all kinds right now, often ones that include sewing and this just might be a great project for her.
Thanks for sharing with us at the #HomeMattersParty
Super cute and lovely idea.I really like the outcome.Thanks for sharing
Thanks for sharing your cute notebook cover. Pinned & shared. Hope to see you again soon. Thanks for joining the Inspiration Spotlight Party. Have a great week ahead.
I love making my notebooks pretty and this is a great way of doing it. Thank you so much for sharing at Share It One More Time. Cathy
So cute, we have so many boring composition books lying around here, what a fun way to spruce them up and breathe life into them. Thanks for sharing with Small Victories Sunday Linkup. Pinning to our linkup board and hope you found some great posts to visit this week!
Loving this! You are so talented. Thanks for sharing this at our party. Pinned and tweeted. I hope to see you on Monday at 7 pm, so we get to party with you again! Lou Lou Girls
These are super cute! I have just the books in mind to cover. Thank you for sharing on #HomeMattersParty!
I love covering composition notebooks! I’ve never tried it with fabric. Yours is so cute!
Oh this is so cute and I love the letter. A great gift idea too! Thanks for sharing at #overthemoon link party.
These notebook covers are so cute!
I found a journal that I want to use as a garden journal/planner and I’ve been wondering how I could make the cover more gardeny. This looks like a great option for doing that!
What a cute notebook cover!