Guess what? Christmas is exactly 4 MONTHS from today! I’m finishing off the Christmas in July section of my 101 Handmade Days project with a bang! Or should I say a tassel?!?! A Christmas Yarn Tassel Garland to be exact 😀
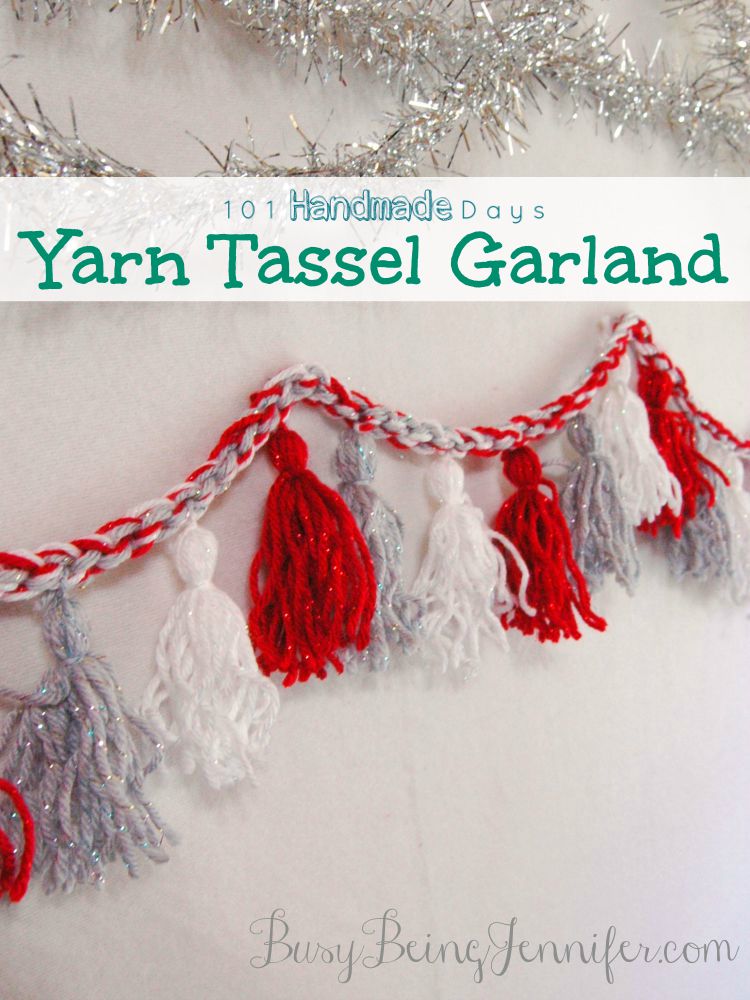
I am SO in love with the way this tassel garland turned out. Have you ever had an idea in your head, but you’re not quite sure how to make it a reality? And then you finally figure it out and its even better than you imagined? That’s exactly went down with this tassel garland 😀
Making your own Tassel Garland is pretty easy! And if you have some yarn, than you probably already have everything you need!
Supplies…
Yarn – in as many shades as you desire. I used Caron Simply Soft Party yarn.
Scissors
Piece of cardboard 3 inches wide.
8 mm and 3 mm crochet hooks (optional)
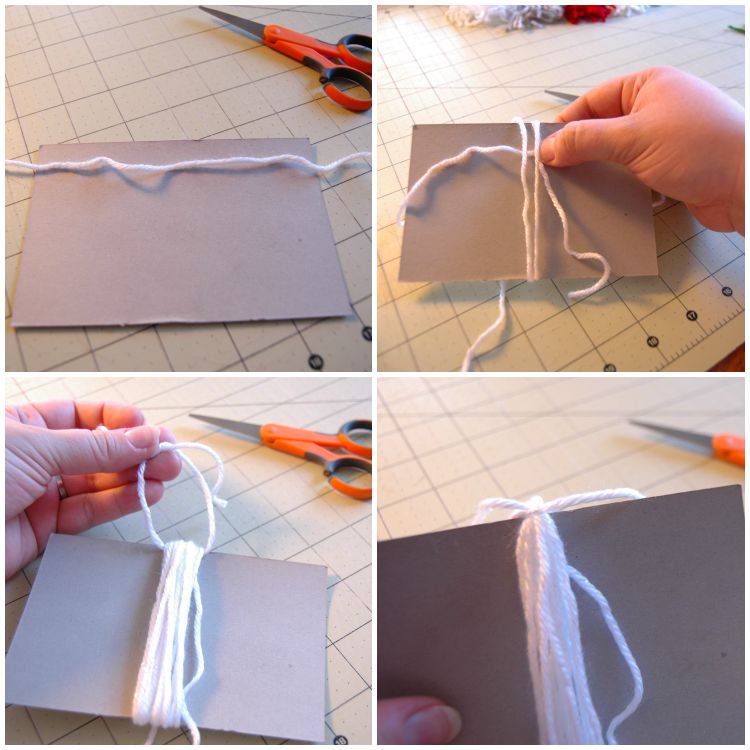
We’re gonna start with the tassels! First, cut two 6 inch pieces of yarn. Set one across the piece of cardboard. Set the other piece aside.
Using your thumb to anchor the the end of the yarn AND the short piece you laid across earlier.
Wrap the yarn around the cardboard, not too tightly, but not too loosely. I wrapped the yarn around 15 times.
Take the ends of the piece of yarn you laid across the cardboard and tie them in a tight knot across the top.
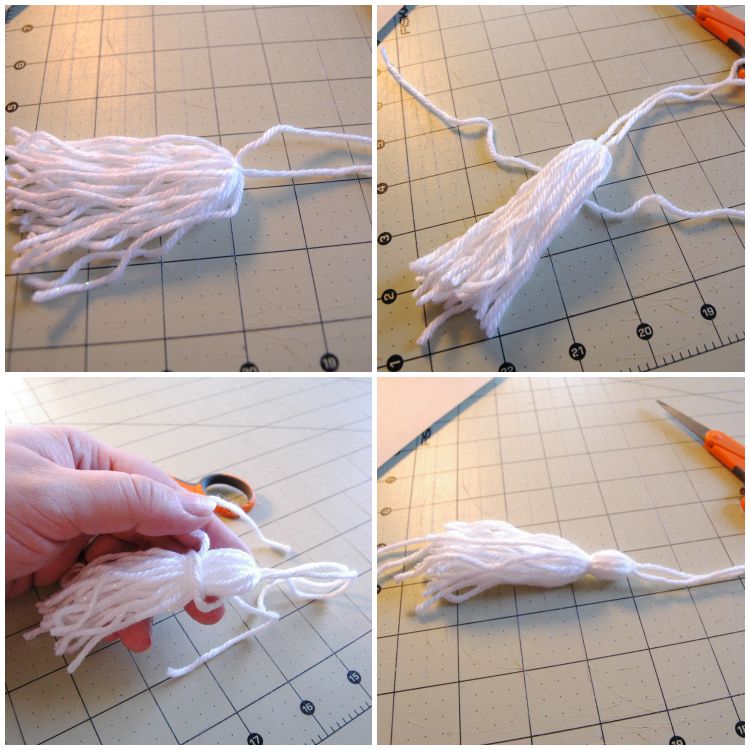
Carefully work the scissors under the yarn on one side of the cardboard and trip the ends of your tassel.
Smooth out all the lumps and bumps in the yarn.
Lay the knotted yarn on top of the second 6 inch length of yarn as shown.
Tie the 6 inch length in a tight knot, about half an inch from the top.
Trim the end of your tassel.
Repeat for as many tassels in as many colors as you desire.
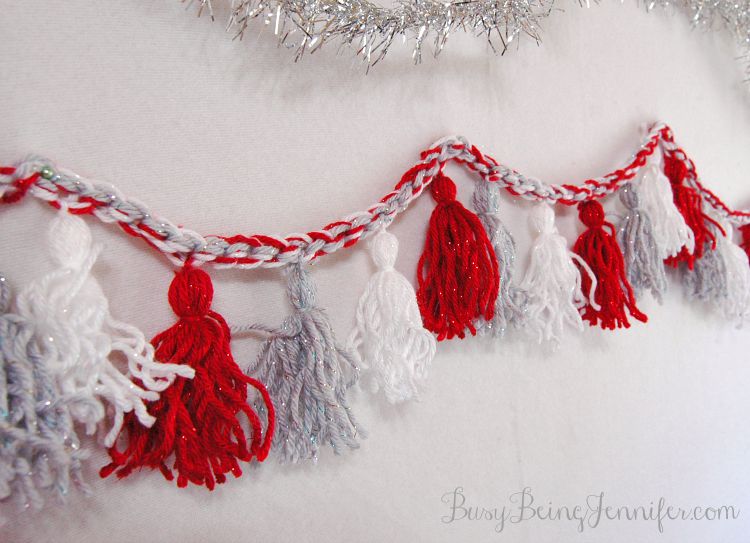
Once your tassels are made, set them aside to create your chain for the garland. I created 30, 10 in each color.
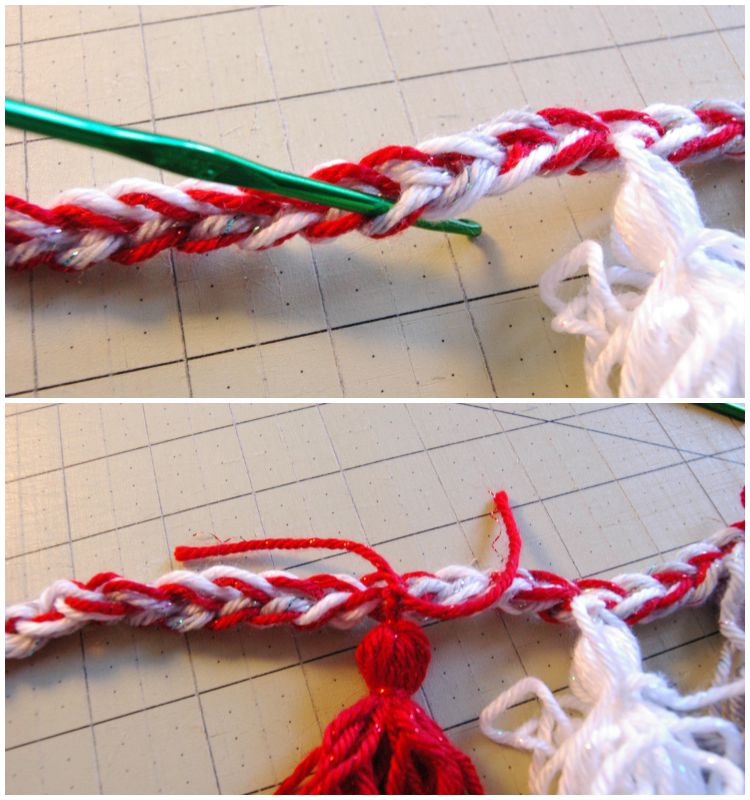
Take 3 or 4 of your yarn colors and the large 8 mm crochet and Chain 120.
Using the smaller crochet hook, pull on of the ends of the tassel top through the bottom loop and tie securely.
Skip 3 holes and add the next tassel in the 4th hole. Continue along, alternating colors until you reach the end.
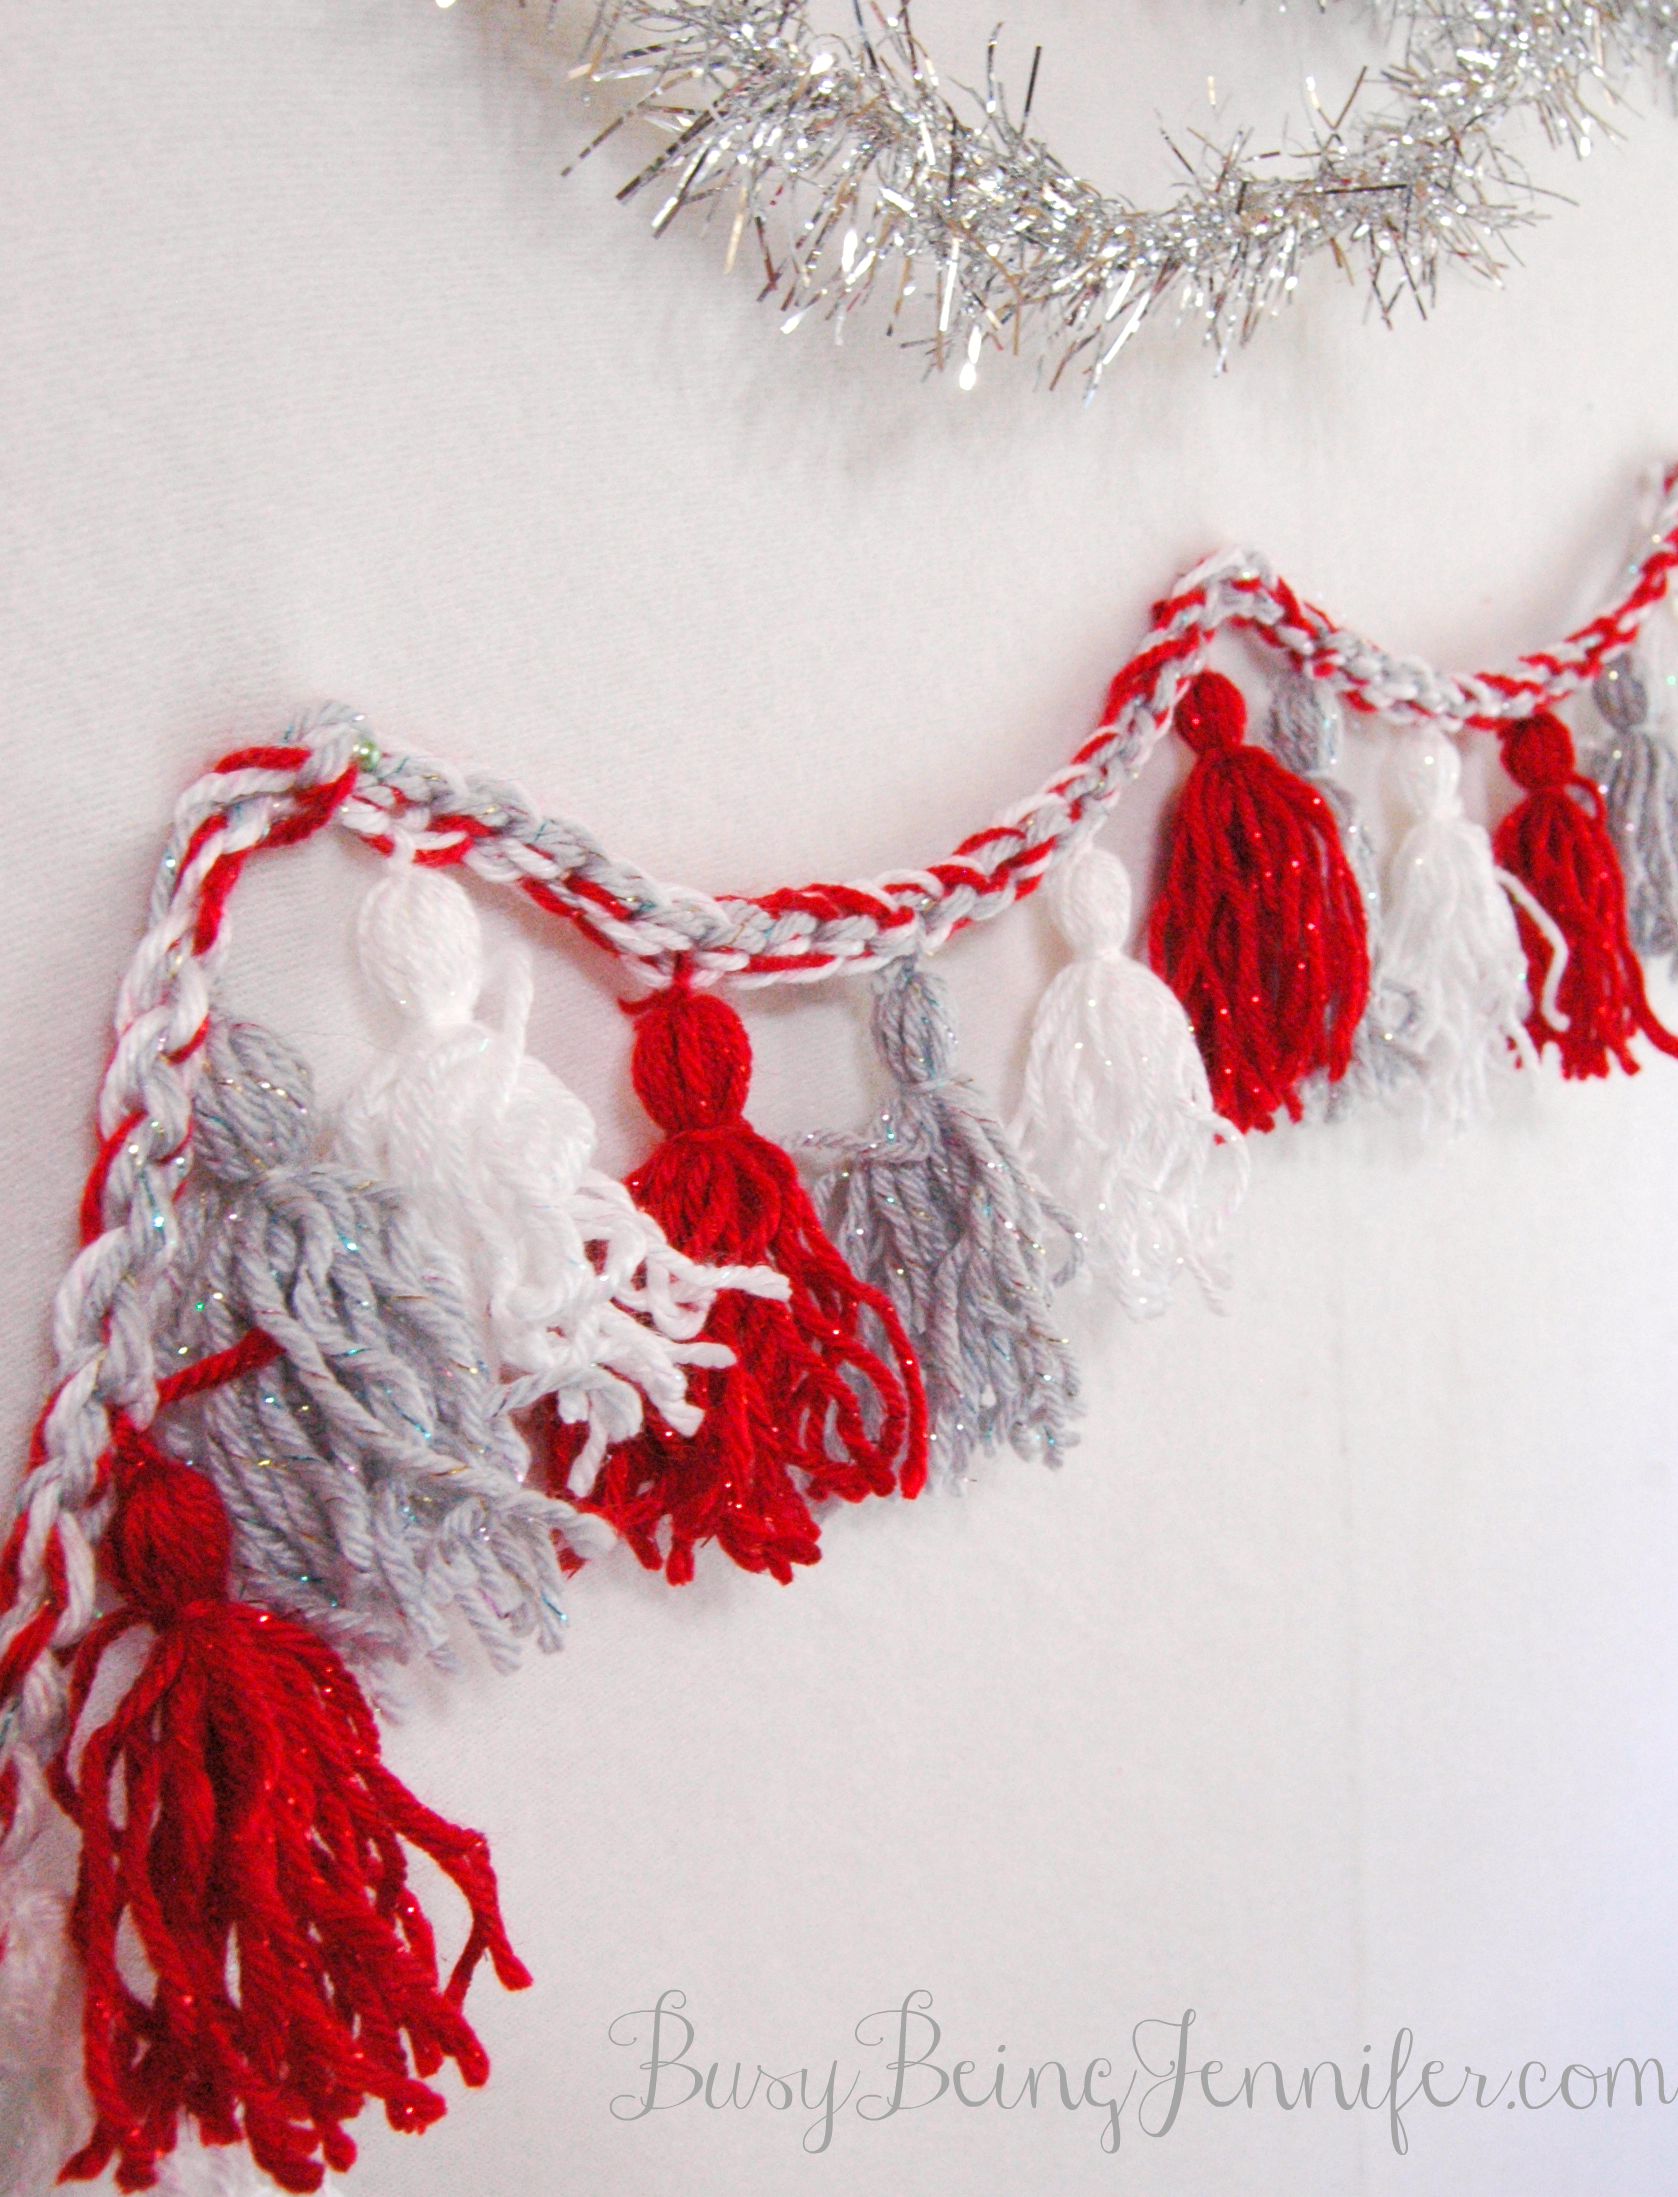
Hang your tassel garland and enjoy!
I can’t wait to string mine along our tree this Christmas! Oh and I might have to make another one to hang around my booths at the craft shows and markets I have planned this fall!
I love it! And you could do this for every major holiday (green, purple and gold for Mardi Gras; yellow, orange and brown for Thanksgiving; pastel blue, pink and purple for Easter; black, orange and purple for Halloween; red, white and blue for all the summer holidays…)
Although, Christmas being 4 months away…..yikes. I’m not ready!