One of my favorite things about the beginning of the end of summer, is all the deals and sales on back to school supplies! I adore stocking on everything I could possibly need for the rest of the year and coming up with fun and creative ideas. Like this fun Back to School Crayon Wreath!

Here’s what you need to make your Back to School Crayon Wreath:
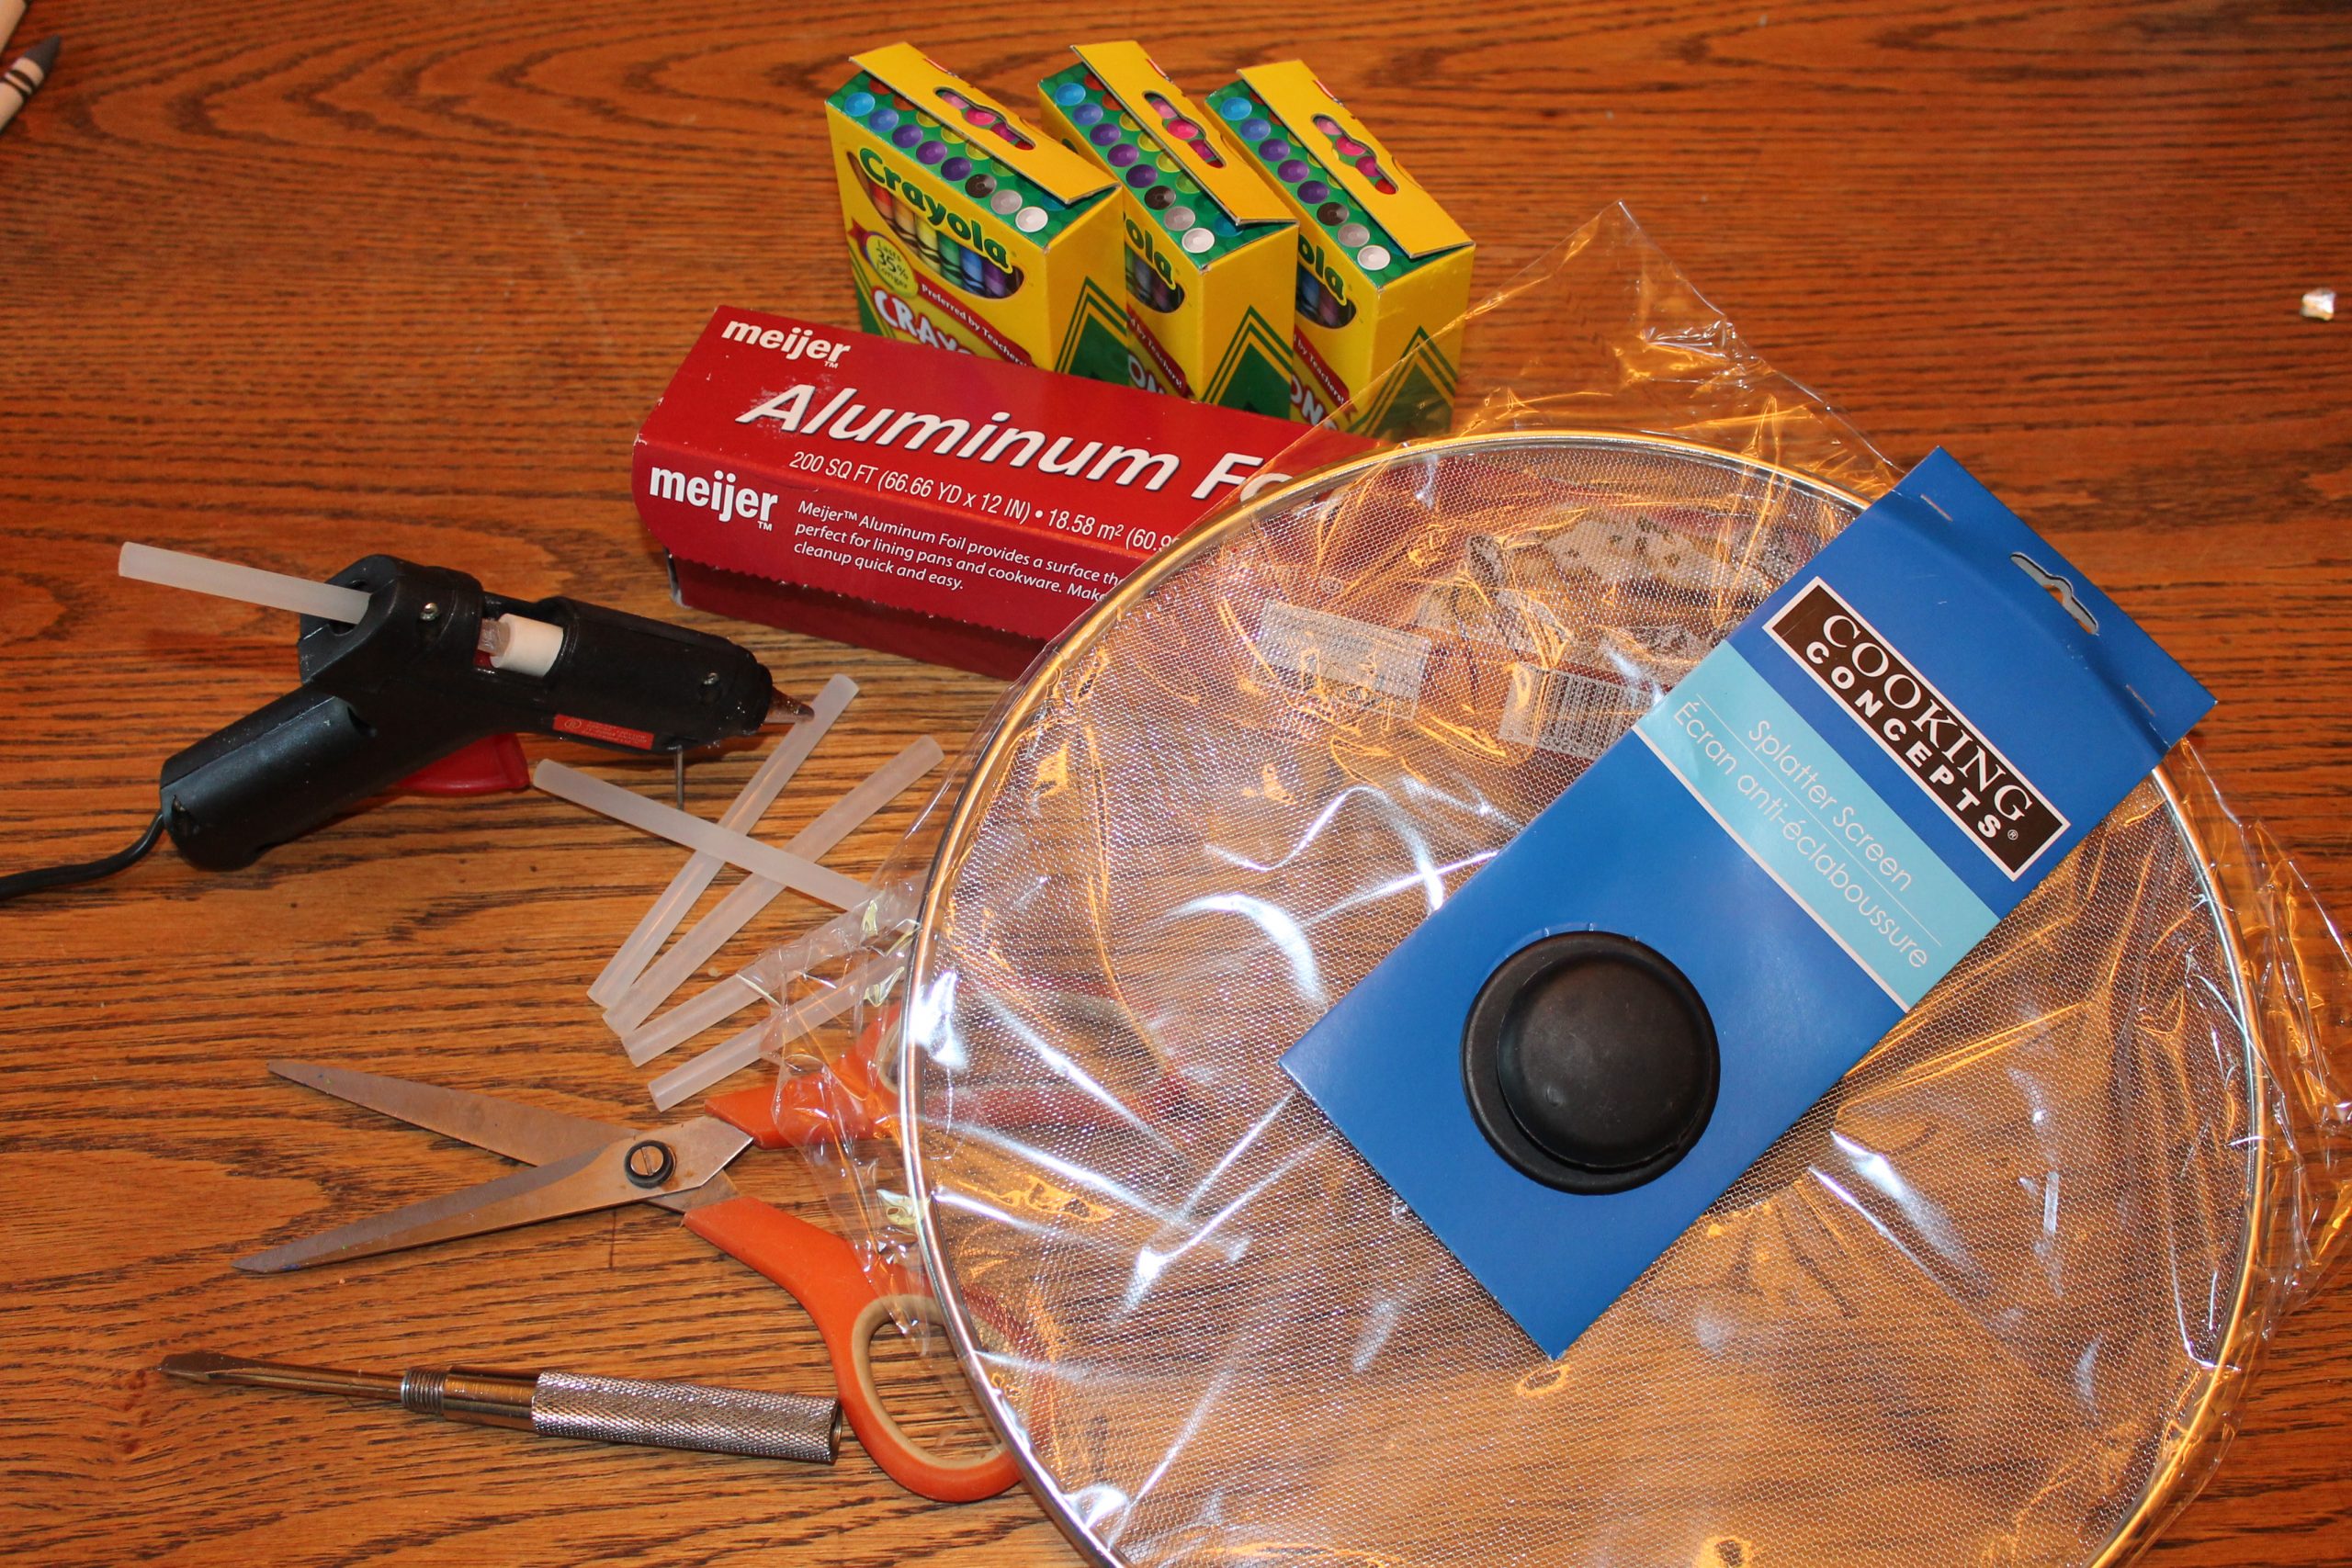
1 Dollar store “splatter guard”
3 Box crayons
Hot glue/gun
Pencils, scissors, glue sticks or other school items to decorate
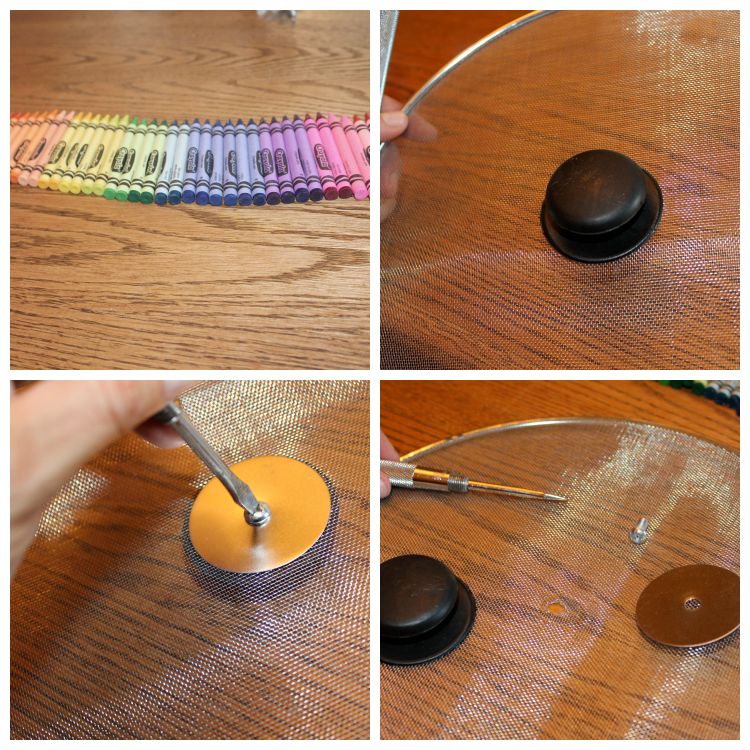
Directions:First lay your crayons out in color order and set them aside. Then take the splatter guard and remove the handle from lid. Then place lid on foil.
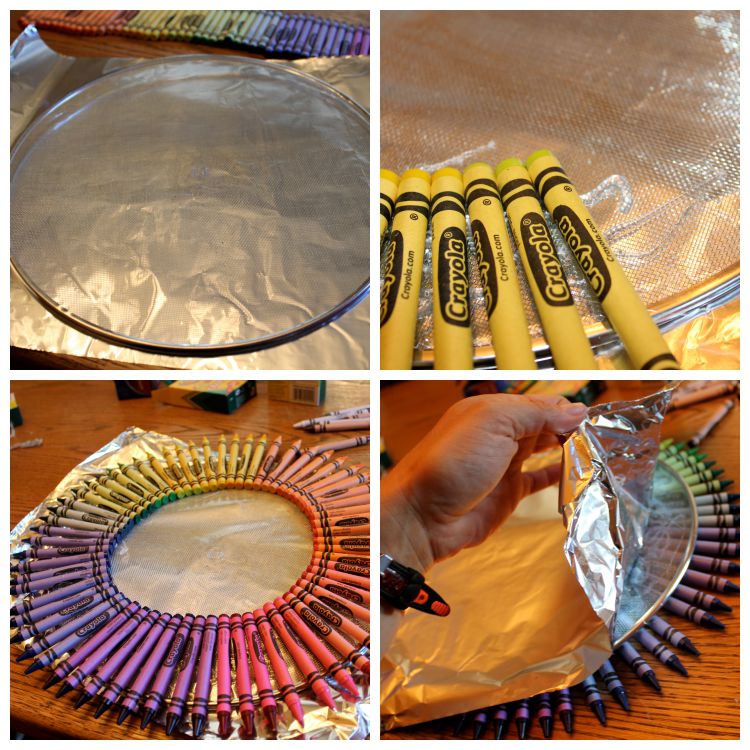
Using hot glue gun glue crayons around edge. Place the crayon about 1/3 of the way off the lid. Continue in a circle. Once all crayons are secured flip everything over. Peel off the foil and run a thick layer of hot glue around the base of the crayons.
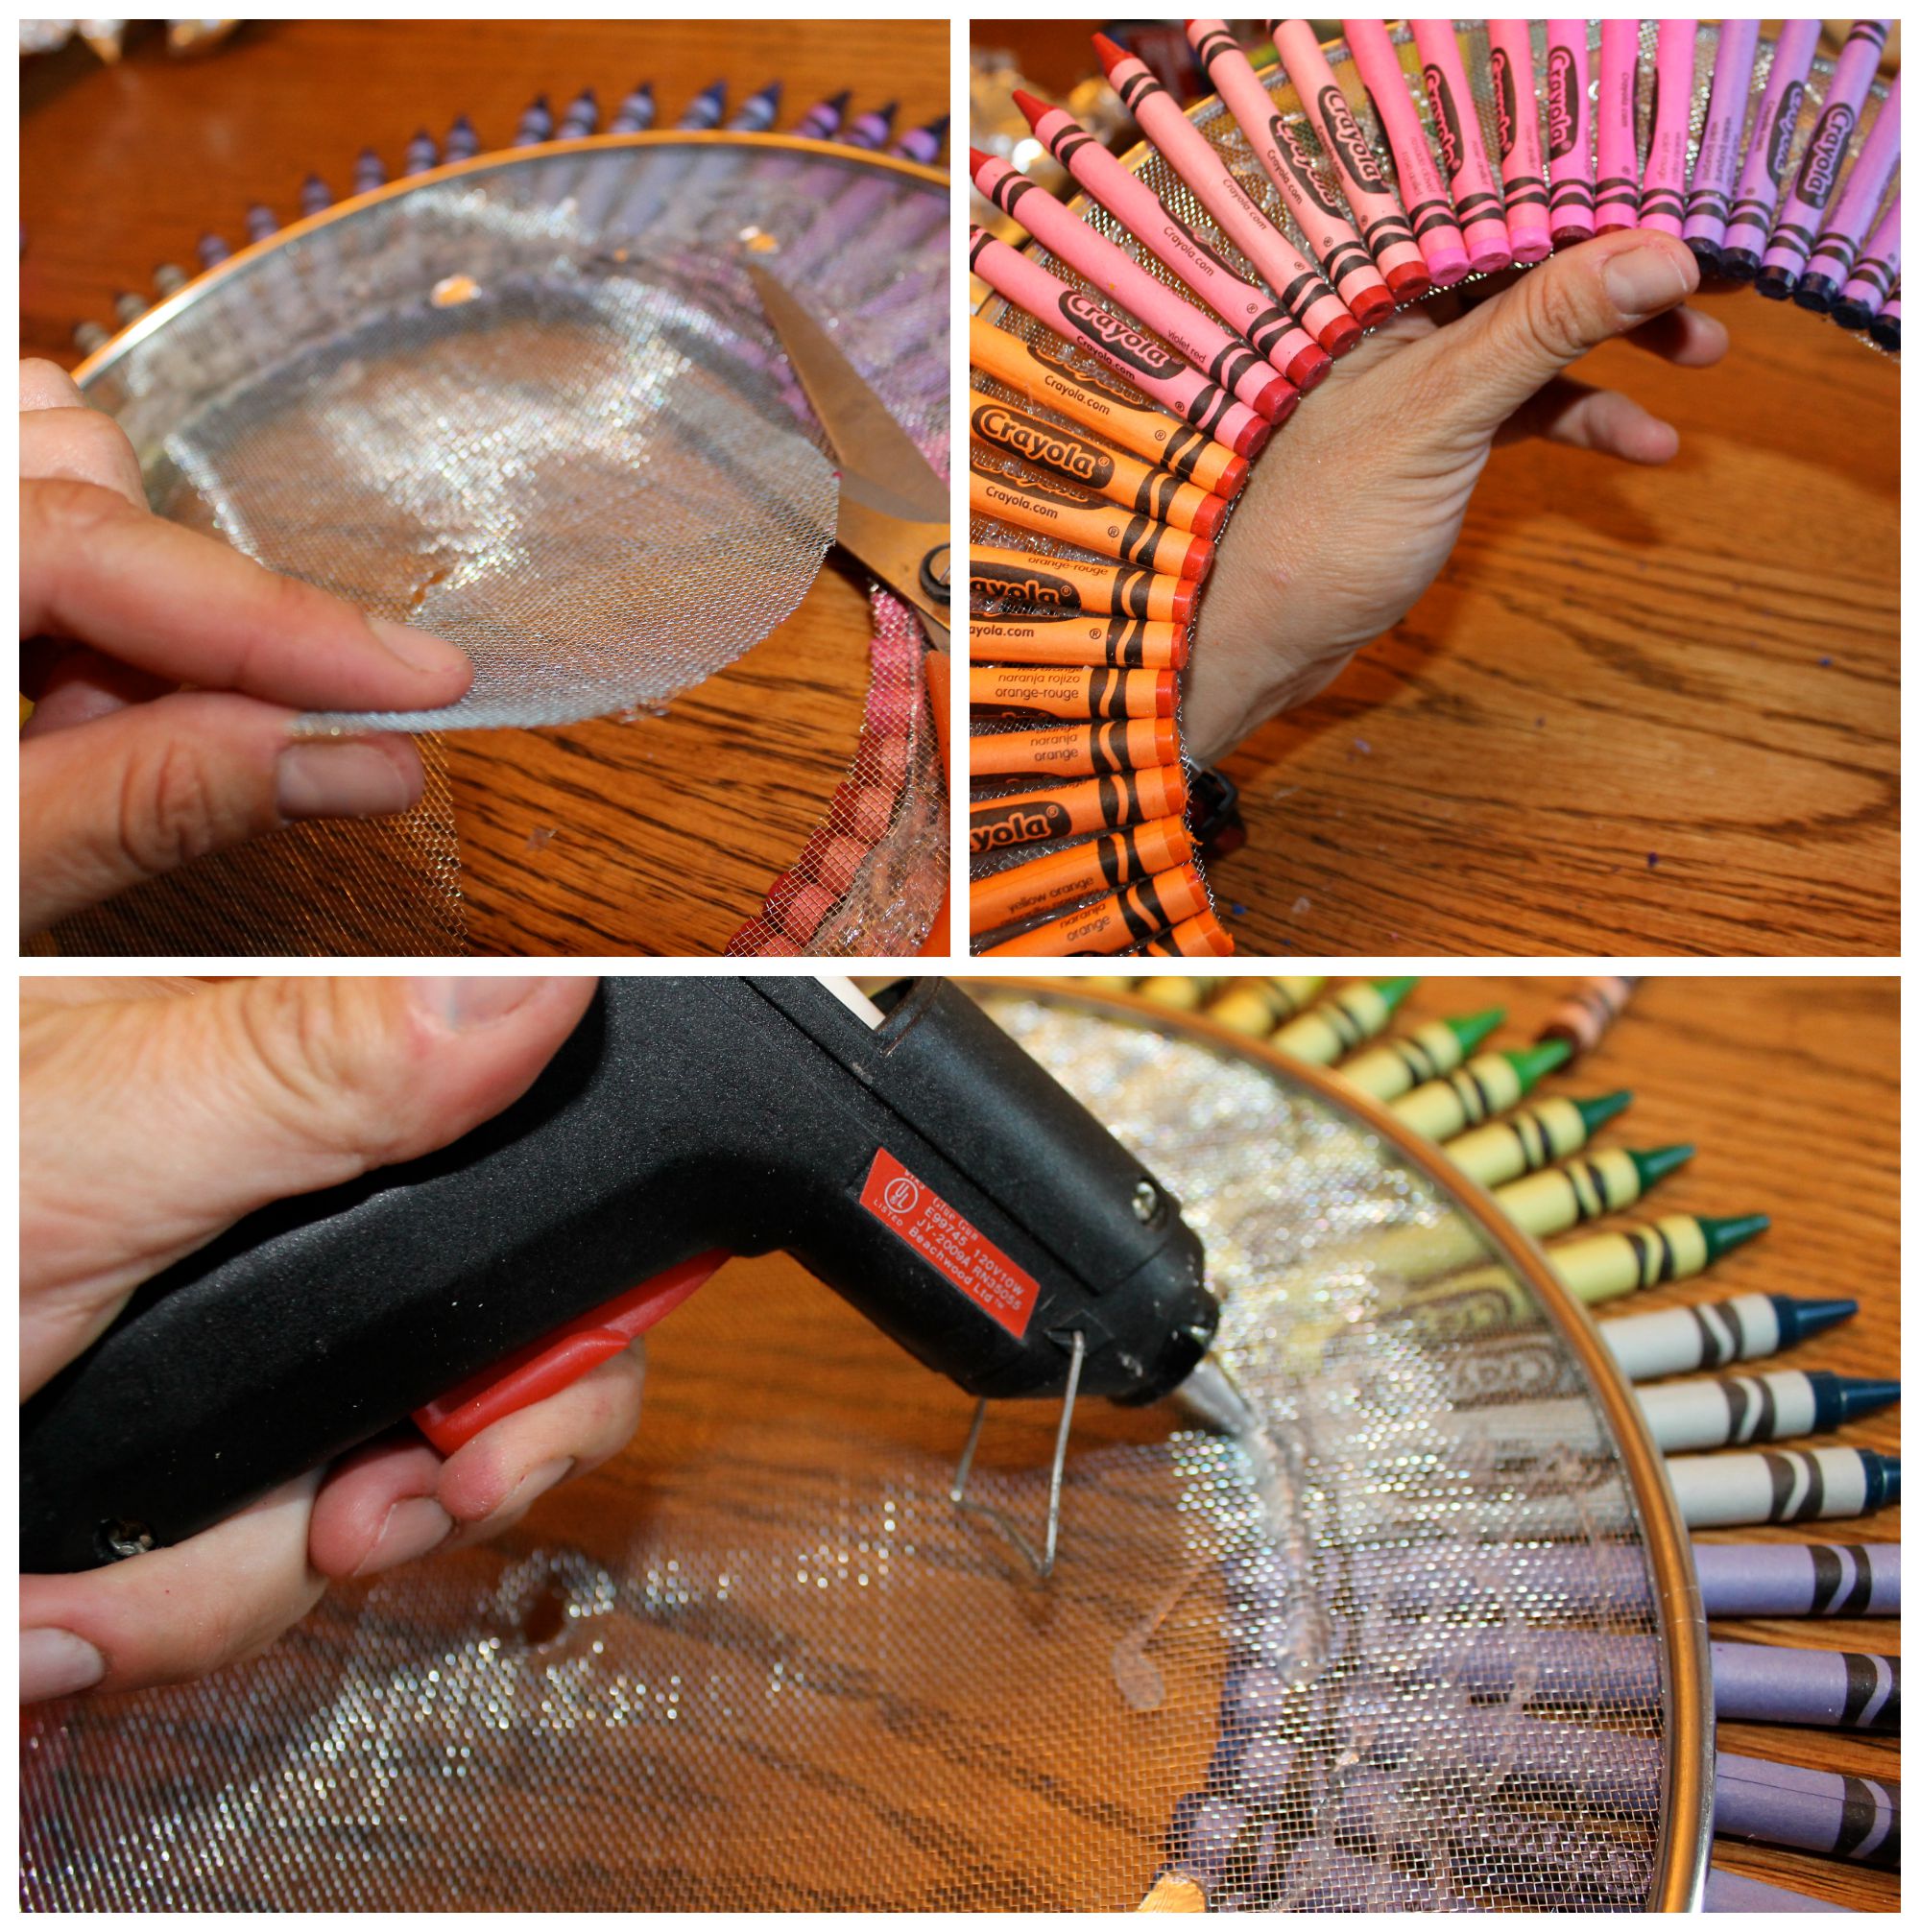
The handle to the lid works great to press the glue thru the mesh to secure the crayons well. Once dry flip back over and use sharp scissors to cut the mesh from the center. Then add the decorations using a few dabs of hot glue.
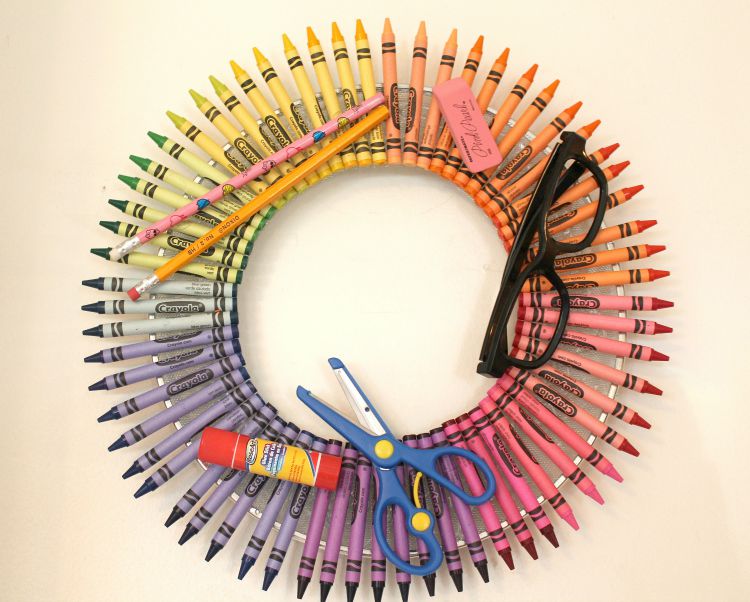
Isn’t this back to school crayon wreath fun? I love how bright and colorful it is too! Hang on the door, or the wall, or above your homework station!
Using a splatter guard us borderline genius! GREAT tip! And the colors in order soothe my OCD soul! lol
I totally love this! This might be a good teacher gift at some point. I’ll definitely be pinning this. My son is entering kindergarten, so I’m sure there will be teacher appreciation weeks and I think this might be a good thing to give (instead of random things from Bath & Body Works!). Thanks for sharing!
How adorable! May have to make this for my mom’s office!
This is sooo creative! I love wreath DIYs!
So cute. I love this. As soon as all back to school stuff goes clearance, I’m going to make one. Thanks!
I can actually see myself (and Sweet E0) doing this project. Great use of a splatter guard!
splatter guard…who knew!
seriously, love the dollar tree splatter guard!!
Love this! What a great gift for a favorite (or new!) teacher!
How clever! I love this wreath. The glasses are a great touch!
Navy Wifey Peters @ The Submarine Sunday Link Party
Love the name of your blog. This is the cutest!
Here from Two Uses Tuesday.
This is supercute! Love this and will try it soon. Thanks for the inspiration.
Linking up with Fluster Buster
Darling!! Pinned.