The Fabulous Linda is taking over the blog today with the prettiest DIY Upcycled Jewelry Organizer
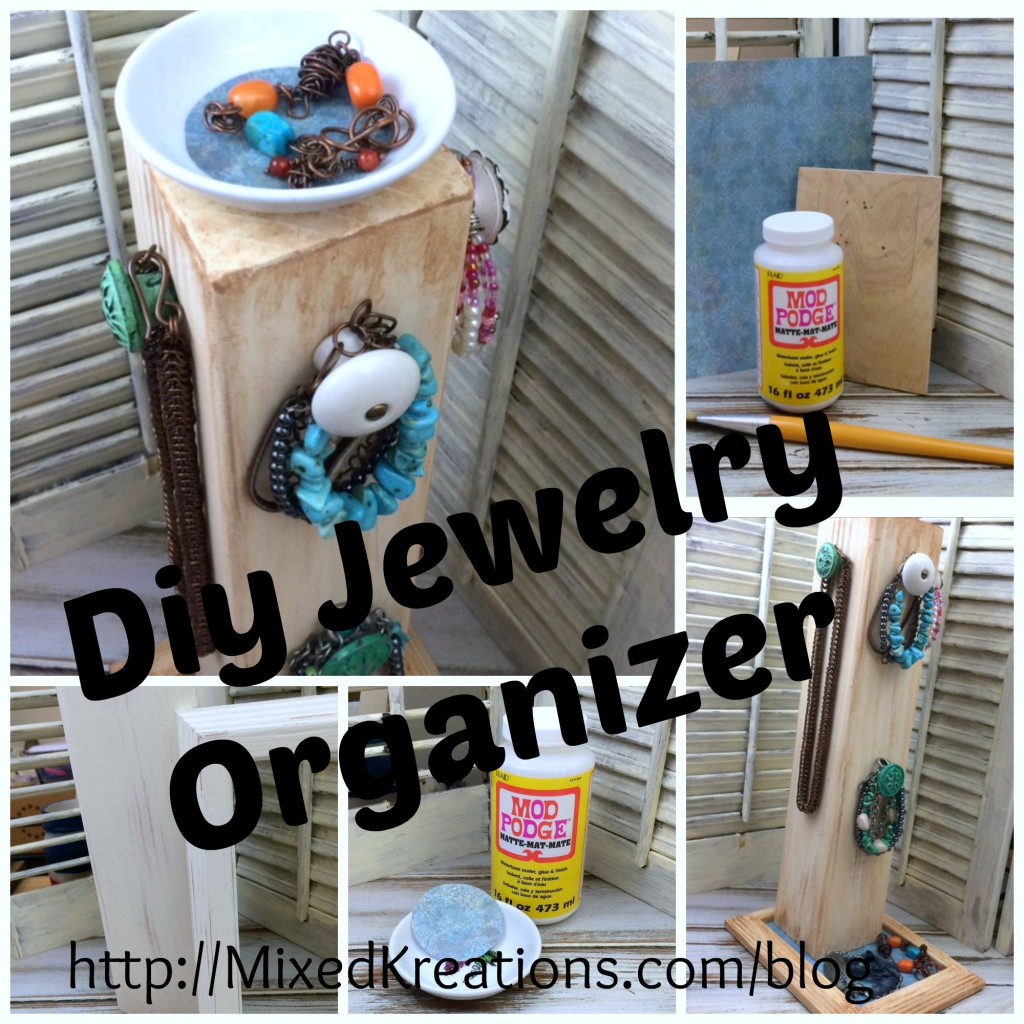
Hi there! I’m Linda, and I blog over at Mixed Kreations, where you will find diy projects, recipes, and more. I am so happy to be here today, and have the chance to share with you how to make a jewelry organizer made from a wood post, picture frame, and pull knobs.
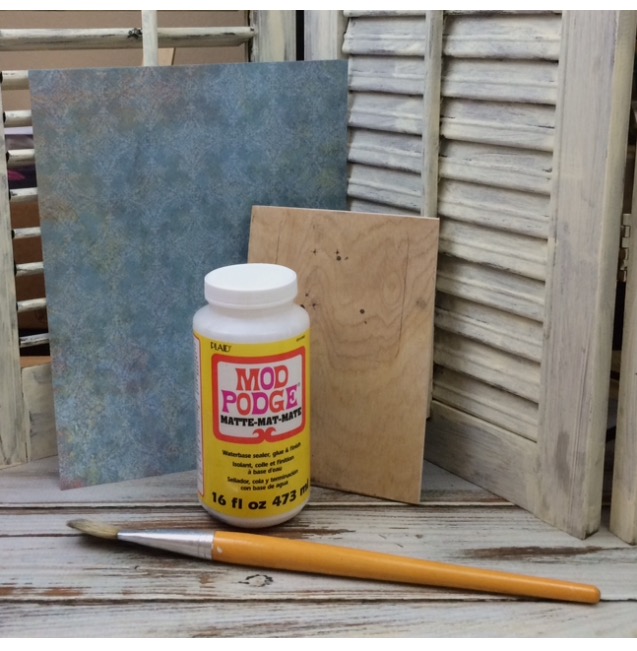
Materials Needed to make your own upcycled jewerly organizer:
4″x4″ wood post approximately 18″ long
5″x7″ wood picture frame without the glass
Thin piece of wood cut to fit the frame
Chalk paint (color your choice)
6 Drawer pull knobs
Scrapbook paper
Felt
3 Screw’s 1 1/2″
Small dish
Wood glue
Antiquing gel
Sandpaper
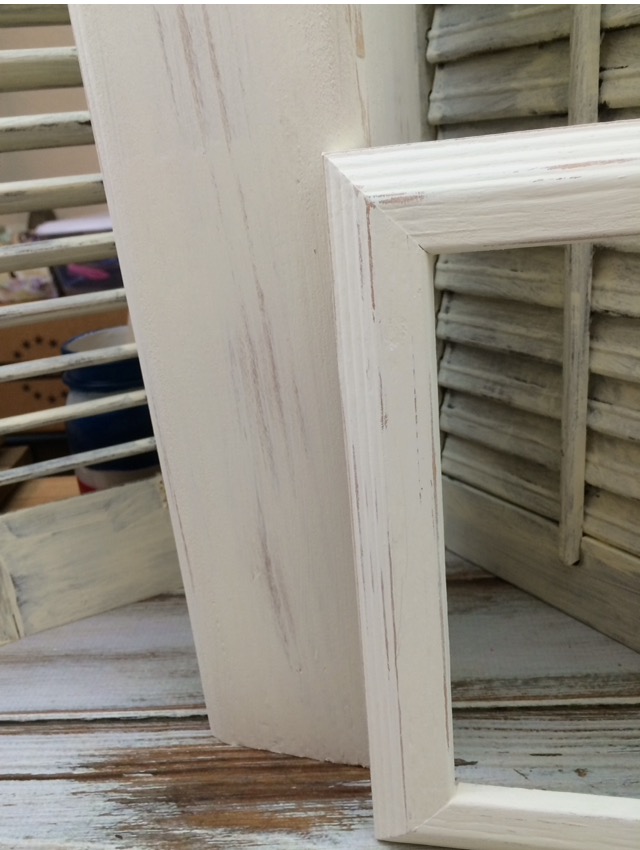
First paint your post and wood frame with chalk paint.
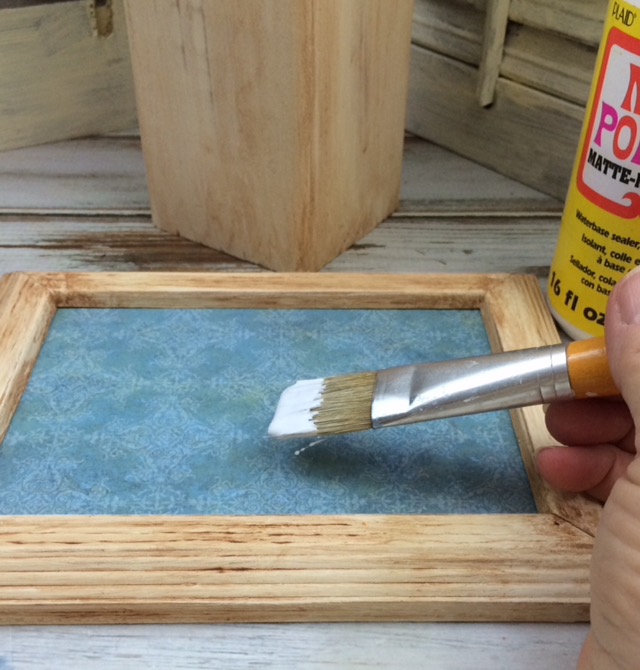
While that is drying paint the top side of your thin piece of wood with Mod Podge, then before it dries place your scrapbook paper on top and press down and smooth out wrinkles.
Once dry, trim any excess scrapbook paper off.
Now take your sandpaper and sand the edges and sides of your wood post and frame where you want to make it look worn.
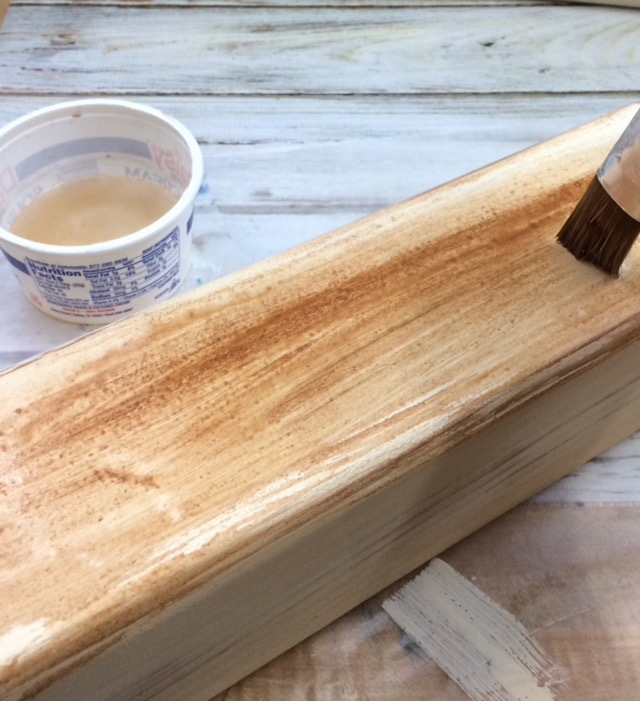
Mix a little water with your antiquing gel, and apply it to your wood post and frame.
Use a rag to wipe off any excess, a little or a lot depending on the look you want.
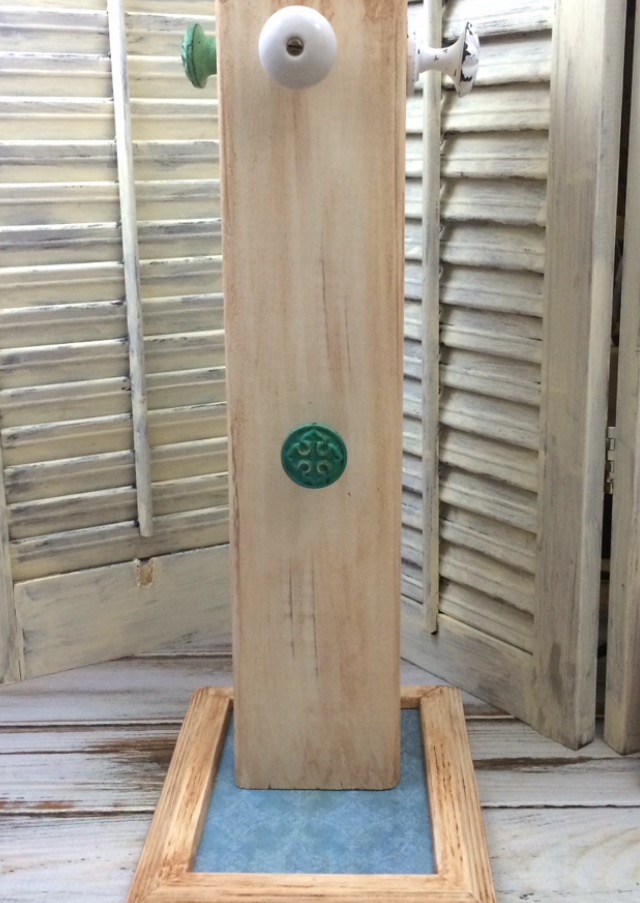
Now drill the holes for your pull knobs on the wood post. I drilled two holes each on opposite sides for bracelets, and one each on the other two opposite sides for hanging necklaces.
Squirt some glue in the holes then place the pull knob screws in the holes and let dry.
Run some glue around the inner edge of your frame.
Place your thin wood piece in the frame and let dry. Then flip over and add a coat of Mod Podge over the top of the scrapbook paper in your frame for protection.
Squirt some glue on one end of the frame where your wood post is going to sit. Set your post and let dry.
Glue on a piece of felt to the bottom to prevent your jewelry organizer from scratching any furniture where it will sit. Let dry, then flip over and add your three screws to the bottom of the post going through the frame for extra support.
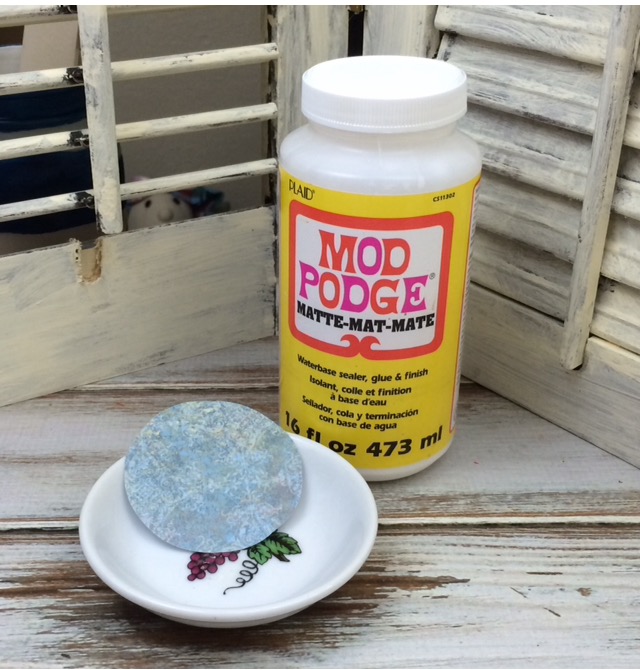
The small dish that I found had grapes in the middle so I covered it up with a small matching piece of scrapbook paper cut in a circle to fit.
I first applied Mod Podge then pressed my scrapbook paper down and smoothed it out.
Add glue to the bottom of your small dish and place on the top of your jewelry organizer post and let dry.
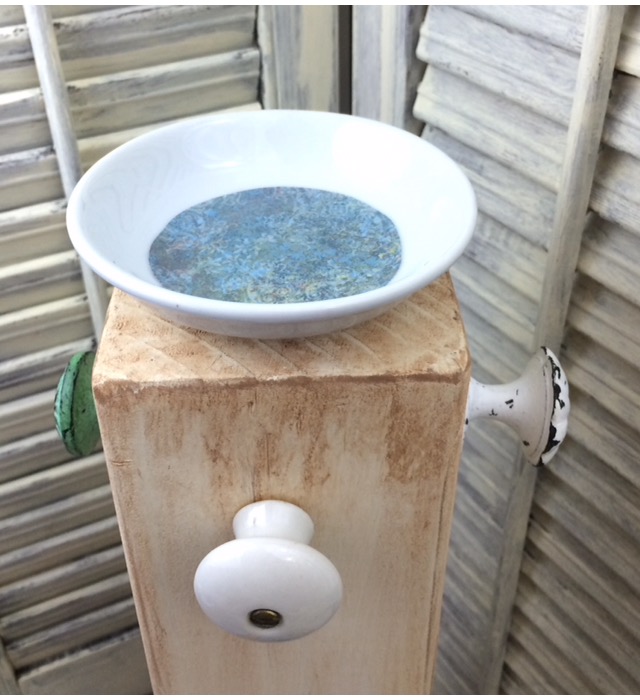
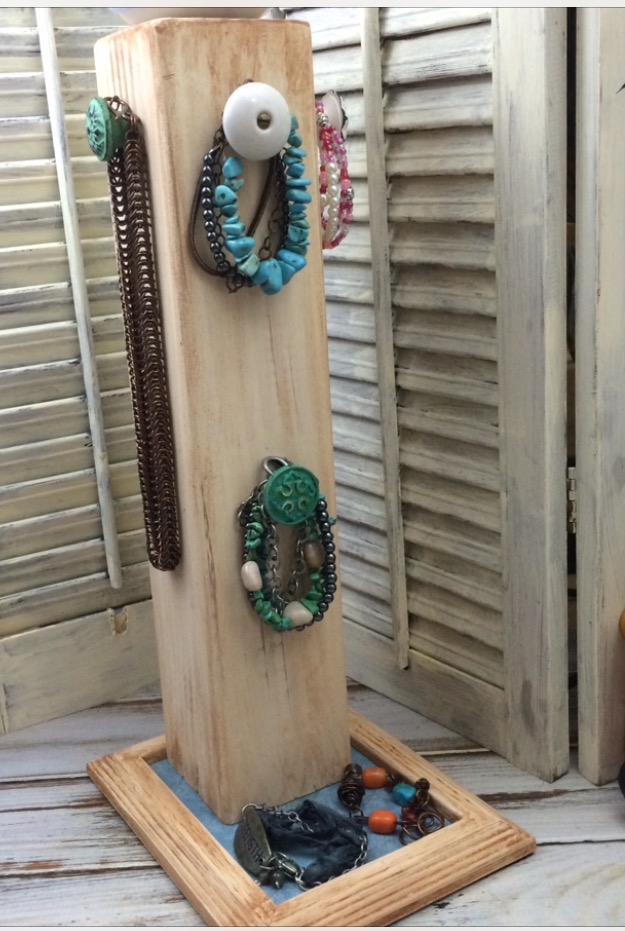
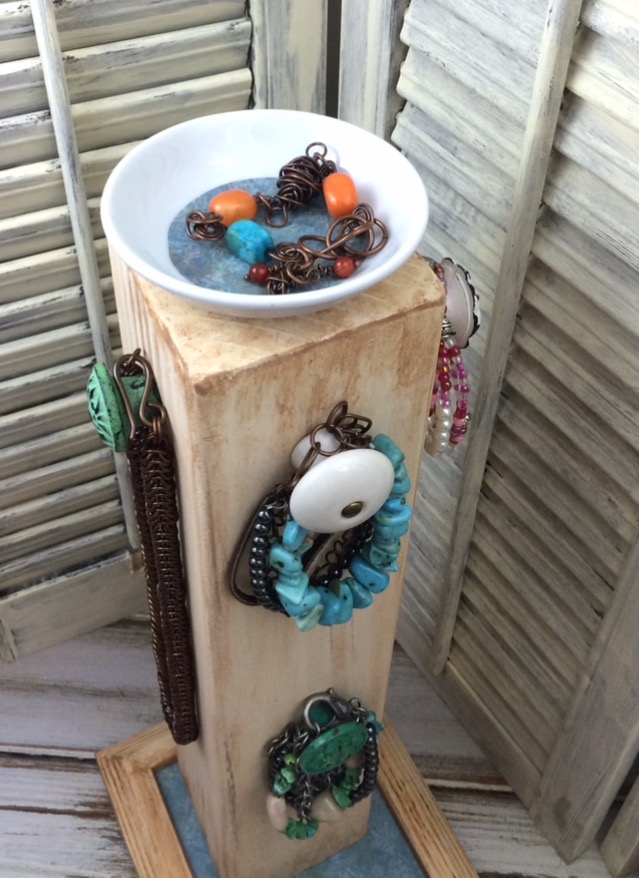
This diy upcycled jewelry organizer is a great way to keep your jewelry organized by hanging your necklaces and bracelets on the pull knobs. Place rings and earrings in the small dish or in the picture frame tray.
To see more of my diy projects visit me at mixedkreations.com or follow me on Facebook & Twitter!
Leave a Reply