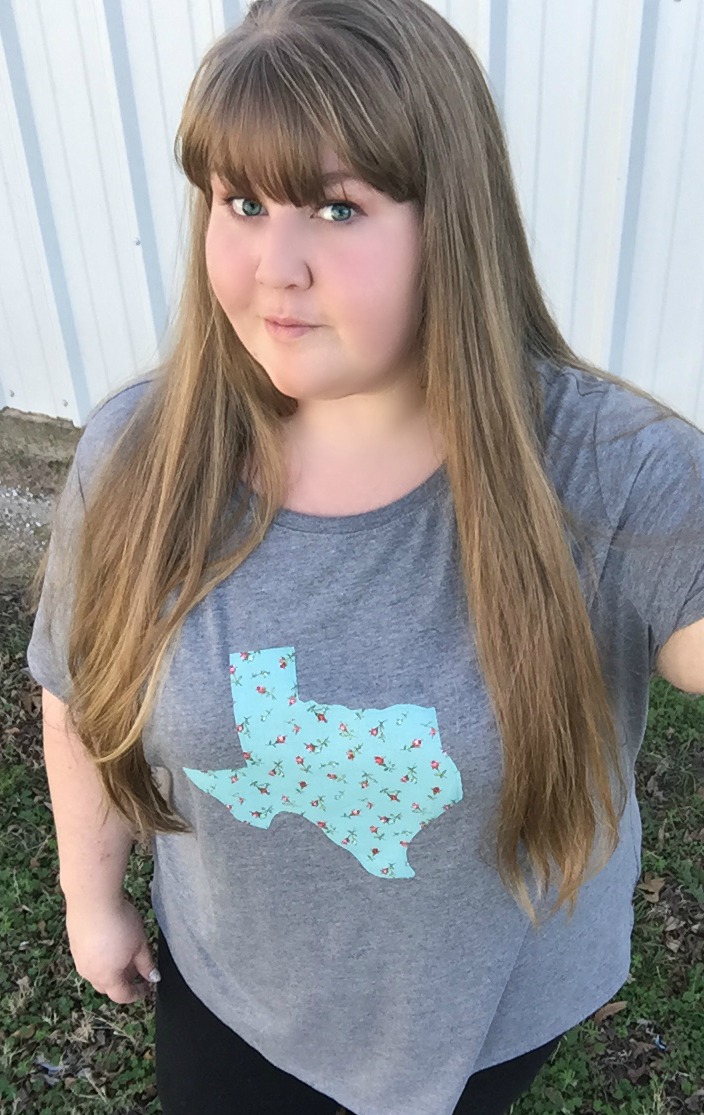
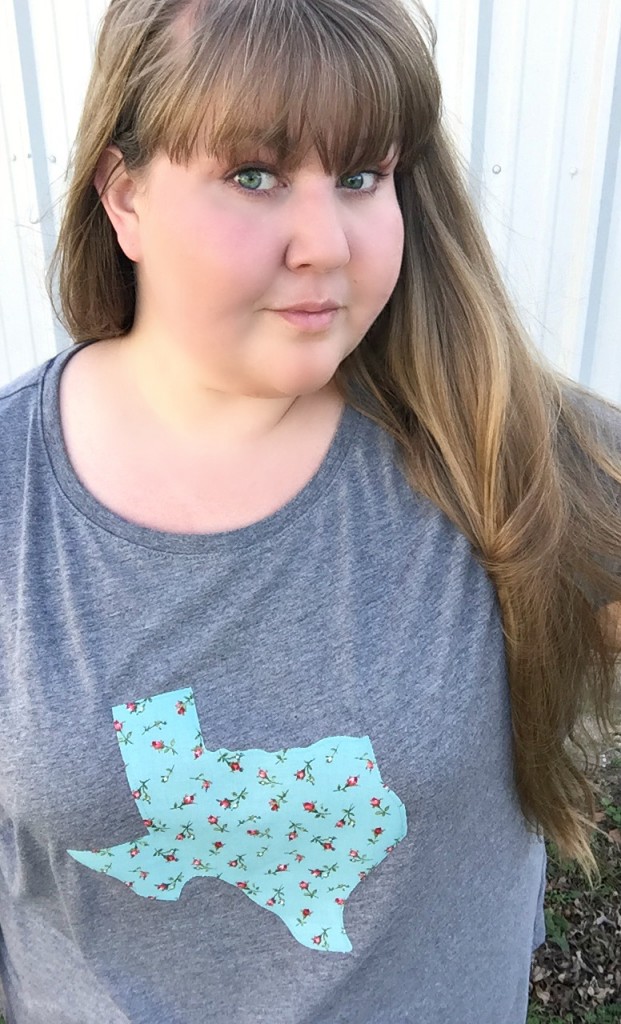
I’ve mentioned before that living in this small town is the equivalent of shopping pergatory! There’s no where to shop but walmart and online! Being a curvy girl my options are even more limited… so when I see something I like, I put on my DIY hat and make it happen! Such is the case with this DIY Home State Tee!
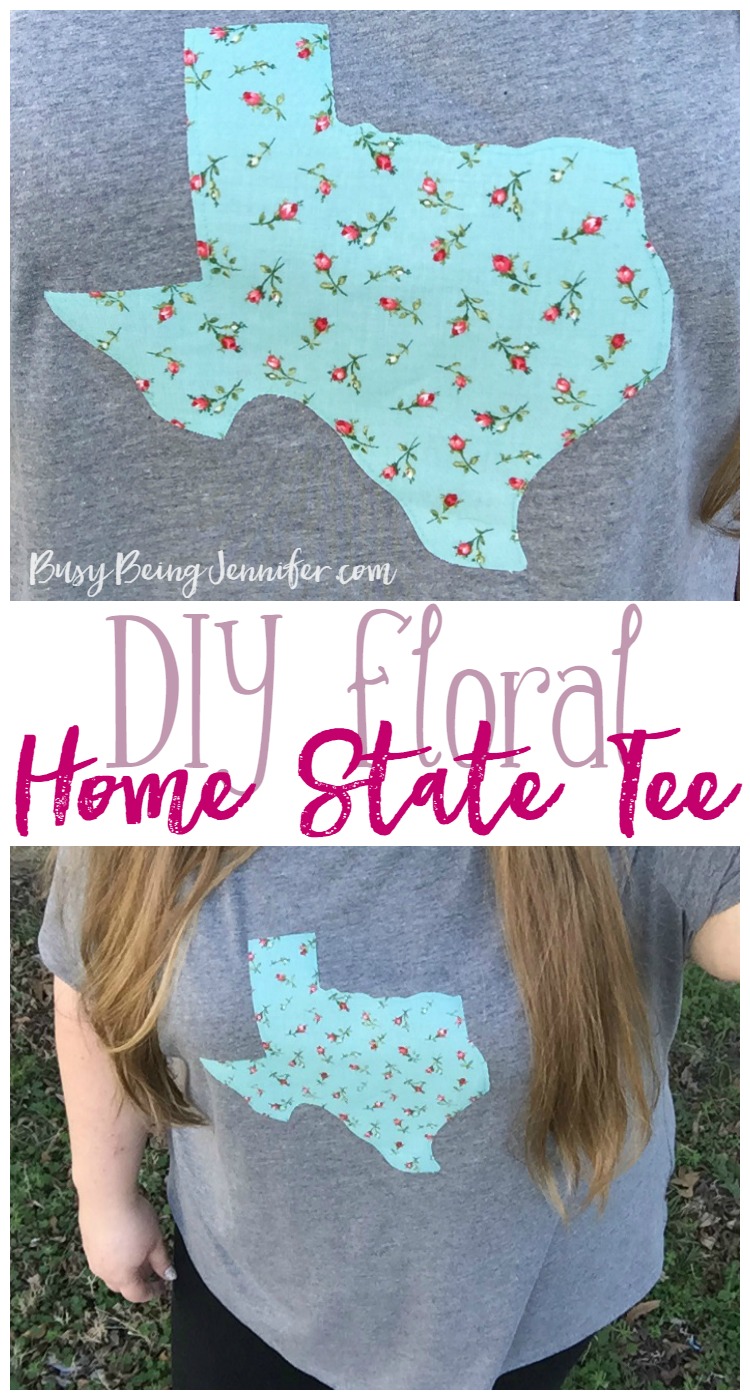
A couple of moths ago I had seen a “home state” t-shirt that had a floral screen print and I LOVED it, but it didn’t come in my size *insert sad face* So I filed that idea away for a future date. I stumbled across the PERFECT fabric to use for this project when I was at a quilting retreat a few weeks ago. That brought this idea back to the front of my project list and last weekend I made my dream DIY Home State Tee a reality!
Affiliate Links Below. See bottom for full disclosure.
Want to make your own DIY Home State Tee?? Here’s what you need:
Tee Shirt (iron before hand)
Fabric of your choice
Heat-n-bond
Paper Template of your state
Pen
Scissors
Sewing Machine + Thread
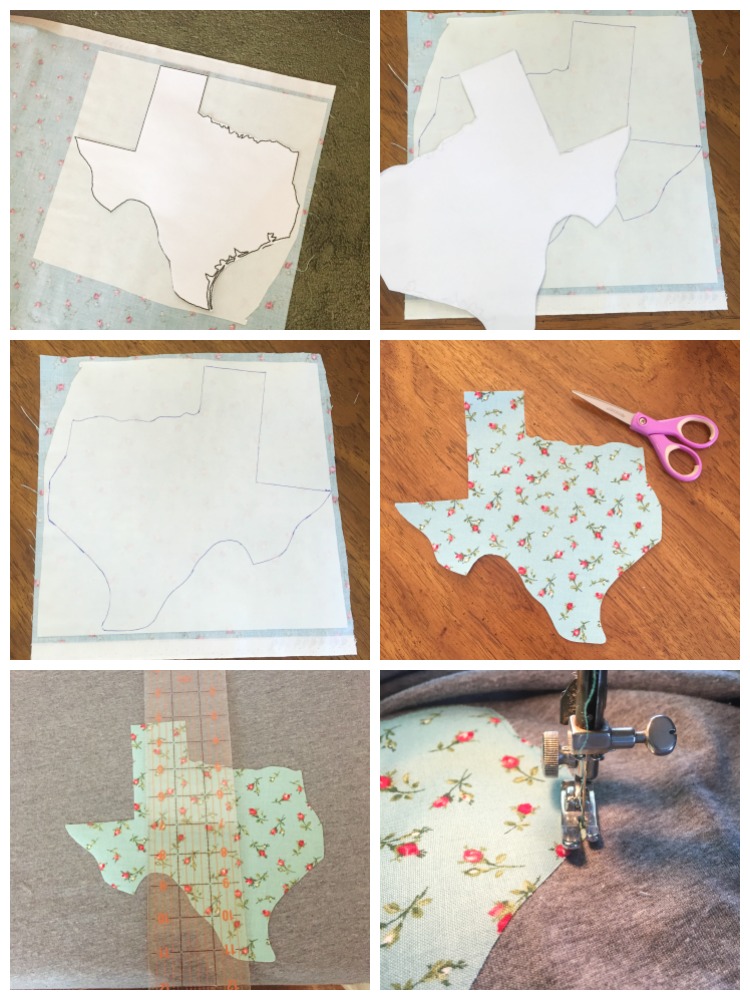
Step #1 Following the directions of the Heat-n-Bond, apply webbing to the wrong side of the fabric. Cut out your state template (I just snagged a Texas outline online). Trace BACKWARDS on top of the Heat-n-Bond transfer paper.Then cut out the state shape with sharp scissors.
Step #2 Place the state on your ironed shirt and use a ruler to ensure that its located in the center of the tee. If you’re not sure how high up the state should go, hold the tee against you and move the state shape around until you’re satisfied with the positioning. Once you’ve found the correct placement, carefully remove the backing. Iron onto the shirt.
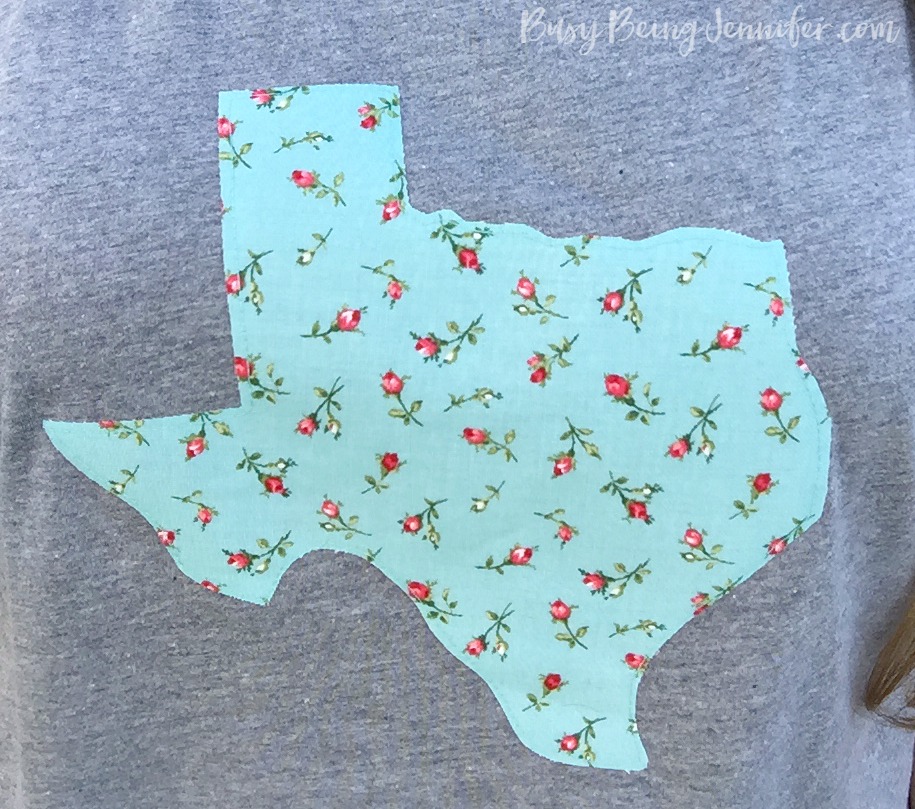
Step #3 Using a straight stitch, carefully sew around the edges of your state, securing it permanently to the tee shirt. Once done, pull the threads to the wrong side, tie a knot as close to the bottom as possible and then trim the threads, leaving a 1/2 tail. This is to ensure that the stitching doesn’t come undone.
All you need to create your own DIY Home State Tee is some basic sewing skills and a few supplies! This project can be finished in just 15 to 20 minutes!
What do you think? Would you make your own DIY Home State Tee with your favorite fabric? I’d love to see it if you do! Tag me on instagram @busybeingjennifer or on twitter or snapchat @busybeingjenn!

Super cute! I’m not very gifted in making my own stuff – but I love how you used a floral print for the state sign, instead of just a solid color.
Cute! I would totally wear this yay Texas 🙂
You are sooo crafty, girl. Love this t-shirt.
Great idea! I love floral fabrics.
Love it.
Super cute! I’ve seen these state shirts too and I’m happy you didn’t use a fancy vinyl-cutting machine since I feel like I’m the sole crafty person without one. Happy that I can recreate this but for Arizona. Visiting from The Ladies Collective party.
You are not alone! I love figuring out how to do things without one of those “fancy” machines because I know not everyone has one! 🙂
Love it! I’m going to try one with both of my home states kind of merged!
I too am a cutting machine free zone so I love the accessibility of this idea for everyone!
I find it lovely how much you Americans all love your states, here in the UK we are really not that into our counties, if I went round with the West Midlands on a t shirt I’m pretty sure no one would have a clue! I guess sticking the Union flag on everything is our version..
NEAT! I love state tees but haven’t found one that fits me as well. This is a perfect customizable tee and the fact that it’s so easy to make makes it even that much better. Thanks so much for sharing this creative project on #SHINEbloghop!
How fun! You really did a great job. Thanks for bringing this by to Throwback Thursday!!
Mollie
That is really cute and I could totally see myself doing it! Thanks for the idea 🙂
This is just soo adorable! A good way to use a little scrap and jazz up a plain tee, maybe even one with a spot you can cover it and nobody will know!
What a cute idea!! Love it! Thank you for sharing on Merry Monday! Hope to see ya next week!
Kim
I love this idea. They would make great ideas too. Thanks for sharing on Sunday’s Best.
Oh, that’s cute! I love the fabric you used for Texas. We just came home from a two week road trip in TX. Thanks for sharing with SYC.
hugs,
Jann
I’m can’t wait to create our own state t-shirts. We’re a military family that moves every 1-3 years. This is such a great idea for military families. Congrats, you’re featured this week at the This Is How We Roll Link Party.
That is so cute! Pinned.