
By now, you should know that easy DIY projects are kind of my thing. I like projects and crafts, but I’m not particularly good at them. So, we tend to keep things as simple as possible, like when we painted kitchen spoons or made coasters from bath tiles.
For this month’s project at BBJ, I knew I wanted to do something in 3D. When I saw a way to make 3D dots using glue and acrylic paint, I figured that was a project I could do!
DIY 3D Colored Glue Dots
We’ve had this sign/frame since my daughter Bo was a baby. I never had anything to go in it before. I decided that glue dots would make the perfect centerpiece for this empty frame.

The empty frame.
Supplies
- Hot glue gun
- Glue sticks (I used about 6 mini sticks)
- Wax paper
- Acrylic paint
- Paint brushes
- Glue
- Frame or blank canvas/paper/whatever you want to use
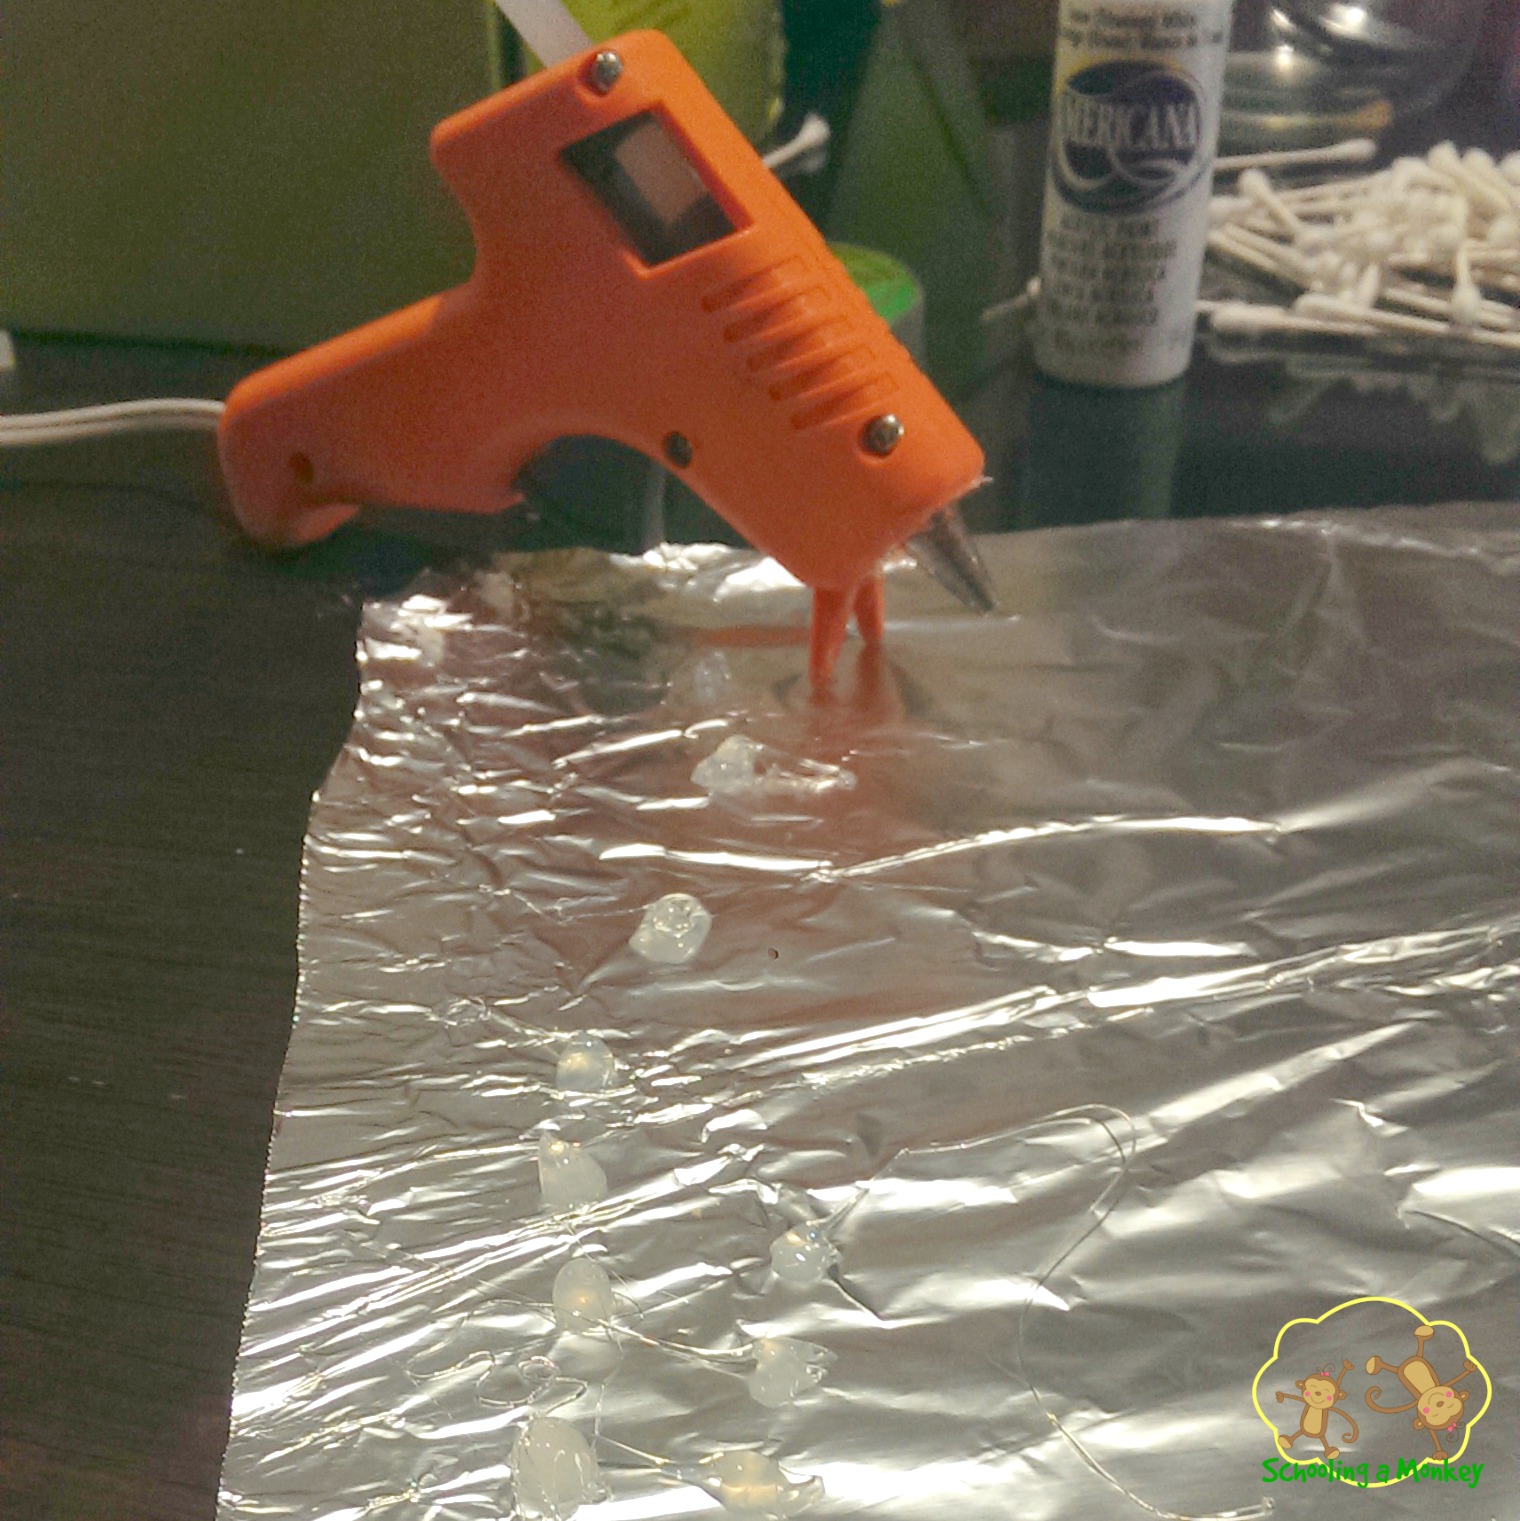
Spread out a piece of wax paper onto a table. I used aluminum foil because we didn’t have wax paper, and it was a disaster. Don’t do that. I think I might try greasing the paper before placing the dots next time. If you try it with a greased surface, let me know if it works.
Heat the glue gun and once the glue is hot, squeeze a small amount onto the paper until it reaches the desired size. I had best results when I sort of wiggled the tip of the hot glue gun in a circle. When the glue was really hot, it was easier.
This photo is of my early dot attempts, which were not so good. It took some time to figure out the best way of forming the dots.
After the dots harden, remove them from the paper and paint the back with your chosen colors. I found that similar colors don’t look different when viewed through the top of the dots, so make sure to use colors that are drastically different. I decided on a design by drawing it freehand on paper, then filling it in with dots. Using the design, I could then determine how many dots in a certain color I needed.
Once the paint is dry, glue them to your chosen background. When the glue is dry, hang your finished art piece!
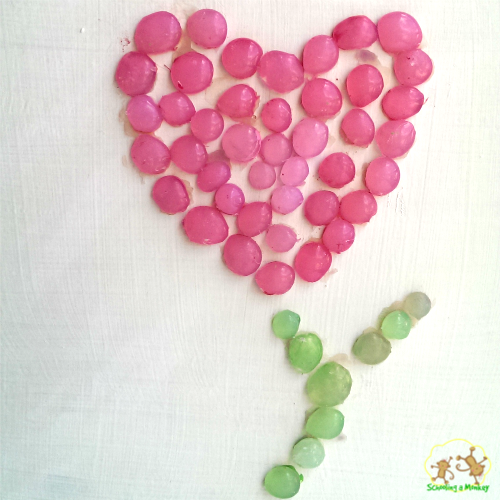
Close up of the painted dots.
Monkey and Bo were happy with the new art piece in their room, and I was happy it turned out as well as it did considering the quality of my first dots.
I kind of want to cover everything in glue dots now. It was a lot of fun! I could see a glue dot picture frame looking super cute!
Cute! Looks perfect in the frame!
That is super cute! I've never thought about making my own glue dots! Your a genius & I love reading your blog.
Nice! Saving this for my daughter…she'll love it! =)
Very cool! Looks like those expensive glass stones used as vase fillers.
I have been using hot glue for 30+ years, yes….
I love this idea! Going to try it on some paper crafting. Thanks for sharing.
This is so cute! Saving it for later!
Smart idea and cute project! I wish I took the time to be crafty. Stacie xo
Solution to all those dribbles of glue I get on my counters while crafting. Love this cute idea.
That's a great idea Trini! I did that with some- just trimmed away the stringy bits. 🙂
This is adorable! I need to find my glue gun…
Super cute. Thanks for sharing!
Hi there! Visiting from Hit Me With Your Best Shot. This is very cute! Thanks so much for sharing!
Hi Jennifer. First time here at your blog. Found you on Create and Share. Your colored glue dots are super cute. I didn't know we could make our own! I would love for you to share this on my link up party at Idea Box this Thursday at http://www.christmanscreations.com
I love how simple and fun this is! Thanks for joining the Home Matters Linky Party! We hope you’ll join us again next week!
I just saw this clever, clever idea of yours on the Life with Lorelai Home Matters link party. What a wonderful Idea! I have a link party that I’m trying to get going for my readers. (I have a site that shares ideas that grandmothers can do with their grandchildren to strengthen their relationship.) Would you consider sharing this on my link party? I think my readers would really like this idea. Here’s the link: http://grandmaideas.com/grandma-ideas-link-party-12 and it closes tonight at midnight Mountain Daylight time.
Please keep sharing your great ideas!
All the best,
Nina
Hi Jennifer, stopping by from Pretty Pintastic Party. Great idea! I never thought to use hot glue as anything but glue, now my mind is racing with ideas!