Growing up we always had a hanging tea towel on our stove in the kitchen. It was so handy and convenient! For as long as I’ve lived in Texas, I’ve had making some pretty hanging tea towels on my to do list. I finally got around to it this weekend and I am in LOVE!

Ignore the ugly stove and focus on the pretty hanging tea towel! I was so thrilled with how this sewing project turned out that I just had to share the steps I took to make it!
To make your own hanging tea towel, you’ll need:
1 tea towel
Fabric of your choice
cotton batting or felt
cutting mat
rotary cutter
scissors
Sewing Machine
Thread
Button
1/4 inch wide elastic
needle
paper
pen
ruler
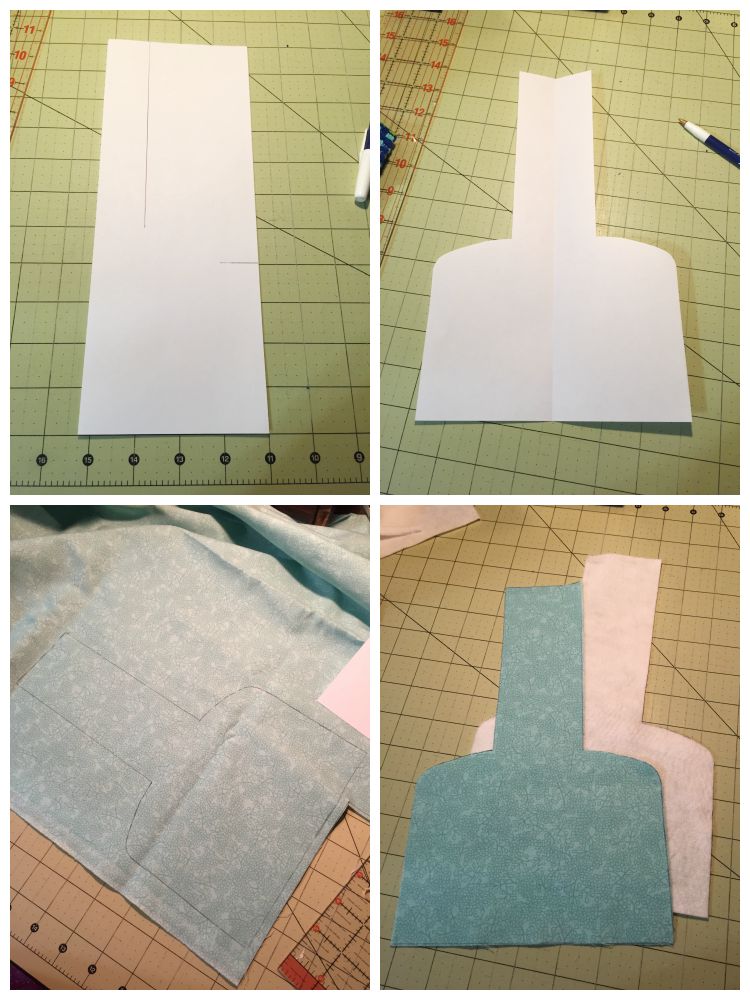
Start by making a template. I took a piece of plain computer paper and folded it in half. I marked a line 1.25 inched from the folded line and a mark 4 inches from the bottom. I kinda winged the curve around corner to meet the handle.
Once your template is done, trace it onto your fabric and onto your batting. You’ll need to cut out 2 of your fabric pieces and 1 of the batting.
Cut a 2 inch piece of the elastic thread.
Place one of your fabric pieces right side up on top of the batting and the second piece of fabric right side down. Pin in place.
Leaving the bottom open, sew a 1/4 inch seam around the sides and handle. When you reach the top of the handle, fold your elastic in half and tuck it (loop side in) in between the fabric layers.
Finish sewing around. Be sure to leave the bottom open.
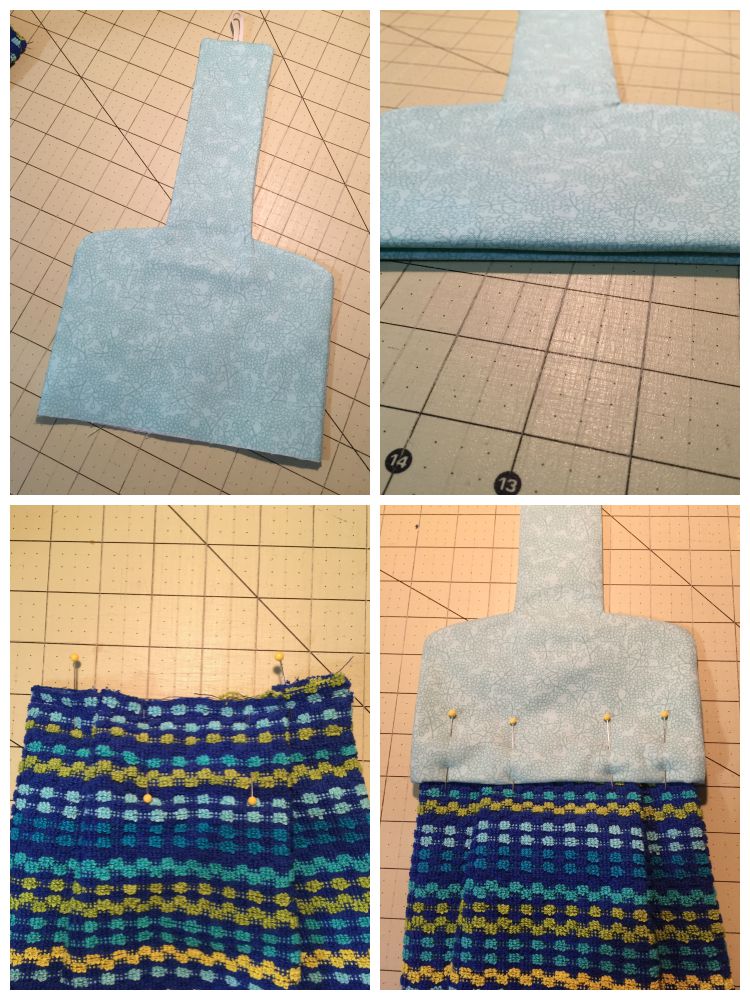
Turn right side out and iron flat.
Fold the open bottom in about 1/2 inch and iron flat.
Take your tea towel and cut it in half.
Tuck and fold it to create pleats. It needs to be about 6 inches wide. Sew a line of straight stitching across the pleats to secure them in place.
Carefully tuck the pleated tea towel a half inch into the opening of your fabric/batting top.
Make sure its even and as straight as possible. Pin in place.
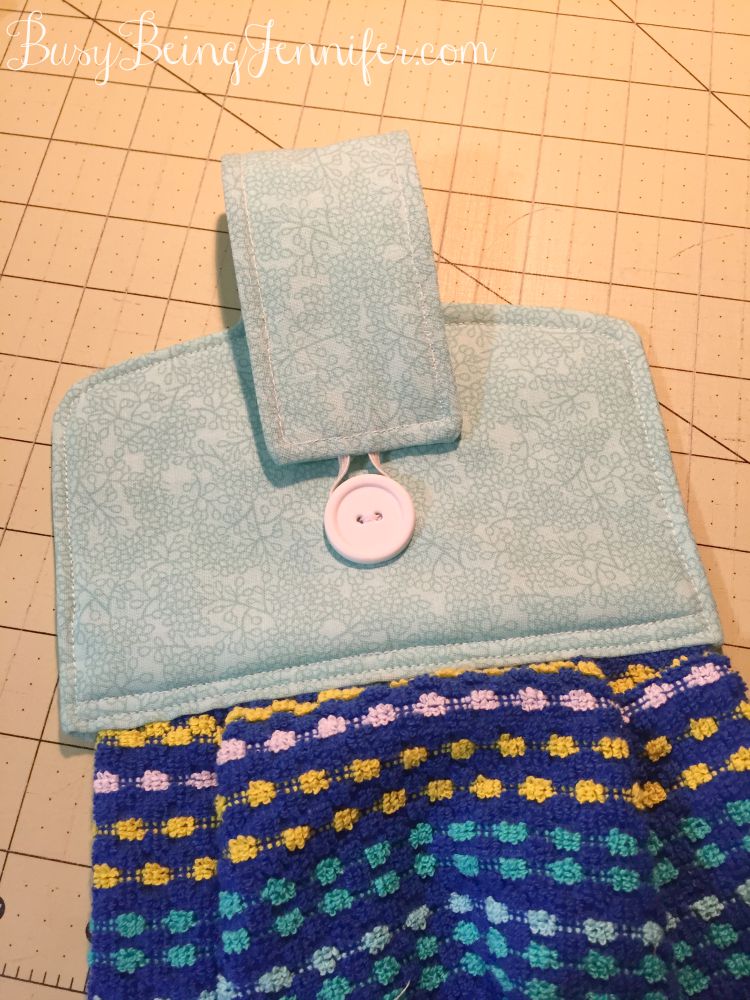
Top stitch around your fabric top. I added 2 lines of stitching across the bottom to make sure the towel was in there securely!
Add your button. To find the right spot, I simply folded the handle in half and marked the spot with a fabric marker. Then I hand sewed the button over the mark.
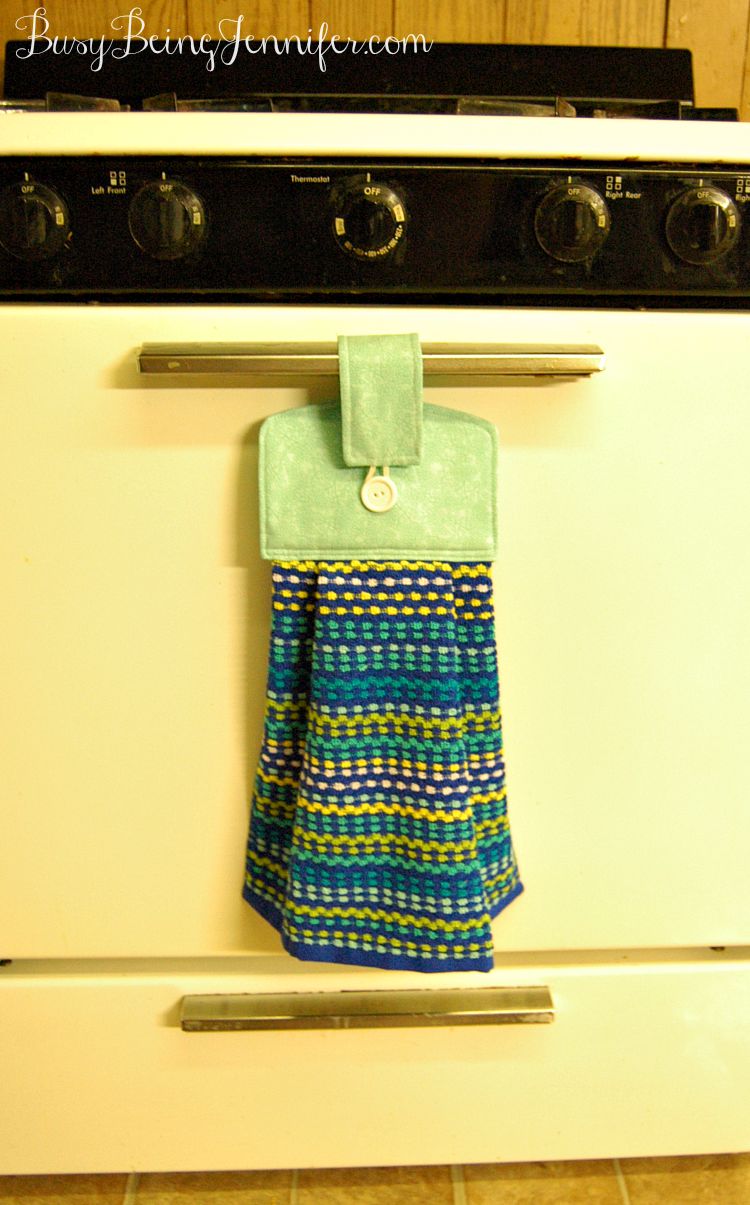
Let me tell you, the photos don’t quite do this hanging tea towel justice! Its so pretty! And I am thrilled to have finally crossed this project off my never ending “to do” list!
I love the vintage look of it. I have one of those homemade pot holders hanging from my stove (that I made when I was a kid).
I love this! These would make great housewarming gifts. You should join my weekly DIY roundup at http://haleysvintage.com/category/diy/. Have a great week, Haley
My towel is forever falling off, so one that is secured = GENIUS!
What a crafty cute idea! Love it!
love this little loop idea!! That is perfect for the towel not falling off!
elle
Southern Elle Style
Love these! My mother in law made all the girls these for Christmas one year. I love how they button and can hang on knobs and handles!
How cute is this!! Thanks so much for sharing.
Cameron Proffitt