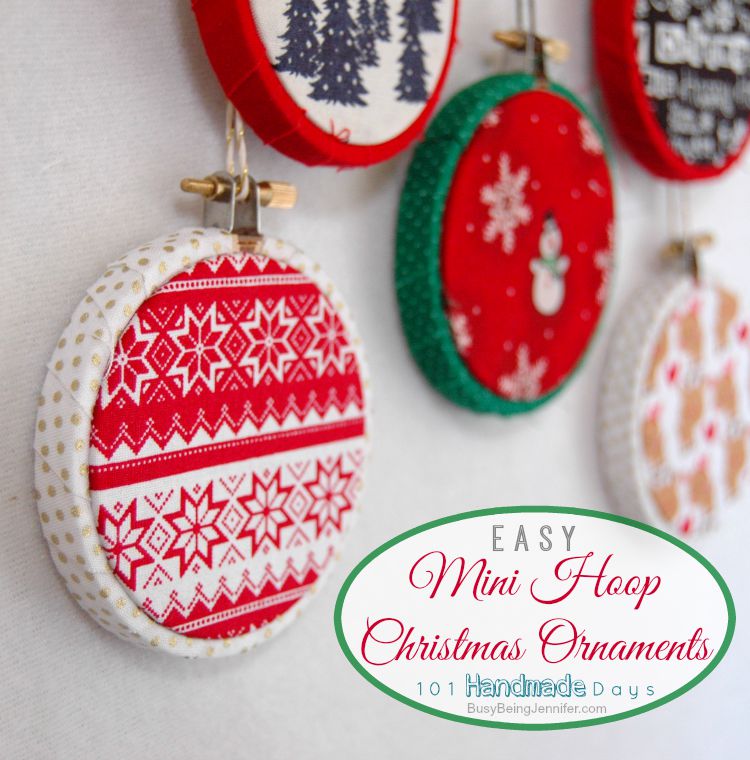
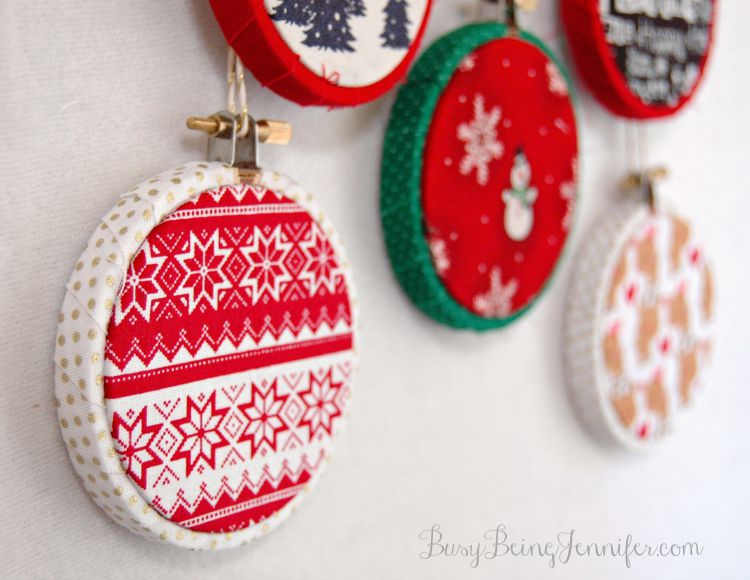
By know ya’ll probably know that I LOVE Christmas and that I LOVE hoop art… so when I find a box of 3 inch mini hoops that I completely forgot about, its time to combine 2 of my favorite things! These Mini Hoop Ornaments are super easy to make and totally adorable!
To make your own mini hoop ornaments you’ll need…
3 inch Mini Hoops
Christmas Fabric
Hot Glue and Glue Gun
Ribbon or Twine
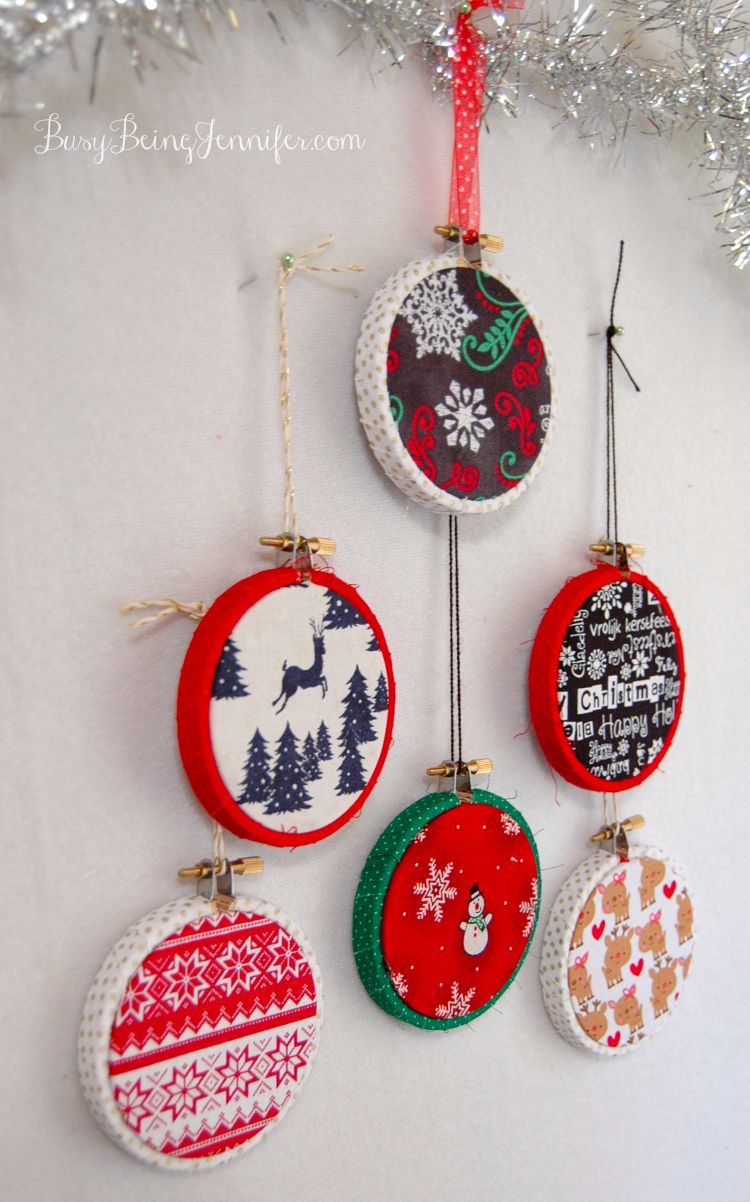
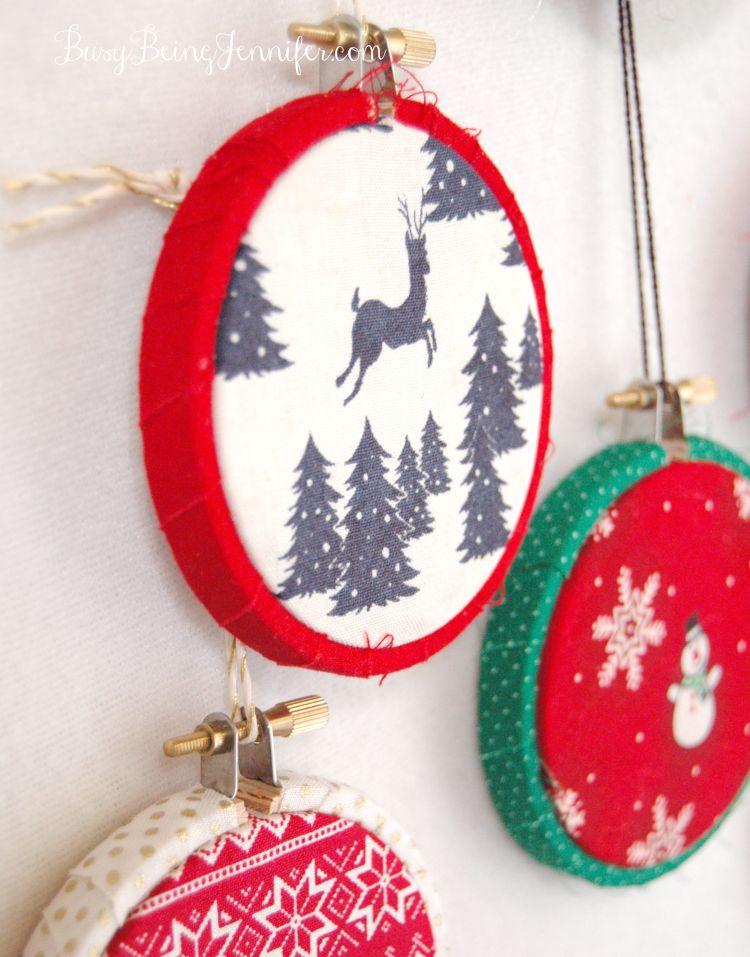
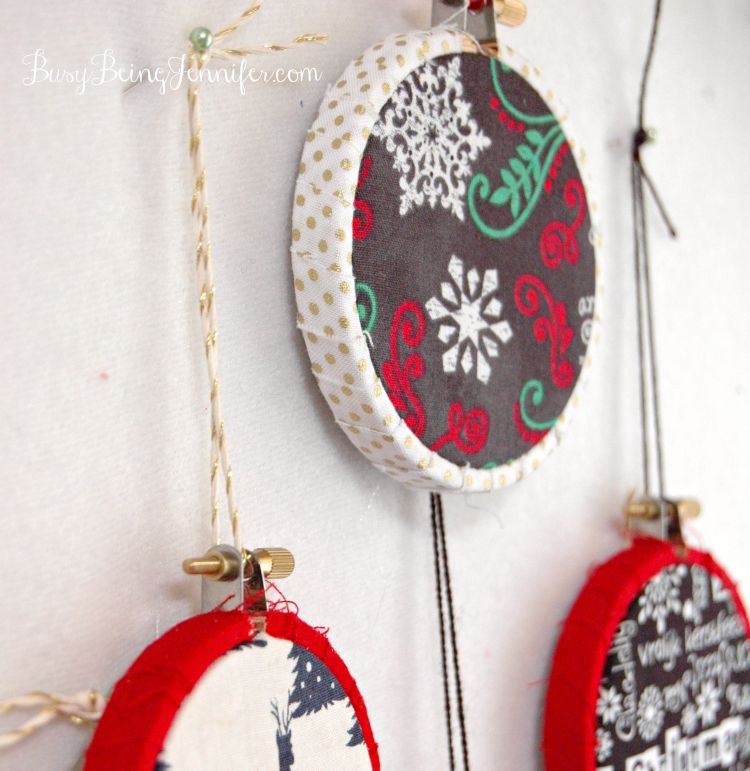
I will warn you now… these mini hoop ornaments are so easy to make, you’ll find yourself unable to to stop! As you can see, I made a bunch… they’re a little bit addicting 😀
Start by cutting some 1 inch fabric strips. I choose more neutral, simple patterns and colors for the wrapping fabric.
Remove the inner wring from the hoop. At the top of you hoop, place a drop of hot glue on the underside of the clasp. Quickly secure one of the ends of your fabric strip. Allow it to harden for a few seconds. Then tightly wrap the fabric all the way around the outer hoop.
Secure the end of the fabric to the hoop with a another drop of fabric on the underside of the clasp.
Trim the access fabric.
Cut a piece of fabric for the center of your mini hoop ornament it needs to me at least 5 inches square. Charm packs of pre-cut fabric are perfect for these!
Lay your inner hoop on a flat surface. Place your fabric on top and center it over the inner hoop.
Open your top hoop clasp as wide as you can.
Carefully push your fabric wrapped outer hoop over the fabric and inner hoop. It will take a little bit of even placed pressure to get it all the way flat.
Gently tug on the inner fabric to smooth it out.
To secure the inner fabric, add a thin line of hot glue on the inside of the inner hoop. Carefully fold the fabric over and hold in place for a second or two. Continue to glue and fold all the way around. Carefully trim any access fabric.
Loop a length of ribbon through the hoop clasp and knot.
I told you these mini hoop ornaments were easy! Honestly the hardest part for me was deciding which fabric to use… and then which one was my favorite!!
You just keep amazing me with your craftiness! I’ve pinned, so those who are crafty like you (so not me), can make these too.
Oh Patti. Even you could do these! 😉
Those are adorable!!
These are so pretty and look like fun to make. I’m sending my mom this link for ideas for her senior group to make.
Oh how I love Christmas as well. These ornaments are awesome! Pinning this, for sure. And I will be on the hunt for Christmas fabrics. Thank you for sharing this awesome DIY!!
These are adorable!! I’m coming back to this post closer to the holidays, I need to make these!!
I love how simple and classic these are! And I know they’re meant for a tree, but I love how they look on a wall like you’ve displayed them in the post. They’d be a great addition to a photo wall during the holidays.
That would be pretty!!
I love these so much!!! Wonder who I can talk into making these for me, hint hint wink wink
These are adorable!!! I’ll have to give them a go
These are SO cute and look SO easy. I will definitely be doing these with my daughter as a Christmas craft. Thanks for linking up with us at Share the Wealth Sunday!
These are so cute. Thanks for sharing!
These are beautiful! We’d love to have you share this at our weekly link party. http://www.thelifeofjenniferdawn.com/2016/12/rustic-christmas-farmhouse-decor-weekly.html Hope to see you there!
Awh, I love these all clustered together like that, they look great. I think I have some cheap plastic hoops left over from a kids embroidery kit, this wrapping them in fabric idea might be perfect to give them a makeover. thanks.